How to Live Loop on a Mac with a MIDI Foot Controller or Pad Controller
A looper on a laptop screen is fine for rehearsal. On stage your hands are on a guitar or a keyboard, and the only thing free is your feet. A software looper starts to feel like a pedal once a footswitch can record, overdub, undo and stop a track without you looking at the screen.
This guide shows how to set that up with LOOM, the live looper I build for macOS. LOOM answers a fixed set of MIDI notes, so the setup is mostly a matter of programming your controller to send the right note numbers on the right channel. The full reference is the MIDI mapping chapter of the manual. This post is the practical version.
Can you use a MIDI foot controller with looper software?
Yes, as long as the controller can send MIDI note messages. LOOM's commands respond to notes only. Control changes, program changes, pitch bend, aftertouch and MIDI clock are all ignored by the commands. Before you buy or reprogram anything, check that each switch or pad can be set to send a note number of your choosing.
LOOM listens to every MIDI source macOS reports, so there is no device list to configure. You can plug a controller in while LOOM is running, and the notice row confirms it.
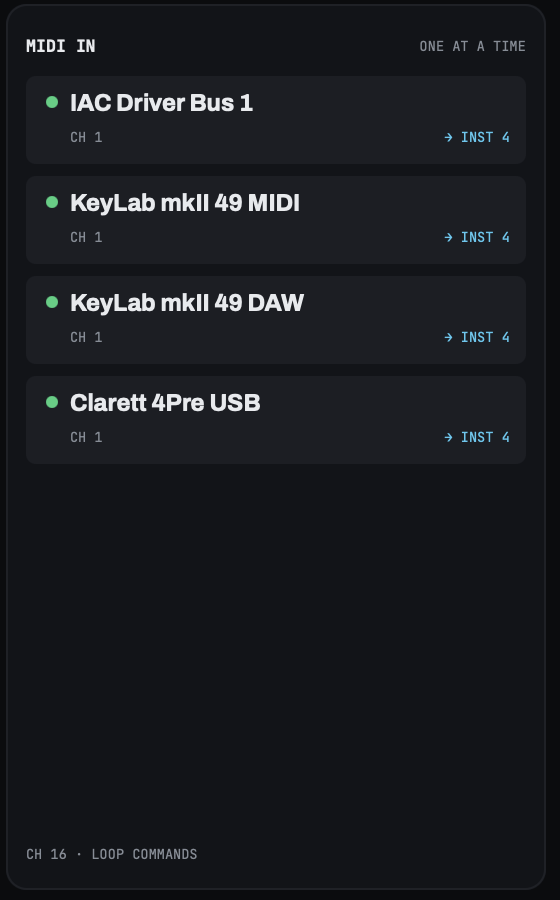
How LOOM's MIDI note map works
Every track gets its own octave of notes, and every octave has the same commands in the same order. There is no MIDI learn and no mapping editor yet, so you set your controller to the notes LOOM expects rather than the other way round.
Track n starts at raw note (n − 1) × 12. The commands sit at offsets from there:
| Offset | Command | Hold? |
|---|---|---|
| +0 | Ring button (does what the track's on-screen ring would do) | no |
| +1 | Overdub, always | no |
| +2 | Undo the last layer | no |
| +3 | Redo | no |
| +4 | Stop this track | no |
| +5 | Clear | hold one second |
| +6 | Play, always | no |
So the audio tracks land here:
| Track | Notes |
|---|---|
| Track 1 | 0 to 6 |
| Track 2 | 12 to 18 |
| Track 3 | 24 to 30 |
| Track 4 | 36 to 42 |
| Track 5 | 48 to 54 |
Notes 60 to 71 are reserved and do nothing. The instrument tracks (LOOM's own synth, drum machine and sampler) take the next octaves: 72 to 78, 84 to 90, 96 to 102 and 108 to 114. The global commands sit at 120 to 125.
One footswitch per track gets you a long way
The +0 note is not a dedicated record button. It does what the ring button on that track's strip does, which depends on the track's state:
- On an empty track, it records. If the transport is stopped, it starts the transport first.
- While recording, it closes the loop.
- While playing, it starts an overdub.
- While overdubbing, it punches out.
- On a stopped track that holds a loop, it plays the loop again.
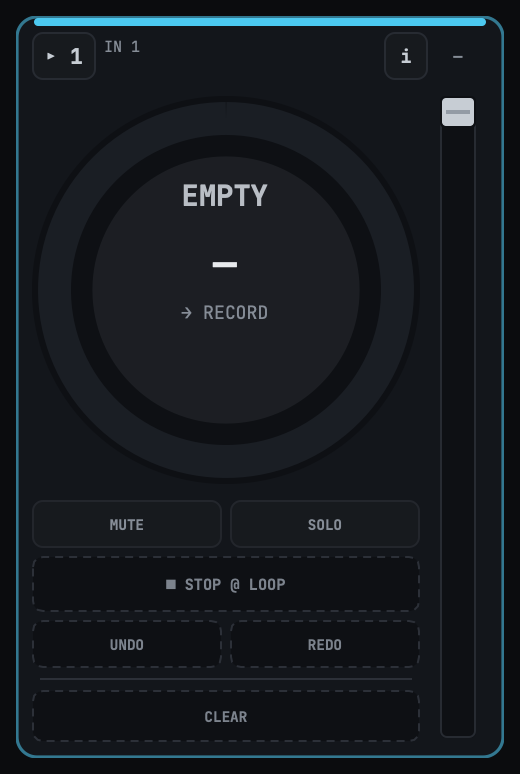
That last case matters on stage: a switch that always meant "record" would record over the loop you just stopped.
If you prefer switches that do exactly one thing, use +1 (always overdub) and +6 (always play). You can mix both approaches on the same board.
Watch out for octave numbering
This is the mistake that costs people an evening. LOOM matches raw MIDI note numbers, 0 to 127. Controllers and DAWs disagree about what to call those numbers, by a whole octave:
| Raw note | Arturia, Akai and Ableton call it | Scientific pitch calls it |
|---|---|---|
| 0 | C-2 | C-1 |
| 12 | C-1 | C0 |
| 60 | C3 | C4 |
| 120 | C8 | C9 |
Type "C-1" into an editor that uses the Arturia naming and you get note 12, which is track 2's ring button. Nothing errors. A different track simply responds.
Put LOOM's commands on their own MIDI channel
LOOM's commands listen on one channel, the command channel. It is 16 by default. Notes on any other channel never reach the commands; they go to whichever instrument track is listening on that channel.
This is what lets one controller do two jobs. Put the pads or footswitches on channel 16 and leave the keys on channel 1. The pads run the looper, and the keys play a synth on an instrument track.
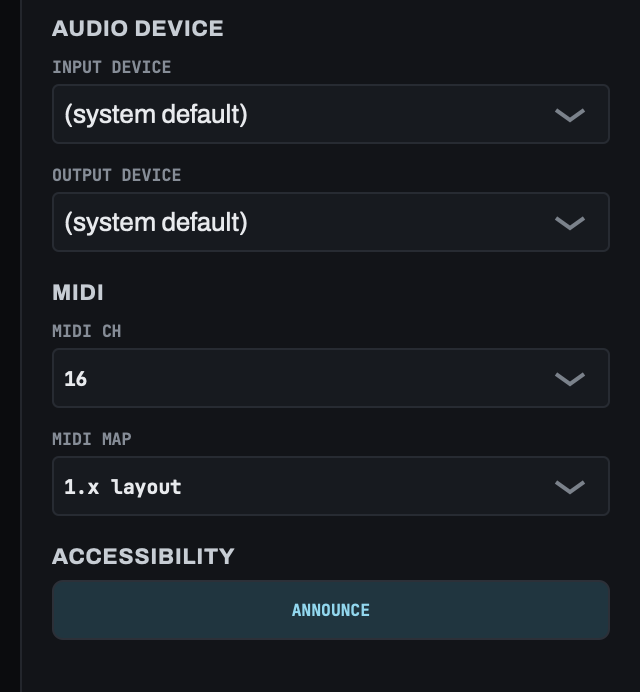
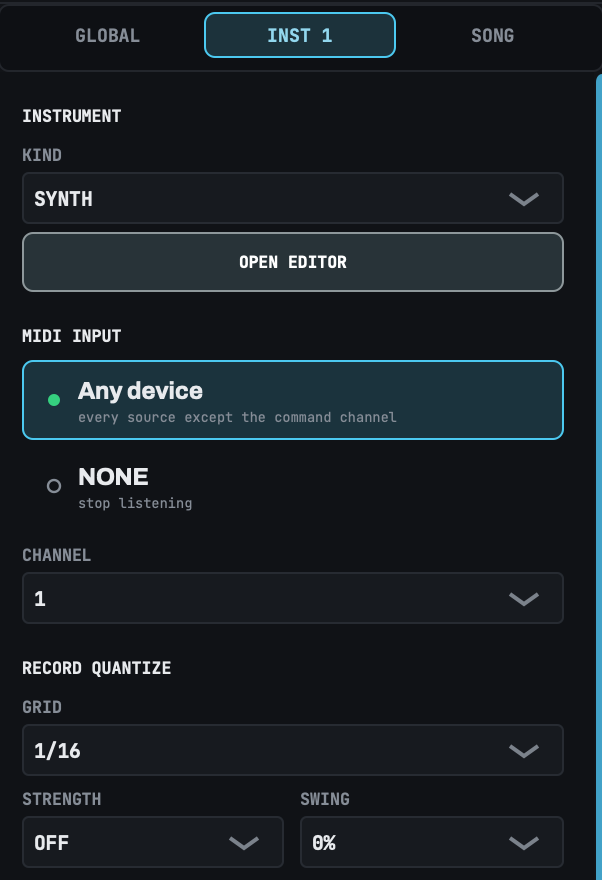
If your controller can only transmit on one channel, do it the other way round: leave the controller where your instrument needs it and change LOOM's command channel to one you can spare. Set MIDI CH in the side panel's GLOBAL tab. It takes effect immediately and is saved per Mac, not per song.
Planning a pedalboard layout
You do not need a switch for every command. If you have room for three switches per track, these are the three to map:
- The ring button (
+0): record, close the loop, overdub and play, all from one switch. - Stop (
+4): stops that one track. - Clear (
+5): erases the track, after a one-second hold.
After those, add undo (+2) for the tracks you overdub most. +2 and +3 act on the track the note names, not the track that has focus, so a pedal can undo track 3 while you are looking at track 5.
Keep room for the global commands as well. In a live looping set these are the ones I reach for all the time:
- ALL START (note 120) starts every included track, and starts the transport if it is stopped.
- ALL STOP (note 121) stops every track but leaves the transport running and the click sounding.
- ALL CLEAR (note 122) erases every track, after a one-second hold.
LOOM has one more stop, and it is easy to confuse with ALL STOP. TRANSPORT STOP (note 124) stops the transport and every track with it. If you stomp 121 expecting silence, you get silent tracks over a click that is still going. Use 121 to drop out for a section and 124 to end the song. Its partner, TRANSPORT START (note 123), starts the clock and click without starting any tracks, which gives you an empty bar to count in over.
If you draw arrangements in LOOM's arrange view, note 125 is worth a switch too. It plays the arrangement from bar 1, from any view. More on that in arranging a live looping song in advance.
Clear needs a one-second hold
The Clear command (+5) and ALL CLEAR (note 122) only fire after you hold the switch for a full second, and a tap does nothing. Clearing cannot be undone, so a stray foot should not cost you a loop. If you still hear the track playing, letting go is safe.
Check your controller before you trust it
LOOM's bottom rail has a MIDI readout in every view. It shows the last message received:
MIDI 16 · N36 · 100 ✓
That reads as channel 16, note 36, velocity 100, and the ✓ means LOOM matched it to a command and acted on it. A · at the end means LOOM heard it and did nothing with it. If the readout shows only a dash, nothing has arrived since LOOM started.
Use it like this:
- Still a dash after you press a switch? LOOM is not receiving from that device. Check the cable, power and the controller's mode. Changing note numbers will not help.
- Ends in
·? Read the channel and the note. Wrong channel means the switch is not on the command channel. Wrong note usually means you are an octave out. - Ends in
✓? It worked. Still check it is the note you meant, because an octave error often lands on another track's cluster, which also ends in✓.

A worked example with a pad controller
The manual walks through an Arturia MiniLab: in MIDI Control Center, set pads 1 to 7 to send notes 0 to 6 (C-2 upward in Arturia's naming) on channel 16, and leave the keys on channel 1 for a synth. Press pad 1 and you want the readout to show 16 · N0 · 100 ✓. If it shows N12, you are an octave out. The same steps apply to a foot controller; only the editor changes.
What LOOM's MIDI control does not do yet
It is better to know these before you plan a rig:
- There is no MIDI learn and no way to reassign notes yet.
- CC messages do not control the mixer or effects.
- There is no MIDI clock, MTC or MMC in or out, and no MIDI output.
- There is no per-device choice for commands. LOOM answers every source on the command channel.
More MIDI control is on the roadmap, possibly a full MIDI mapping system, and feedback from people using LOOM will decide what comes first. The note map starts small on purpose. Much of LOOM's appeal is that the arrange view frees you from running the looper, by hand or by foot, at all. So the first release covers what you need to run the loop tracks yourself, with more to come in future releases.
If your controller is programmed for LOOM 1.0's layout, switch MIDI MAP in the side panel to 1.0 layout. It will be removed in LOOM 1.4.
Once your feet are running the looper, the next thing to sort out is capturing the set. See how to record a live looping set as separate tracks.
Frequently asked questions
Which MIDI notes does LOOM use for track 1?
Notes 0 to 6 in the default layout. Note 0 is the ring button, 1 is overdub, 2 is undo, 3 is redo, 4 is stop, 5 is clear (hold one second) and 6 is play. Each later track is 12 notes higher.
What MIDI channel does LOOM listen on?
Channel 16 by default. You can change it to any channel from 1 to 16 with MIDI CH in the side panel. Notes on other channels go to the instrument tracks, not the looper commands.
Can I use CC messages from my foot controller?
Not for LOOM's commands. The commands respond to note messages only, so your controller needs to send notes.
Does LOOM have MIDI learn?
Not yet. The note map is fixed for now. A fuller MIDI mapping system is on the roadmap, and feedback from people using LOOM will set its priority.
Do I need to restart LOOM after plugging in a controller?
No. LOOM connects to a newly plugged controller within about a frame and confirms it on the notice row.