How to Record a Live Looping Set as Separate Tracks (Stems) for Mixing Later
The usual way to record a looping set is to take a stereo feed off the main outputs. It works, and it captures exactly what the room heard. The trouble starts afterwards. The guitar loop was too loud, the vocal was buried, the reverb was wrong for the video, and none of it can be pulled apart because it is all in one file.
The fix is to record stems: each loop, each instrument and each live input in its own file, all starting at the same moment, so you can line them up in a DAW and mix the set like a studio session. This post shows how to do that in LOOM, the macOS live looper I build, using its RECORD button and the Record Setup sheet.
Can a looper record each track to a separate file?
A looper's outputs give you whatever it mixes down to them. A software looper can do more, because every track already exists as a separate signal inside the app. LOOM's performance recording writes one stereo WAV file per stream you choose, and every file in a recording starts at the same moment and stays in sync.
You can record:
- each loop track, after its own insert effects, fader and pan;
- each instrument track (synth, drum machine or sampler), taken at the same point as a loop track;
- each effects bus, including the CUE headphone bus, after its effects and before its return level;
- the main mix after the master fader, without the click;
- groups, which sum several sources of your choice into one stereo file.
The groups are how you get your live inputs, such as a lead vocal, onto their own files. More on that below.
Takes and performance recordings are two different things
LOOM writes audio to disk in two separate ways, and it helps to know which one you want.
Takes are the loops themselves. Every recorded pass on a track is saved as a WAV file inside the song's folder, ~/Music/LOOM/<song>.loom/takes/, the moment the loop closes. They are what LOOM plays back when you open the song again. A take is the raw material you played, not what the track sounded like in the mix.
Performance recordings are what RECORD makes. They capture the whole set as it happened, over time, one file per stream, in ~/Music/LOOM/Recordings. Nothing goes into the song's folder, and your takes still save to the song as usual.
For mixing a gig later, you want the performance recording. The manual's chapter on where your recordings live covers both in detail.
Step 1: choose your streams in Record Setup
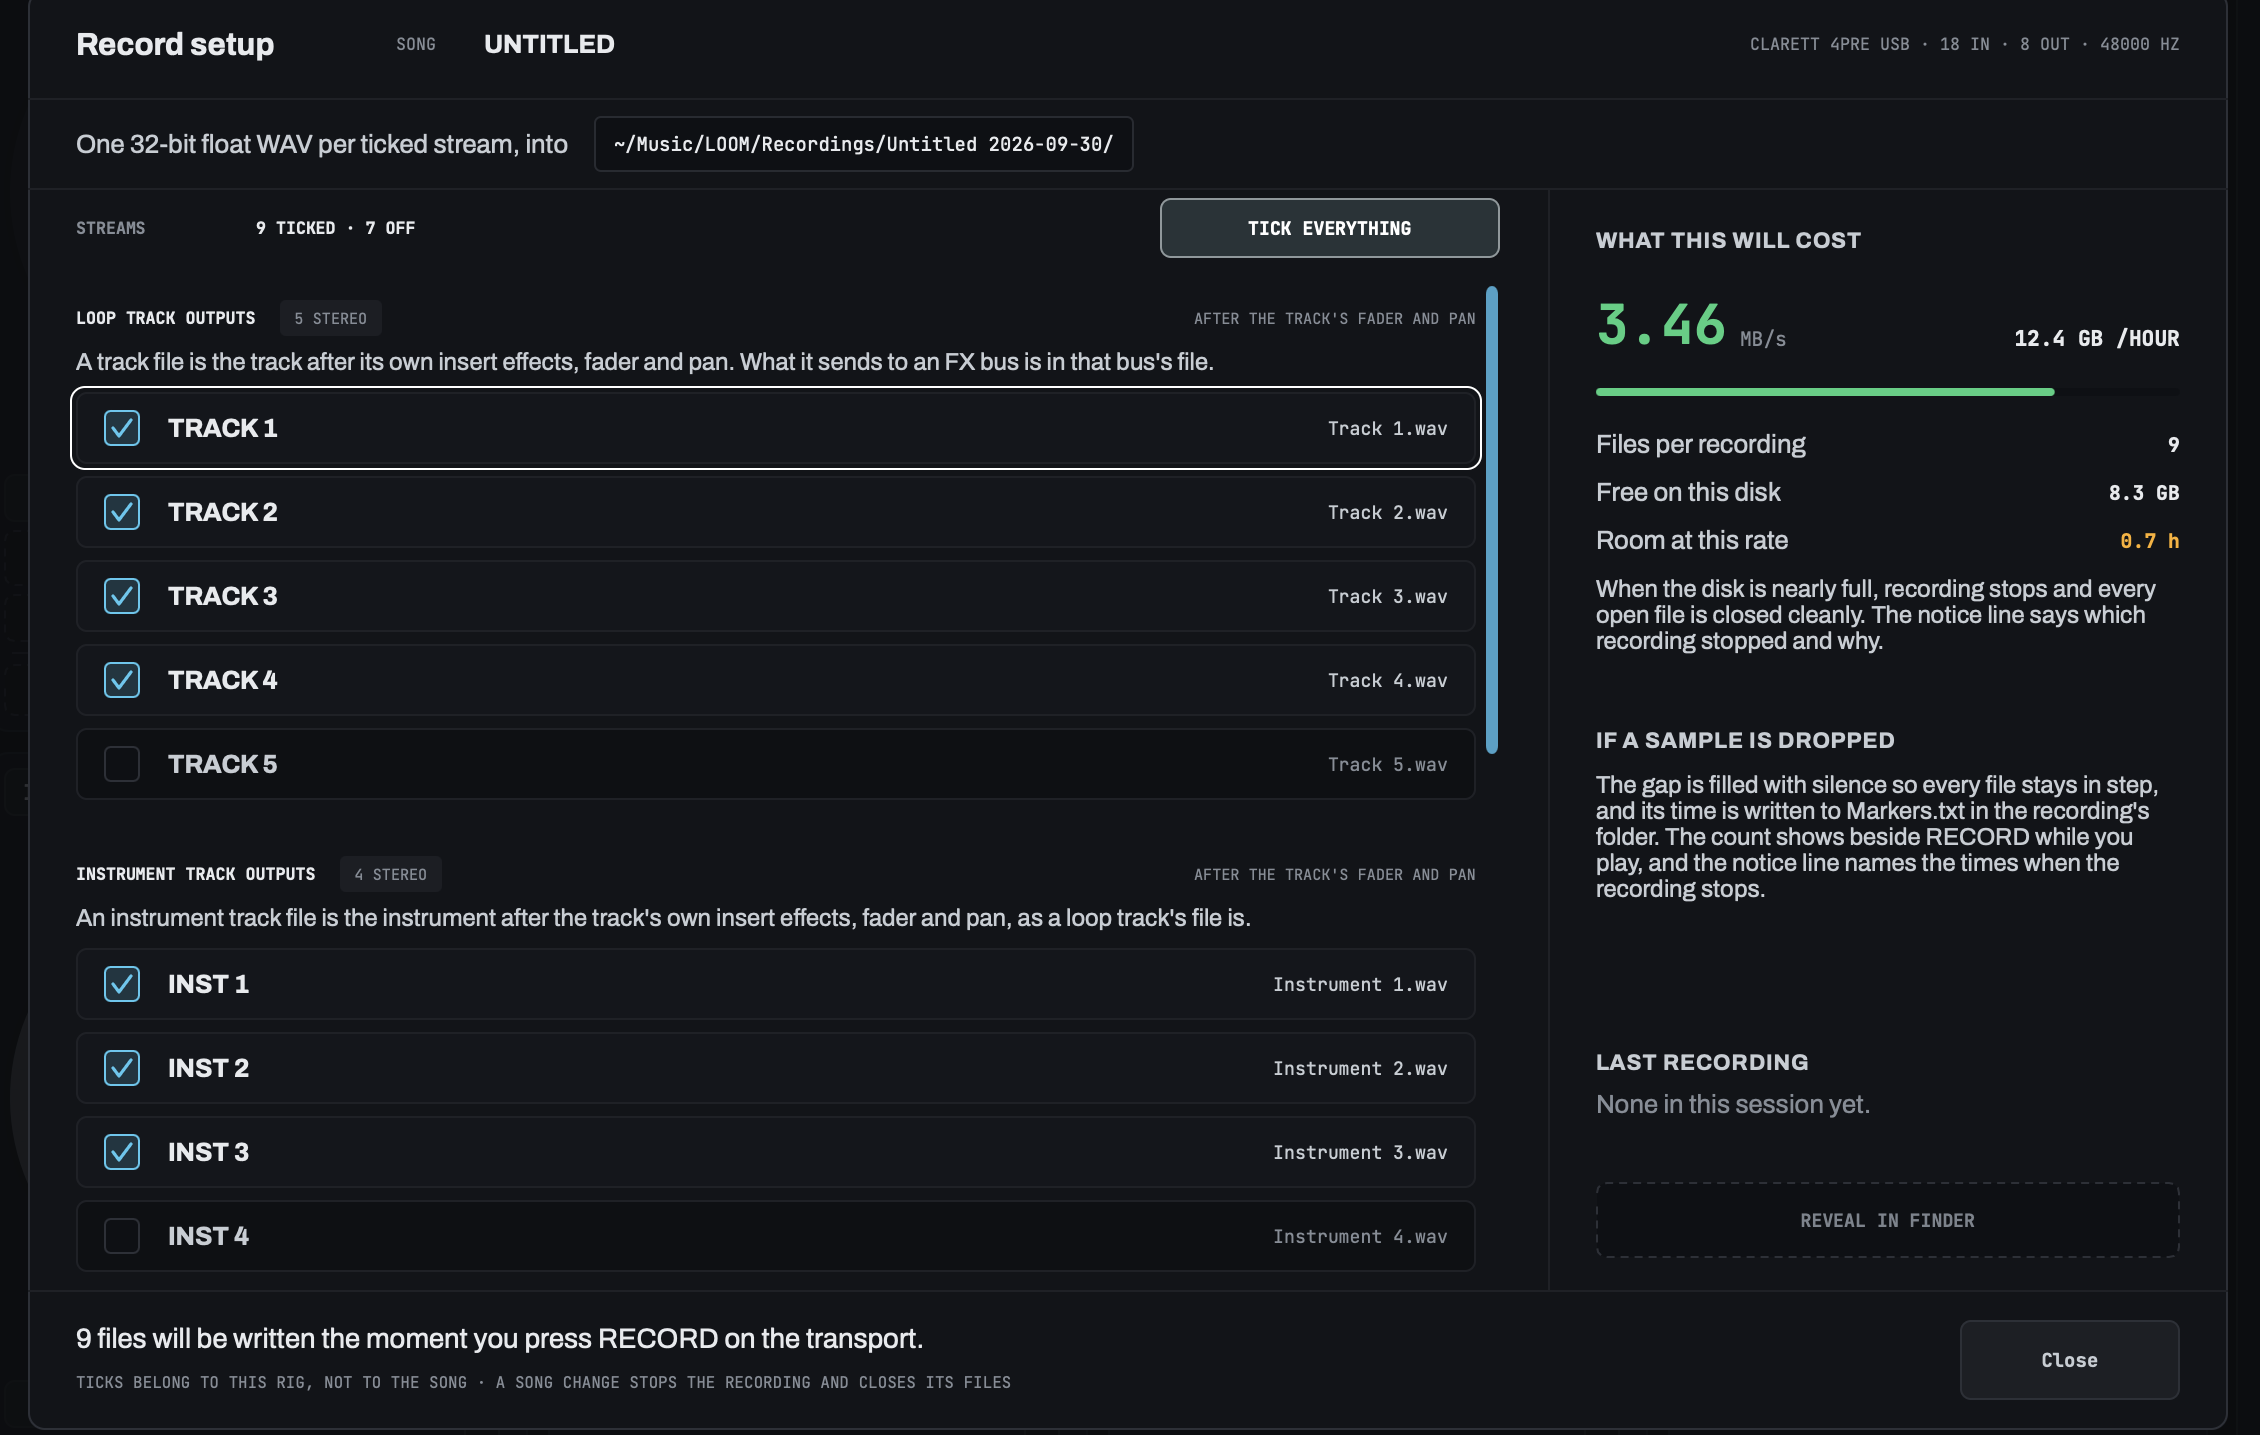
Open File ▸ Record Setup… or press ⌥⌘R. The sheet lists every stream LOOM can write, with the file name for each row on the right:
| Section | File it writes |
|---|---|
LOOP TRACK OUTPUTS |
Track 1.wav, Track 2.wav and so on |
INSTRUMENT TRACK OUTPUTS |
Instrument 1.wav and so on |
FX BUS OUTPUTS |
CUE.wav, FX 1.wav, FX 2.wav |
MAIN MIX |
Main Mix.wav |
GROUPS |
Group 1.wav and so on |
Tick the rows you want, or press TICK EVERYTHING. Your ticks belong to this Mac, not to the song, so they stay the same in every song you open. That suits a gig: set it up once at soundcheck and every song in the set records the same way.
Check the disk cost before the show
The sheet shows what your ticks will cost: megabytes per second, gigabytes per hour, the number of files per recording, the free space on the disk and how many hours of recording that leaves. The rate turns amber above 4.4 MB/s, and the hours figure turns amber under two hours.
Every file is 32-bit float, stereo, at your interface's sample rate. At 48 kHz that works out to about 0.38 MB per second for each file, so ten streams are close to 4 MB/s. If a set runs long, a file that passes 4 GB (about three hours at 48 kHz) continues in a second file named like Track 1 (2).wav, and the recording carries on.
Step 2: get your live inputs onto their own files with groups
A loop track's file holds what that track plays back. It does not hold your live vocal or the guitar you are playing over the loops. For that you need a group.
Groups are built on the mixer's routing page: open the mixer, choose MASTER in the BANK row, then ROUTING in the PAGE row. Record Setup has a button that takes you straight there. Press + NEW GROUP and tick its sources.
A group is one of two kinds, decided by the first source you tick:
- LIVE groups hold device inputs only. A group with just your vocal mic in it records your vocal on its own.
- PLAYBACK groups hold loop tracks, instrument tracks and effects buses.
The two kinds cannot share a file. LOOM lines up live inputs with the loops you played along to, and that shifts an input's file by a different amount from a track's. One file can only have one starting point, so live and playback sources go in separate groups.
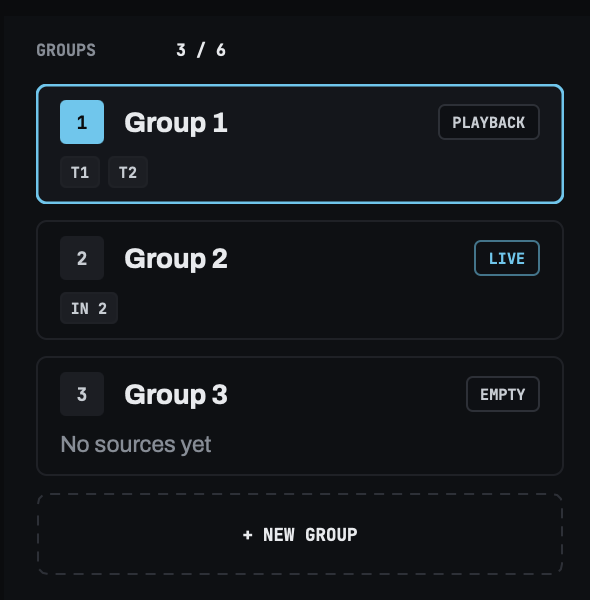
For a typical singer with a looper, that means one LIVE group per mic or instrument input you want isolated, plus the loop track files.
Watch for dry tracks
Reverb and delay sends do not appear in a track's own file. If you send a track to FX 1 for reverb, the reverb comes back on the FX 1 bus, so Track 1.wav is dry. Either record the FX buses as their own files, or put the bus in the same PLAYBACK group as the track.
The routing page warns you about this. When you tick a track whose send bus is not in the group, the track's row turns purple and reads DRY · FX 1 MISSING, with an ADD FX 1 button beside it. When every bus the track sends to is in the group, the row reads WITH FX 1 in green.

Step 3: press RECORD and play
RECORD sits on the top bar between the MOVE set and the tempo field. It reads REC 00:00 in grey when nothing is recording. Press it to start and it turns red, with the time showing how much audio the files hold. Press it again to stop, and every file is closed and complete.

A few things it does not do:
- It does not start or stop the transport. You can start recording before the first loop and stop after the last one.
- It does not record into a loop track. It only writes the performance files.
- It does not carry across a song change. Opening another song, or starting a new one, stops the recording cleanly. Start a new one in the next song if you want to keep going.
When you stop, the notice line gives the number of files and the folder's path, and REVEAL IN FINDER in Record Setup opens it.
What happens if the disk can't keep up
If the disk falls behind, LOOM drops a block of audio and fills the gap with silence in every file at once, so the files stay in sync with each other. The RECORD button turns amber and stays amber until you stop. The notice line gives the time of the gap.
Each recording folder has a Markers.txt file you can open in any text editor. It lists every gap with its time, its position in samples and its length, so you know exactly where to look when you mix. A clean recording reads no gaps.
If LOOM stops unexpectedly, the files are still readable up to the last few seconds.
Step 4: mix the stems in your DAW
A recording folder looks like this:
Take 5 2026-09-19/
    Track 1.wav
    Track 2.wav
    Instrument 1.wav
    CUE.wav
    FX 1.wav
    Main Mix.wav
    Group 1.wav
    Markers.txt
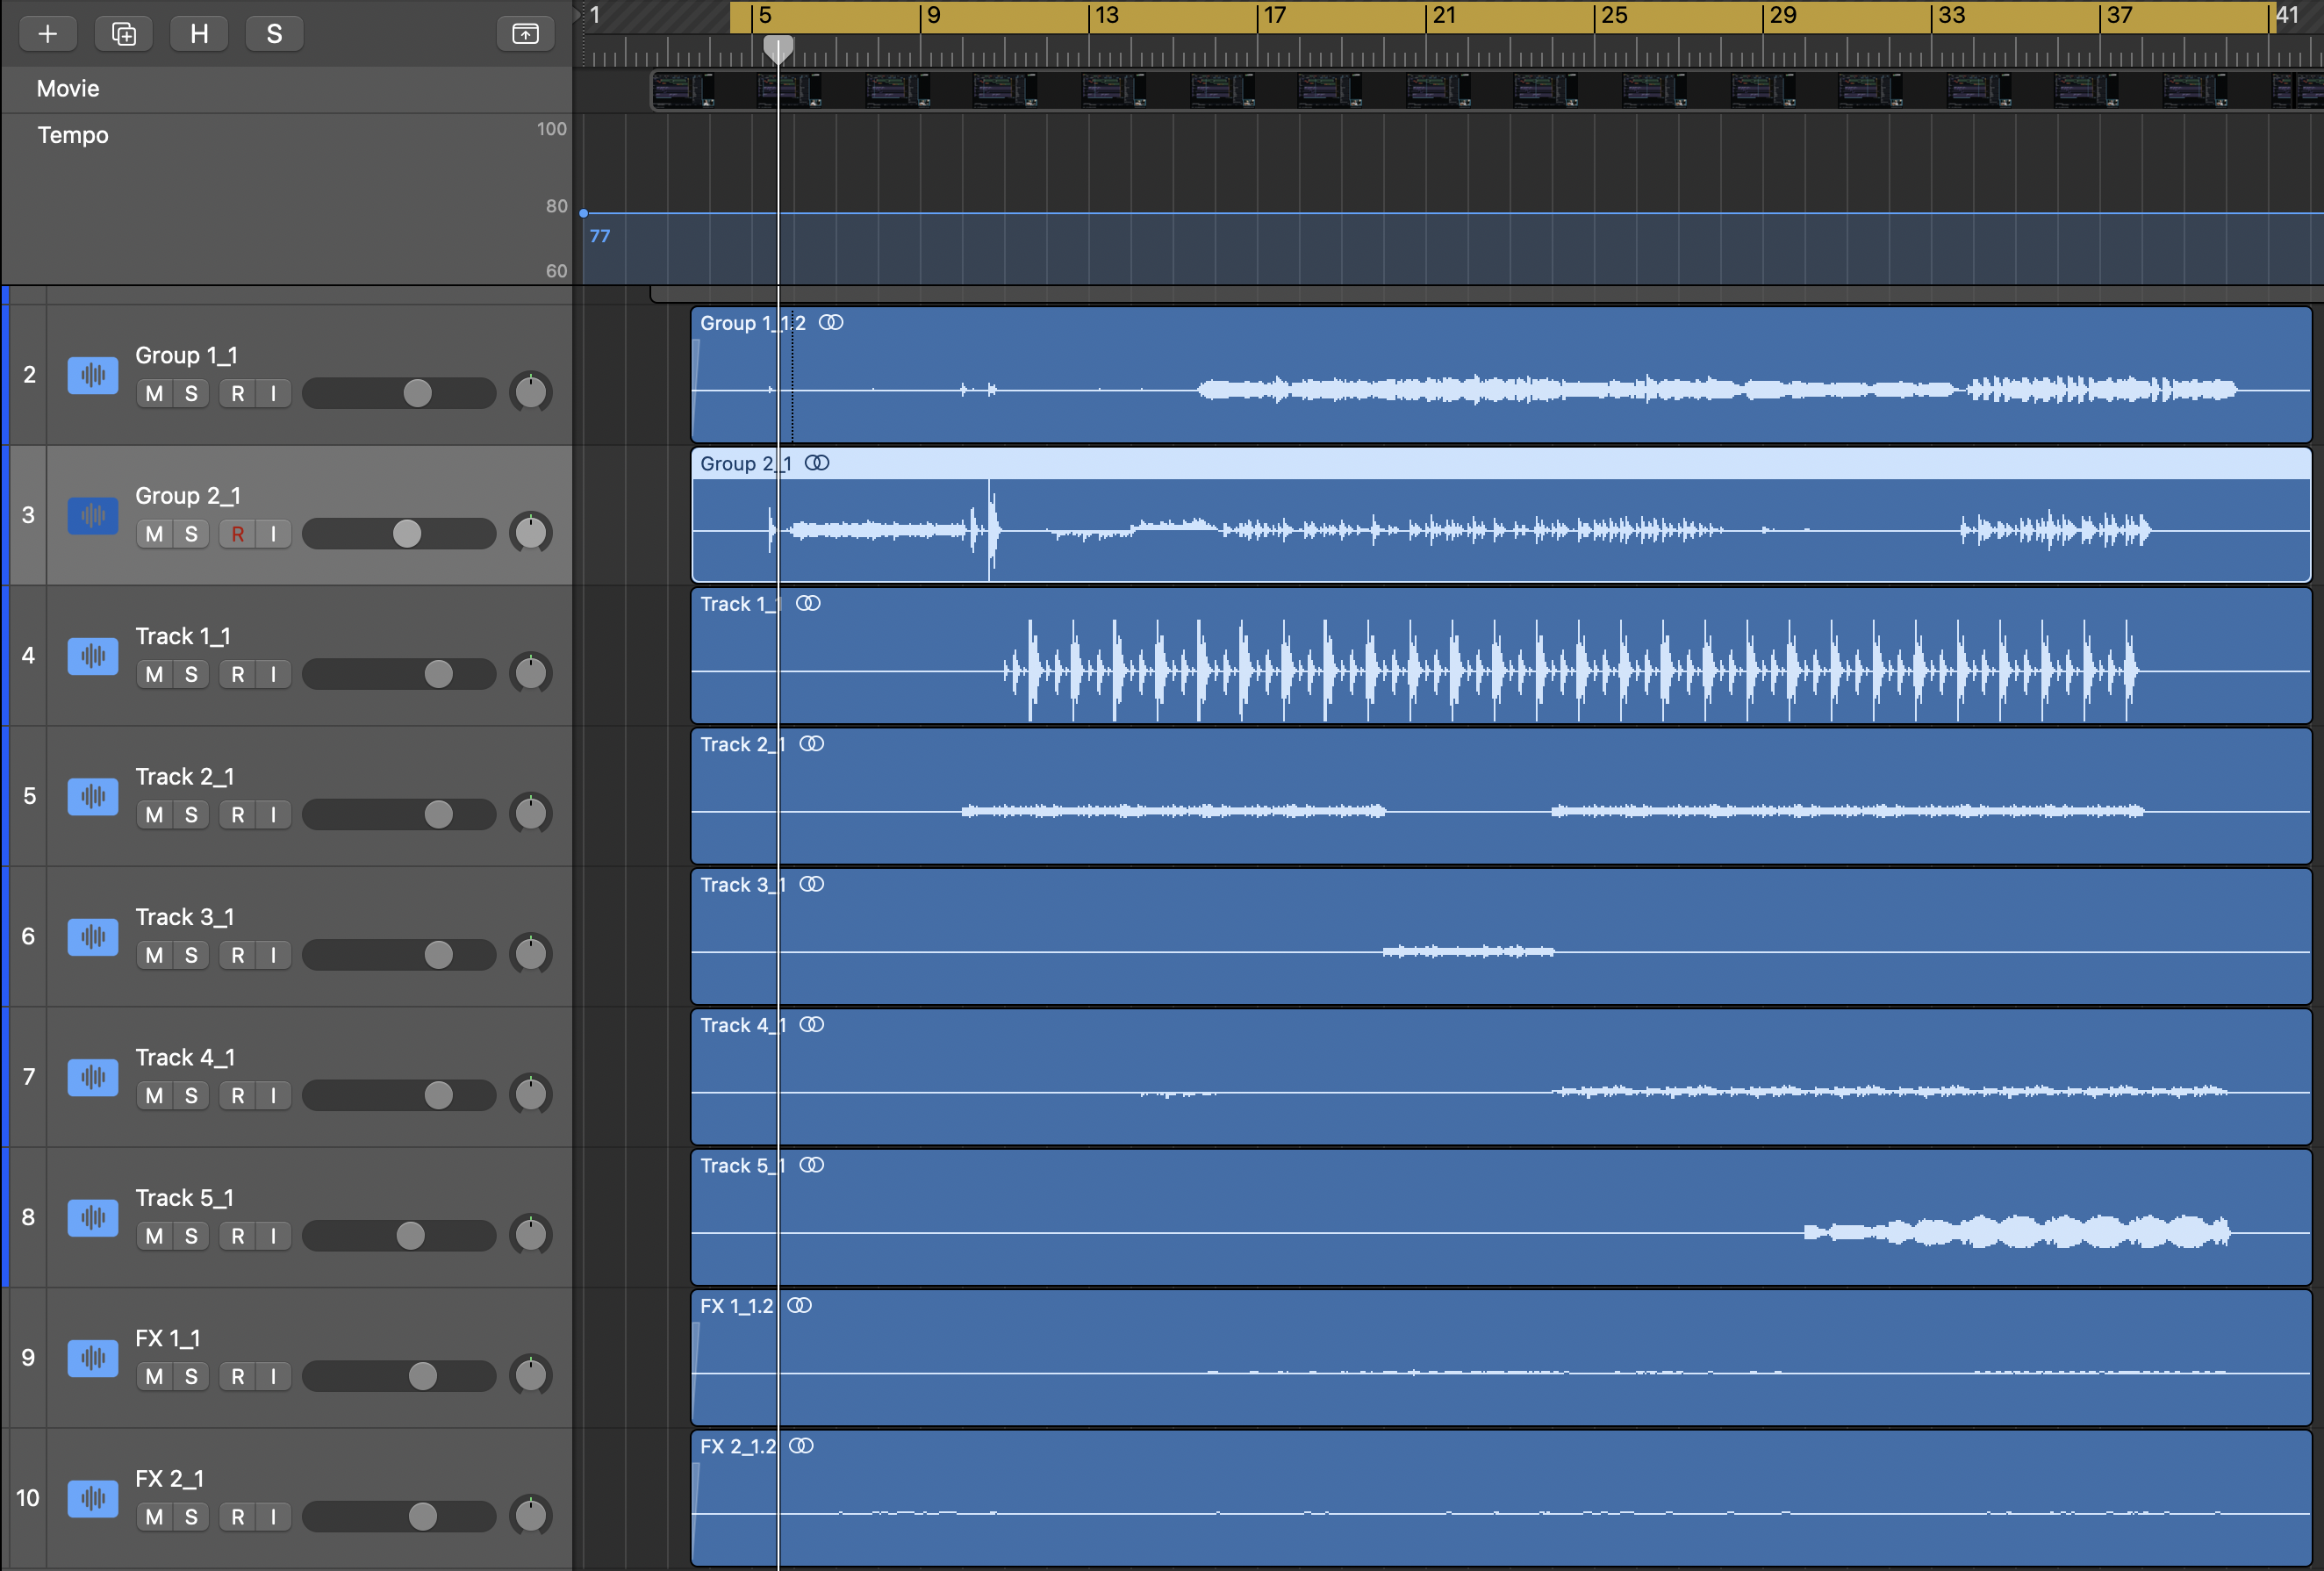
Drag the WAV files into any DAW and place them all at zero. They start at the same moment, so they line up without nudging. From there it is a normal mix: rebalance the loops, re-process a guitar that was too loud in the room, or sync the audio to a video of the show.
Back up before and after
Copy ~/Music/LOOM before a show. It holds your songs, their takes and your performance recordings. CLEAR and ALL CLEAR cannot be undone, so a copy taken before the gig protects the takes, and a copy taken after protects the recording.
If you want the song itself to play the same way every night, so that the stems from two shows line up section for section, see arranging a live looping song in advance. And if you are running the looper from your feet while you record, the MIDI foot controller guide covers that setup.
Frequently asked questions
What format are LOOM's recordings?
WAV, 32-bit float, two channels, at your interface's sample rate. LOOM does not offer another format.
Does the main mix recording include the click?
No. The click is not in Main Mix.wav.
Can I record my live vocal separately from the loops?
Yes. Make a LIVE group on the mixer's ROUTING page with your vocal input in it, then tick that group in Record Setup. It records to its own file.
Why does my track's file have no reverb on it?
Effects sends are recorded on the effects bus, not in the track's file. Tick the FX 1 or FX 2 bus in Record Setup, or add the bus to the track's PLAYBACK group.
Where does LOOM save performance recordings?
In ~/Music/LOOM/Recordings, in a folder named for the song and the date, such as Take 5 2026-09-19.