 LOOM
LOOMThe mixer is the third view. It shows faders side by side, with rows across the top that say which faders you are looking at and what they address. It uses the same body band as the looper and the arrange view, so the top bar, the notice row and the status rail stay where they are when you switch to it.
Open it with ⌘3, with the MIXER cell of the VIEW switcher at the right end of the top bar, or from the View menu. Keyboard shortcuts lists the keys. A few keys belong to this view. M and S mute and solo the focused strip, and they work only while the keyboard is somewhere in the rack. F moves the FADERS row to the next bus, and the digits 1 to 5, with no modifier, choose a bank. F and the digits work from anywhere in this view.
The BANK row chooses which faders the rack shows, and the FADERS row chooses what they address: the MAIN mix or one of the three sends. LOOP TRACKS has one fader per loop track, for the material you have already recorded. INSTRUMENTS has one fader per instrument track. INPUTS has your interface's own channels: what you are playing right now, on its way to the speakers. MASTER is the output page, with the click strip, the cue strip and the master strip. Nothing on it is a track, a device input or an effects return. BUSES has one strip per effects bus, FX 1 and FX 2. Each bank shows the MAIN mix or one of the three sends. The master is the exception: it has no send, and it says so. The MASTER bank also has a ROUTING page, where you build the groups that RECORD can write. See Groups: the ROUTING page.
The master strip is on screen in every bank, except on the ROUTING page, which has no faders. It sits at the right-hand end of the rack, past the last fader, and stays there while the rest of the row scrolls. Its two-bar meter reads what is leaving LOOM, so it tells you whether you are clipping the interface, usually while you are reaching for another fader. Choosing MASTER in the BANK row hides the other strips and leaves the click and cue strips beside the master.
The FADERS row and the buses
FADERS has four settings, in one list:
MAIN · CUE · FX 1 · FX 2
Whichever one is selected, every fader in the rack addresses it. On MAIN, a track strip's fader is that track's level in the main mix, what goes to front of house. On CUE, the same fader is how much of that track goes to your headphones. On FX 1 or FX 2, it is how much of that track goes into that effects bus.
That includes the effects bus strips themselves. On MAIN, FX 1's fader is how loud FX 1 is in the main mix. On CUE, it is how much FX 1 sends into your headphones. On FX 2, it is how much FX 1 sends into FX 2. See The BUSES bank.
The CUE strip is the exception. Its fader is its own level, shown on the MAIN page, and the row does not point it at anything. On CUE, FX 1 and FX 2 the cue strip draws a refusal instead of a fader, because it has no send for those pages to show. The cue strip is on the MASTER bank, with the other outputs. See The CUE strip.
No other control chooses the bus. The FADERS setting is the choice, and the selected cell always names what you are about to move.
Each setting has its own colour
On a send, every fader in the rack takes that bus's colour: blue for CUE, violet for FX 1, magenta for FX 2, as a faint tint across the strip and as the colour of the caption above each fader. On MAIN there is no tint. A rack with no tint is the main mix, and pulling a fader there changes what the room hears.
The colour never carries the setting on its own. The FADERS row shows the selected word, and each fader's caption prints the bus it is addressing. Use the colour to check at a glance and the words to be sure.
The difference between CUE and the two effects buses
CUE is tapped before the fader and before mute. Pull a strip down for the room, or mute it, and it stays in your headphones at the level you set. This lets you hear something before you bring it in.
FX 1 and FX 2 are tapped after the fader and after mute. Pull a strip down and it leaves the effect too; mute it and its reverb tail stops with it.
The tap point is the only difference between a headphone feed and an effects send. Each bus strip prints which one it is.
Sends start where they are useful
A new track's CUE send starts at unity, so your headphones work the moment you plug them in and you carve the balance by pulling sends down. Its FX 1 and FX 2 sends start at silence, so nothing lands in an effects bus until you send it there.
The effects buses also reach your headphones
FX 1 and FX 2 return into the main mix, and they also send into CUE at unity. Put a reverb in FX 1, send a vocal to it, and you hear the reverb in the room and in your headphones.
You do not need to route anything for this. The buses start this way, so a monitor mix works before you have set anything up.
To change it, go to the BUSES bank, put the FADERS row on CUE, and move FX 1's fader. Pull it to the bottom for a dry monitor; the reverb stays in the room.
How a fader move reaches your headphones
A strip reaches CUE before its fader and reaches FX 1 and FX 2 after it. Both of those paths end in your headphones, and they answer the same fader move differently:
- the dry signal stays where it is, because the
CUEsend is tapped before the fader; - the effect falls with the fader, because the
FXsend is tapped after it.
So a strip you pull down for the room gets drier in your headphones rather than quieter. A strip you pull all the way down is still there, dry, at the level its CUE send sets, with no effect on it.
The same applies to a track's MUTE: the dry signal stays in your headphones and the effect stops. An input's MUTE is different. It is the monitor switch for that channel, and it silences both.
An effects bus returns into CUE as a whole rather than strip by strip, so a track whose own CUE send you have pulled down is still audible in your headphones through any effects bus it feeds. To take it out of your headphones completely, pull its FX 1 and FX 2 sends down as well. A track's MUTE does not do it, because a track's CUE send survives its mute.
The BUSES bank
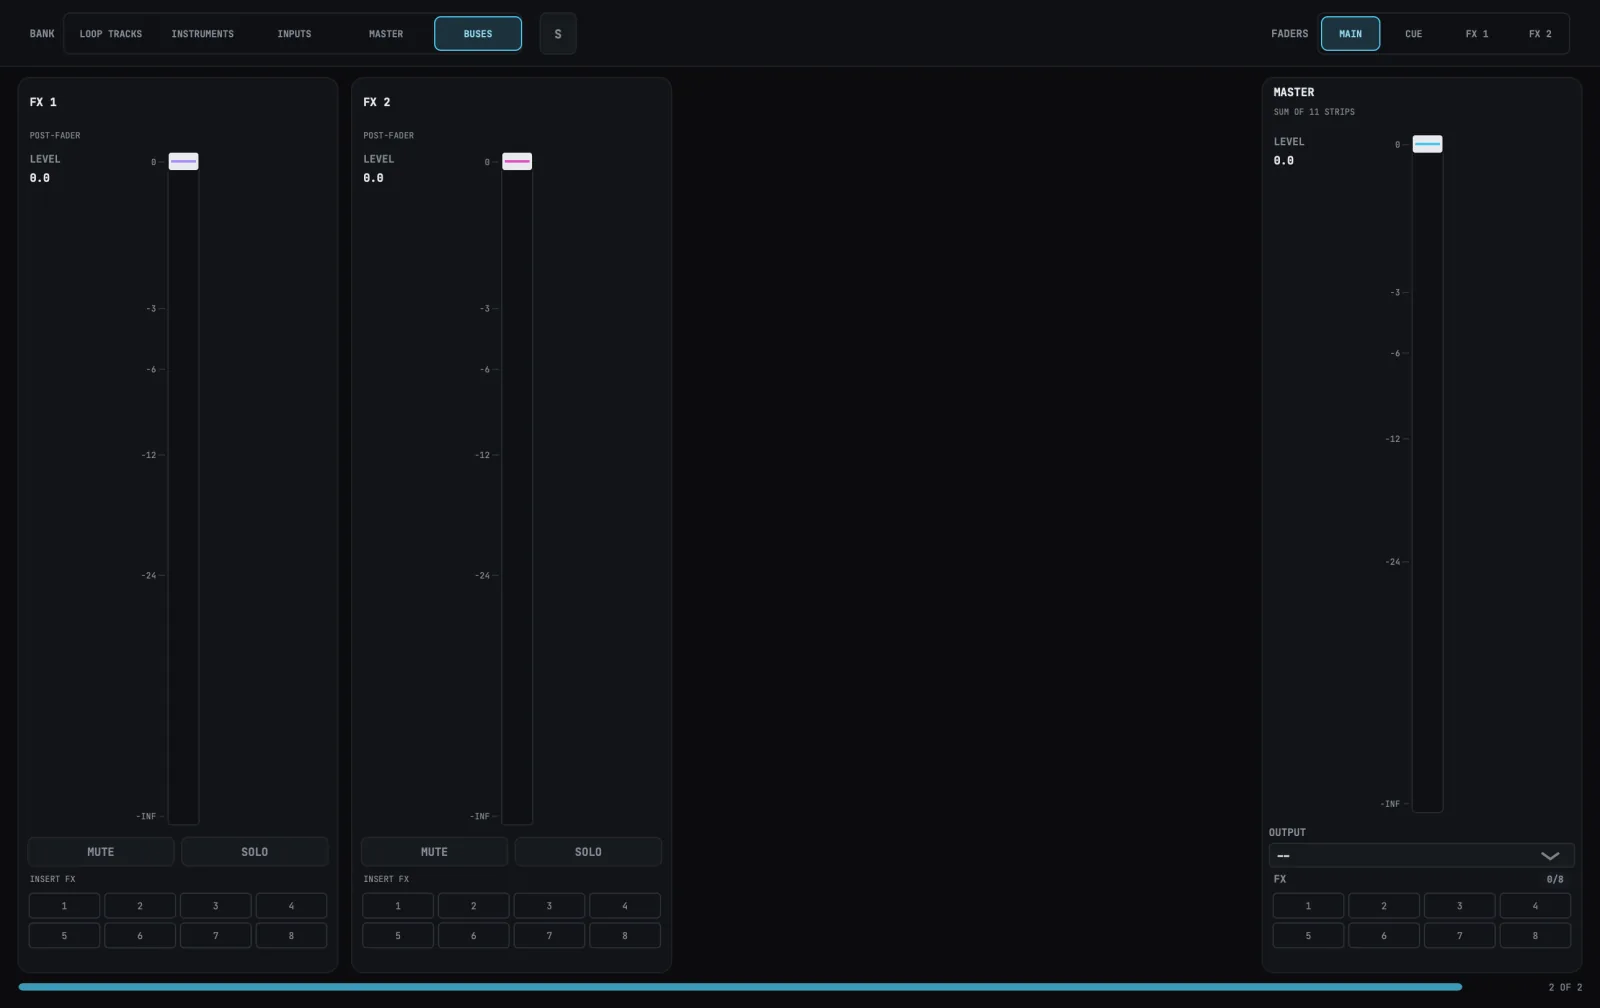
One strip per effects bus, in the order the FADERS row cycles them: FX 1, FX 2.
The two strips have the same layout. An effects bus is a return: it goes into the main mix and into your headphones, and the FADERS row is how much of each.
The CUE strip is not here. It is on the MASTER bank, with the click and the master, because it is an output and not a return. See The CUE strip.
Each strip carries:
- the bus's name, and under it
POST-FADER; - a fader, which follows the
FADERSrow. OnMAINit is that bus's own level, how loud the reverb is in the room. OnCUE,FX 1orFX 2it is how much this bus sends into that bus; - a two-bar meter inside the fader's slot, which shows what the bus is sending;
MUTEandSOLO. See Muting and soloing a bus below;- eight insert slots, the same eight every other strip has. Put a reverb in
FX 1and every strip'sFX 1send feeds it.
There is no OUTPUT picker on an effects bus. It does not leave by sockets of its own: it goes into the main mix and into the cue, and the FADERS row sets how much of each. The only two OUTPUT pickers in the mixer are the master's and the cue's, and both are on the MASTER bank.
An effects bus strip's fader follows the FADERS row
FX 1 and FX 2 work the way every other strip in the mixer works. Put the FADERS row on the bus you want to feed, and move the fader of the bus you want to feed it from.
FADERS is on |
FX 1's fader sets |
FX 2's fader sets |
|---|---|---|
MAIN |
how loud FX 1 is in the main mix |
how loud FX 2 is in the main mix |
CUE |
how much FX 1 sends into your headphones |
how much FX 2 sends into your headphones |
FX 1 |
nothing — a bus cannot send to itself | how much FX 2 sends into FX 1 |
FX 2 |
how much FX 1 sends into FX 2 |
nothing — a bus cannot send to itself |
A bus cannot send to itself, so on its own page a strip draws NO SEND where its fader was. Its own level is on the MAIN page.
Two effects buses cannot feed each other. Send FX 1 into FX 2 and the send the other way is refused, with a line on the notice row naming both buses and telling you which send to remove first. A signal that returns to where it started grows every time round, and there is no level that makes that safe. Pull the first send to the bottom and the other direction becomes available again.
On MAIN, a bus strip's fader handle is drawn in that bus's own colour, the same colour the rack takes when the FADERS row is on that bus. On a send page it takes the colour of the bus the row is on, like every other fader in the mixer, so the colour always says which bus the fader is about.
To set how much of a track or input strip goes into a bus, put the FADERS row on that bus and use that strip's own fader. It is the same gesture.
FX 1 and FX 2 return into the main mix and into CUE. See The effects buses also reach your headphones.
CUE does not send to other buses, so no strip on this bank can be pointed at it as a destination the way FX 1 can be pointed at FX 2. See The CUE strip.
The bus meter
The meter shows what the bus is sending, measured after its effects, after its fader and after its MUTE. Pull the fader down and the bars fall with it; mute the bus and they fall to the floor. Use this reading when you set a send level, because it shows how much of the bus reaches its destination.
It has two bars, left and right. A bus is a stereo sum, so a reverb that has collapsed to one side shows as one bar moving and the other still.
A bus with nothing routed to it reads zero, and falls to zero rather than holding the last level it saw. A still meter means no signal, not a meter that has stopped working.
Muting and soloing a bus
MUTE silences the bus completely. Nothing reaches its destination, and nothing reaches the other buses it sends to. It ramps rather than steps, so it does not click, and the bus's effects keep running underneath: unmute a reverb and you drop back into the tail where it would have been, not into a new one.
You can mute the CUE bus, and that silences your own headphones. Use it to stop a monitor feeding back or an effect that has run away. The strip lights while it is muted, and one press puts it back.
SOLO puts the bus in the soloed set, along with every strip that sends to it. Solo FX 1 and you hear FX 1 and the strips feeding it, and nothing else. A reverb with nothing going into it is a tail that decays and then silence, so soloing the bus on its own would tell you very little.
There is one soloed set and it covers tracks and buses together. A plain press on either kind of strip clears every other solo in the mixer; hold ⌥ to build a set up instead. Soloing a track keeps the buses that track feeds, so you hear the track with its own reverb rather than dry.
The CUE bus has no SOLO, and no solo anywhere takes it out. It is your headphone feed, so it stays where it is whatever you solo. It does not return into the main mix, so soloing it would silence the room and leave your headphones exactly as they were.
Mute wins over solo, on a bus as on a track. A bus that is both stays silent.
A bus another strip's solo has silenced says so. Its MUTE stays unlit, because it is not muted, and a screen reader is told "it is silent right now because something else is soloed".
Both settings are saved with the song. A bus you park muted is still muted when you open the song again.
The OUTPUT picker
Two strips have an OUTPUT picker: the master and the cue. Both are on the MASTER bank, and on each of them the picker sits above the fader. It chooses which pair of your interface's outputs that signal leaves by.
The list holds the output pairs your interface actually has, counted the way they are labelled on the hardware: OUT 1-2, OUT 3-4, and so on. The cue's list also holds FOLLOW MAIN and NONE.
FX 1 and FX 2 have no picker. They are returns: they go into the main mix and into the cue, and how much of each is the FADERS row.
The cue is not offered the channels the main mix is using. The main mix is summed after the buses, so a cue pointed at the same outputs would be pulled down by the master fader along with the house. Move the main mix and the pairs offered to the cue change with it.
The master strip's picker has no FOLLOW MAIN entry. The master is the main mix, so there is nothing for it to follow; it can only choose which sockets it leaves by.
FOLLOW MAIN keeps the cue above the main mix
FOLLOW MAIN is the cue's default. It puts the cue on the pair immediately above the main mix. Move the main mix and the cue moves with it. Change interface and the cue is worked out again from that interface.
The entry names the pair it currently lands on, so it reads FOLLOW MAIN (OUT 3-4) beside a main mix on outputs 1 and 2. Choose the plain OUT 3-4 entry below it instead and the cue is fixed there: it stays on outputs 3 and 4 when you move the main mix.
The two entries resolve to the same pair now and behave differently when you move the main mix. Choose the fixed pair if you have patched your headphone amplifier to particular sockets. Choose FOLLOW MAIN if you want the cue to stay above the main mix wherever you put it.
On an interface with no pair above the main mix, FOLLOW MAIN has nowhere to land and the picker reads NO SPARE PAIR. See On a two-output interface.
NONE sends the cue nowhere
Choose NONE on the cue strip and the cue renders nowhere. Nothing it receives reaches an output, and it costs nothing in the audio path.
Use it to switch off a headphone feed you are not using.
NONE keeps the output pair you had chosen. The picker reads NONE, but the pair is still stored. Choose a pair again and the cue goes straight back to it, without your having to set it again.
NONE is a deliberate choice. It stays set when you plug in a wider interface, and only you can clear it.
The master strip has no NONE. A cue sent nowhere still leaves you every other path out of LOOM. A main mix sent nowhere is silence, and you would have no working monitor left while you looked for the control that undoes it.
On a two-output interface
A stereo interface has no pair of outputs above the main mix, so the cue cannot be given one. The CUE strip's picker reads NO SPARE PAIR.
On such an interface your cue is not in the house mix. LOOM does not fall back to outputs 1 and 2, because that would put your headphone mix in front of house.
Plug in an interface with four or more outputs and the cue appears on the pair above the main mix.
Changing the output fades
The signal fades down on the pair it is leaving, moves, and fades back up on the pair you chose. The whole change takes about ten milliseconds each way.
There is a short silence in the middle, and no moment when both pairs carry the signal. LOOM mutes before it moves rather than crossfading, so a signal never arrives at outputs you have not finished patching.
Choosing NONE, and clearing it again, fade the same way. Nothing on a bus cuts off at full level.
If your interface cannot provide the pair you chose
LOOM keeps your choice rather than changing it to a pair that fits.
- The cue, if the pair is missing, renders nowhere. Its picker shows the pair you chose, marked
(NOT ON THIS DEVICE), and the strip says so. - The main mix falls back to outputs 1 and 2, so you always have a house mix to work with. The master strip shows the pair you chose, marked
(NOT ON THIS DEVICE), and LOOM tells you when the song opens.
Plug the wider interface back in and both return to the outputs you set, without you doing anything.
LOOM remembers your outputs per interface
Your choices are stored against the audio interface you made them on, and they are restored the next time you open LOOM with that interface connected. They are saved when the session is saved, at ⌘S and when you quit.
A cue set to NONE is stored as well, and so is the pair underneath it. Silence your headphone feed at a rehearsal on a small interface and the routing you set up on the big one is still there when you plug it back in.
Output choices belong to the machine, not to the song. A song carries no output channel numbers, so a set built on an eight-output rig opens on a two-output laptop without bringing channels that laptop does not have. Set up the venue's interface at the venue and your own at home; each keeps its own.
The header band
The header is a band across the full width of the view, closed by a hairline. It is one row deep in a window of ordinary size.
| Left | Middle | Right |
|---|---|---|
BANK, and beside it SHOW on the INPUTS bank or PAGE on the MASTER bank, then S |
FADERS |
The rows fit on one line at every window size LOOM opens at, including the smallest one with the side panel open.
BANK chooses which rack is below: LOOP TRACKS, INSTRUMENTS, INPUTS, MASTER or BUSES. It is a setting row like the ones in the side panel, with one tab stop, arrows inside it and no modifiers. Switching banks changes which faders are on screen and nothing you can hear. The master strip is drawn in every bank; choosing MASTER hides the other strips and shows the click and cue strips beside it.
FADERS is the same control the looper view's globals row carries, not a copy of it. It chooses which bus every fader in the rack addresses. It is one tab stop named FADERS, and a change is announced at high priority, as it is on the looper surface. FADERS on the globals row and the track strips explains what it means and why it is never saved.
S clears every solo in the song, on loop tracks, instrument tracks and effect buses alike. It is solid amber while anything is soloed and dead when nothing is. It is the same button the looper view's globals row and the arrange view's header carry, and it sits in the same place in the row. See S — clear every solo on the globals row and the track strips.
PAGE is on the MASTER bank only. FADERS shows the output strips: the click, the cue and the master. ROUTING shows the groups page in their place. It is a setting row with one tab stop, like BANK.
FADERS keeps its full width however narrow the window gets. BANK, SHOW and PAGE share whatever width is left, each drawn at the width of its own words.
What the header says out loud
The header used to show a sentence in the middle of the row: MIXER, and under it LOOP TRACKS on the MAIN mix. That sentence is no longer on screen. The rows say the same thing: BANK names the rack, FADERS names the bus, and each fader's caption prints the bus it is addressing.
A screen reader still hears the sentence, as the first thing in the view's description, followed by the fader state and what it means.
The LOOP TRACKS rack
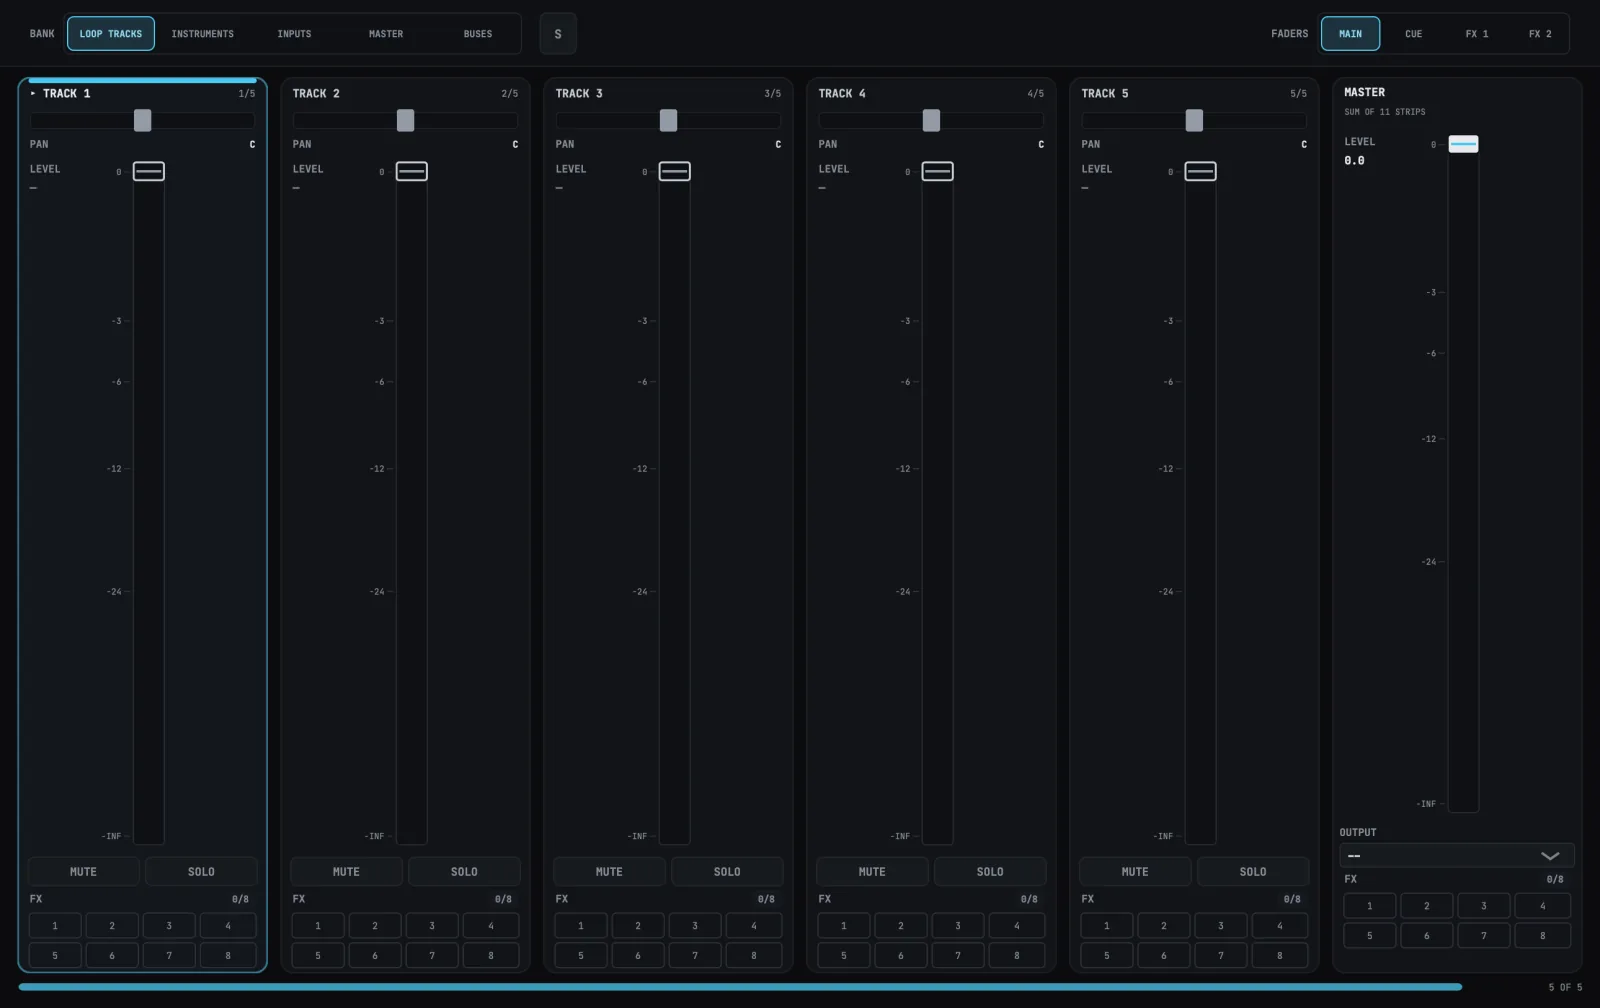
The rack has one strip per track in the session, in equal columns across the rest of the view and in the same order as the looper's strips. The master strip has a column of its own at the right-hand end. With the side panel open, the rack fits into what is left of the body instead of being drawn under the panel, so collapsing the panel widens every strip.
Strips narrow down to 173 px, and then the row scrolls. 173 px is what the slot grid needs (four 36 px tiles, three gaps and a margin on each side), and below it a strip would start clipping its own header. Narrow the window further, or open the INPUTS bank on a 32-input interface, and the strips stop shrinking and the row scrolls instead.
A strip also stops growing at 259 px. Beyond that width the strips keep their size, and the spare room stays between the last strip and the master instead of being shared out. Adding a track then never slides the strips you were reaching for sideways, and a one-track session does not spread a single fader across the whole window.
The master's column is taken from the width first, and the strips divide what is left. The master is the same width as the strips beside it, with the same minimum and maximum. On a 32-input interface the strips are already at 173 px and scrolling, so they keep their width and you see about one strip fewer: four on screen at a time instead of five. On a five-track song in a 1600 px window it works the other way: nothing scrolls, and each strip is about 200 px instead of about 244.
The bar under the strips is always shown, with a count beside it. The count reads 3 OF 5: how many strips are fully on screen, out of how many there are. Both are drawn even when everything fits, so you never see them for the first time at the moment you need them. The master is not in either number, because it never scrolls and so is never out of view. Drag the bar to move the row. The bar is not a tab stop, because moving the keyboard onto a strip scrolls that strip into view.
You can also scroll the strips directly, with a two-finger swipe on a trackpad or a wheel on a mouse, with the pointer anywhere over the rack. Both axes work, so it does not matter whether your hardware swipes sideways or only spins.
A strip has a header, a pan slider, a fader, a mute and solo pair, and eight effect slots:
- the header —
TRACK 3, with a caret in front of it when this is the focused track, and the strip's position in the rack (3/5) drawn small at the right end; PAN, a small horizontal slider above the fader. The row under it readsPANat the left and the value at the right:Cat centre,L14orR9off it;- the fader, with its two-bar meter inside the slot and the handle riding in it, its dB scale beside the slot, and its caption and value to the left;
MUTEandSOLO, two equal halves of a row under the fader;- the slot grid, across the foot of the strip under an
FXcaption — eight numbered tiles, two rows of four, which are this track's insert effects. See The effect rack.
Pan
PAN sets a track's place across the stereo main mix. It reads C in the centre, and L1 to L100 or R1 to R100 off it. Drag it, or press ← and → (two units a press, one with Shift), and ⌥-click to return it to centre. Home is hard left and End is hard right.
At centre both channels pass at full level, so a track you leave centred is untouched by this control. Panning hard to one side is about 3 dB quieter in the room, because the near channel holds its level all the way across and the far one falls to silence.
The control is a balance. It sets how much of the track reaches each side rather than moving a point between the speakers. Hard left passes the left channel through untouched and takes the right one to silence; hard right does the reverse. A mixing console's balance control works the same way.
On a track whose inputs are all centred, a balance and a pan are the same thing, so the control behaves the way you expect whatever is in the track's effect slots.
On a track recording two sources panned apart they stop being the same thing. Pan such a track hard left and you get the source you put on the left, alone: the balance took the right channel away and the other source was in it. To keep both, leave the track nearer the centre. Where each source sits inside the track is set by the input's own PAN, below.
A stereo effect changes what that means. A delay with PING PONG on puts some repeats on the left and some on the right; pan that track hard left and the right-side repeats go with the right channel, so you hear the left-side repeats only and the track sounds sparser than it did at centre. Nothing is broken. The balance took the right channel away, and half the repeats were in it. To keep every repeat, leave the track nearer the centre.
Pan is on the main mix only. It does not move what you hear in your headphones through the cue send.
On a device whose main output is a single channel the slider is drawn dead and says why: there is nowhere to pan to on one channel. It stays on the strip rather than disappearing, so a strip is the same shape on every interface, and it keeps its PAN label so you can tell a refused control from a missing one. On that output a track plays its left channel only.
Mute and solo
MUTE takes the track out of the main mix and leaves the cue send alone, so a track muted for the room is still in your headphones. It ramps rather than steps, so muting in the middle of a loop does not click, and the loop keeps playing and stays in phase: unmute and it drops back in exactly where it had got to. It does not stop the transport or touch the recording.
SOLO puts the track in the soloed set. While anything is soloed, only the soloed strips are in the main mix. Clearing the last solo gives you back exactly the mix you had, because solo never writes a mute.
The soloed set covers tracks and buses together. Soloing a track keeps the buses that track sends to, so you hear it with its own reverb rather than dry, and a plain press clears the buses' solos as well as the other tracks'. The CUE bus is never taken out, so soloing a track does not change what is in your headphones. See Muting and soloing a bus.
A plain press on SOLO clears every other strip's solo. Hold ⌥ to build a set up instead, with an ⌥-click or ⌥S from the keyboard. This is the opposite way round from Logic. LOOM's plain solo is the exclusive one, so if ⌥ means solo this one alone to your hands, here it means and this one too.
Mute wins over solo. A track that is both muted and soloed stays silent.
A strip another track's solo has silenced is dimmed: its name, its fader, its meter and its effect slots all go quiet-coloured, and the word MUTE blinks in blue. The button's fill stays dark, because the track is not muted; something else is keeping it out of the mix. Nothing is wrong with the track. To bring it back, take the other track out of solo or press the S button in the header. The looper view's strips do the same thing for the same reason.
A track you muted yourself does not blink. Its MUTE is lit, which already says why it is silent.
A screen reader is told the same thing in words, and told which of the two reasons it is: "it is muted", or "something else is soloed, so this one is not in the main mix". It says something else because a soloed bus silences a track the same way a soloed track does.
M and S do the same to the focused track from the keyboard. In the mixer they work while the keyboard is somewhere in the rack and the LOOP TRACKS or INSTRUMENTS bank is showing; in the looper view they work wherever the keyboard is.
The fader works the way the looper strip's does: the same taper, the same silence-to-unity range with no gain above unity, the same caption naming the bus it addresses, the same two-bar post-fader meter, the same — on a track that holds nothing, and the same keys. It is described under The fader and its meter on the globals row and the track strips. It is drawn differently here: a scale runs down the left of the slot, and the handle is filled on a track that holds a loop and an outline on one that does not.
The scale is marked at 0, -3, -6, -12, -24 and -INF decibels. Every mark is drawn whatever the strip's size, but the numbers beside them are not. A strip too short to hold every number drops the ones that do not fit rather than setting them in smaller type, and always keeps 0 and -INF. The numbers use the same words as the readout, so -INF on the scale is the position the readout calls -INF.
A track fader sets what that track's recorded loop plays back at. It does not touch what you hear coming in from your interface. That is the INPUTS bank, below.
An input strip's fader is the one exception to silence-to-unity. An input's level and its CUE send both run to +6 dB, so you can lift a quiet source in your own headphones without touching what the room hears. Every other fader in LOOM stops at unity.
Moving a strip's fader does not change which track is focused.
Pressing anywhere else on a strip focuses that track, the same gesture as pressing a looper strip's background. The top bar's FOCUS readout, the side panel's TRACK tab and the looper view's caret all move with it, because there is one focused track and every surface is drawing it.
Focus is drawn four ways here too: a filled cap down the strip's left edge (shape), a brighter border (colour), a caret before the number (text), and the strip's own accessible description (words).
The line across the fader's handle carries the track's state colour, the same colour its ring wears in the looper view. That colour does not show whether the strip holds anything. The handle shows it instead: it is filled on a track that holds a loop and an outline on one that does not, and the readout beside it draws a dash. The same rule applies across the strip: an empty effect slot is an outline, a filled one is solid, and a bypassed one has a line struck across it.
The focus marks stay bright on a dimmed strip. A strip that a solo has silenced is drawn quiet, but you can still see which strip your next press lands on, whether or not it is sounding.
The INSTRUMENTS rack
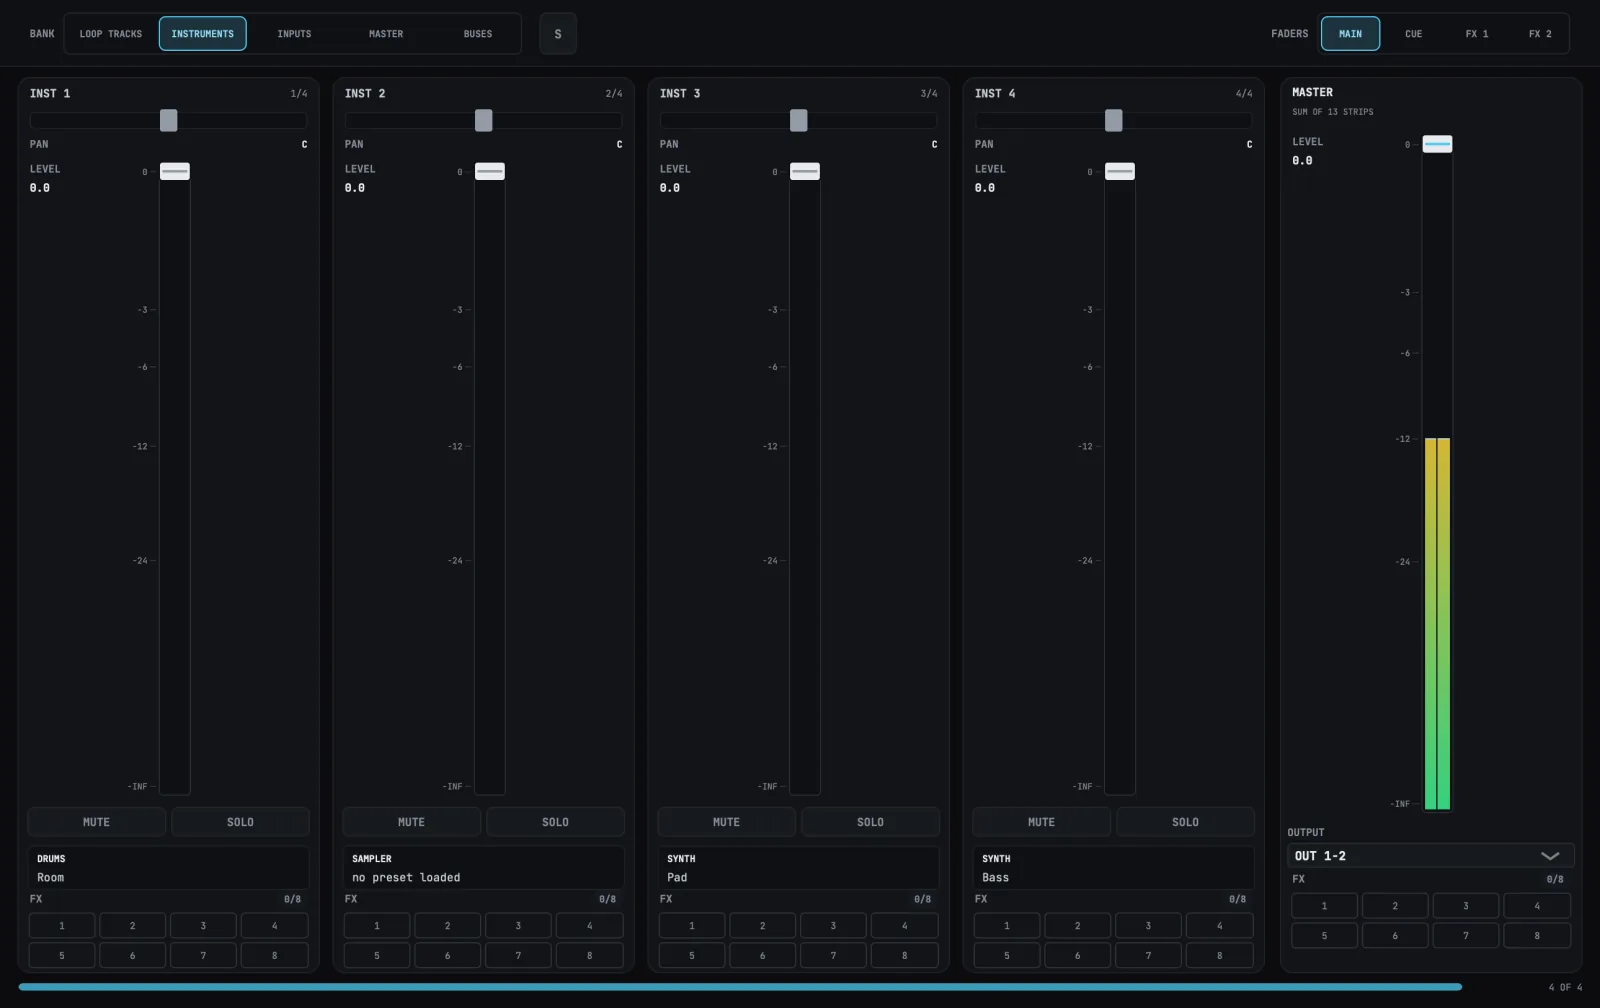
The INSTRUMENTS bank has one strip for each instrument track, headed INST 1, INST 2 and so on. Choose it in the BANK row, or press 2 while the mixer is showing. A strip has the same controls as a loop track's strip: PAN, the fader, MUTE, SOLO and the slot grid.
Between MUTE and SOLO and the slot grid, a box names the instrument the track plays, such as SYNTH, and under it the preset loaded on it. If you have not loaded a preset, the box reads no preset loaded. To change the instrument or open its editor, use the track's INST tab. The mixer has no OPEN EDITOR.
MUTE on an instrument strip silences the track everywhere: the main mix, the cue send and any audio track that records it. This is where it differs from a loop track, whose mute leaves the cue send alone. The loop keeps playing and stays in phase, and a muted track does not record. SOLO works as it does on a loop track, and mute wins over solo.
An instrument track sounds whenever you play it, so its fader always shows a level and its handle is always filled.
Pressing the strip's background focuses that instrument track, and moves the effect drawer to its chain if the drawer is open.
The INPUTS rack
This is where you set what you hear from your interface while you play. An input is open or muted here and nowhere else: no track has to be armed, no track has to exist, and how many tracks are pointed at an input makes no difference to how loud it is.
Input 1 starts audible and every other input starts muted. A guitar in input 1 is in the speakers the moment LOOM opens; a guitar in input 3 is silent until you unmute input 3 here. A muted input is still recorded normally by a track that records it, because muting decides what you hear and not what LOOM captures.
A muted input is a normal setting, not a fault. If you monitor through your interface's own headphone knob you want LOOM's inputs muted, and nothing on this surface treats that as a problem.
The signal map
The signal map is a single row of thin slots above the rack, one slot for every channel your interface has, all shown at once. It never pages or scrolls; on a wider interface the slots are narrower. Its caption reads SIGNAL MAP · 18 INPUTS · 3 ASSIGNED, and the legend beside it names the marks:
| Mark | Means |
|---|---|
| A filled cap along the top edge, and a brighter border | This input's strip is in the rack below. |
| A solid rule along the bottom edge | Some track records this input. |
| A dashed rule | No track records it. |
| A thicker border and a brighter number | The slot you last pressed. |
Pressing a slot selects that input. If the filter was hiding the input, the filter switches to ALL so you can see it. Pressing a slot never assigns anything. Which inputs a track records is a track setting, and it is set on the side panel's TRACK tab.
The map is not a tab stop. It is a picture, so a screen reader gets all of it in the view's description instead.
SHOW: ASSIGNED and ALL
SHOW is a setting row beside BANK, on the INPUTS bank only. ASSIGNED shows the inputs some track records, usually the two or three you are playing through. ALL shows every channel the interface has. It starts on ASSIGNED.
An input you cannot see is still audible if it is unmuted. The filter changes what is in the rack, not what you hear. The view's spoken description says how many inputs are shown out of how many there are, and the rack's footer counts the strips it holds.
An input strip
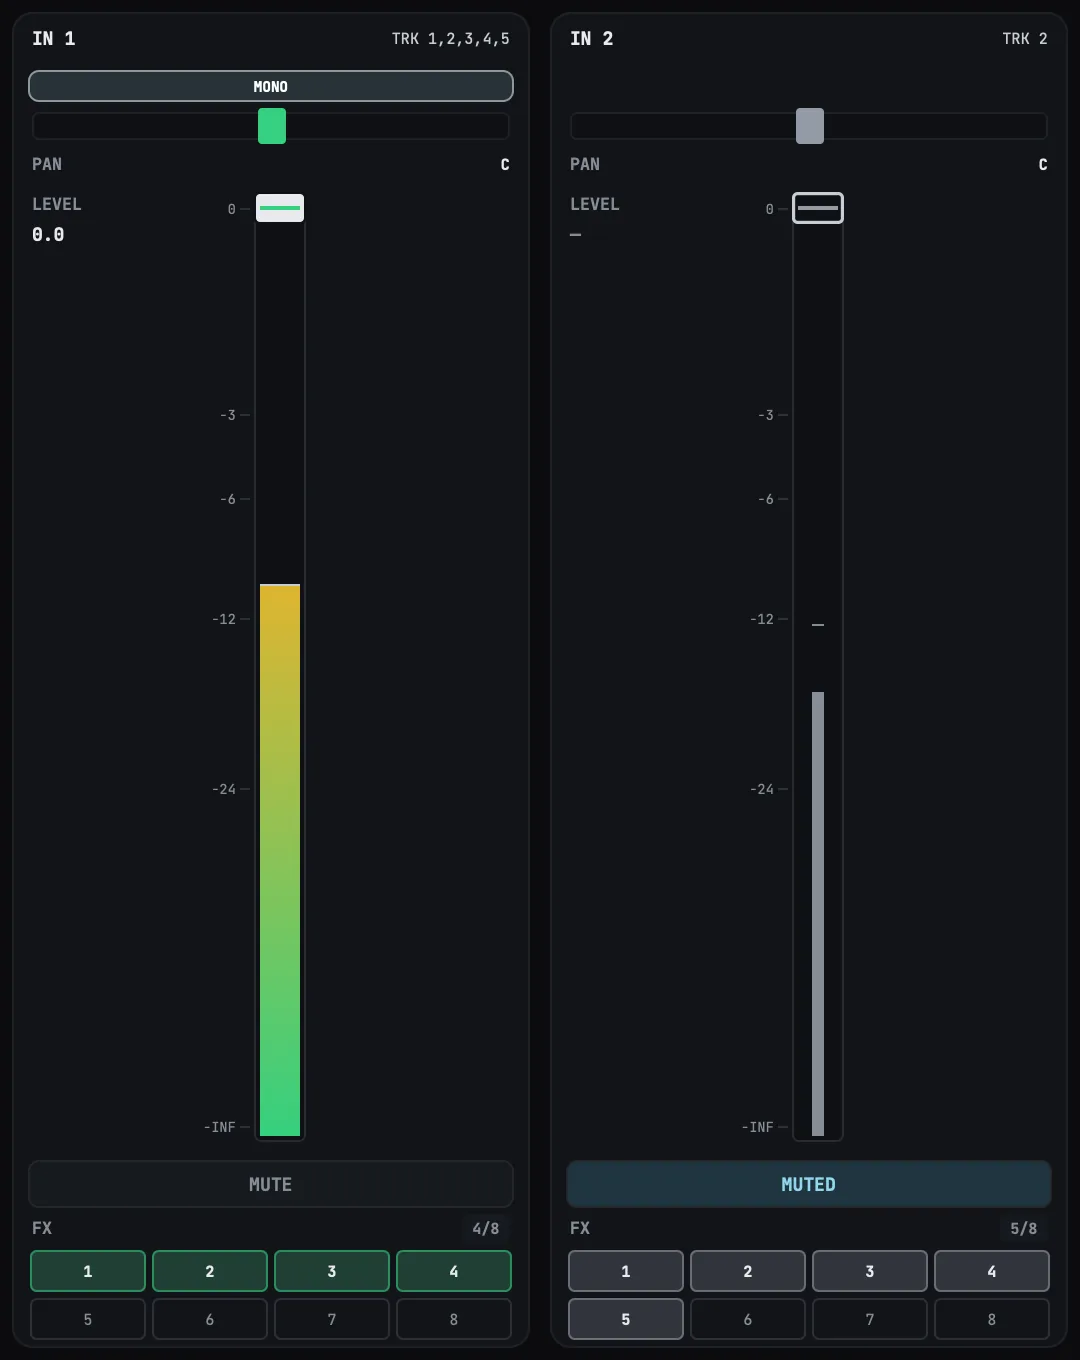
An input strip has a header, a mono/stereo button, a pan, a fader, a mute and eight effect slots:
- the header —
IN 1at the left, and at the right the tracks that record it, asTRK 1,3, orno destinationif none do; MONO/STEREO, below the header on inputs 1, 3, 5 and 7. It joins this input to the one after it. See Linking two inputs as one stereo input;PAN, a small horizontal slider above the fader. The row under it readsPANat the left and the value at the right:Cat centre,L14orR9off it;- the fader, on whichever bus
FADERSis showing; MUTE, across the foot of the strip;- the slot grid, below it — the same eight tiles a track strip carries, opening the same drawer. What differs is what happens to the sound: see The effect rack.
What an input strip changes permanently, and what it only changes for you
The effect slots and PAN are recorded into your takes; the fader and the sends are not. They sit next to each other and behave differently, so read this before you record.
| Control | Recorded into the take? |
|---|---|
| The eight effect slots | Yes |
PAN |
Yes |
| The fader | No — it sets what you hear |
The CUE and bus sends |
No — they set what you hear |
Pull an input's fader all the way down and the take is unchanged. LOOM takes the recording from a point before the fader, so the fader and the sends decide your monitoring and nothing else. On a mixing console the fader feeds the pan pot; here the fader is a send and the pan is not.
Set the pan and the effects before you record, and use the fader freely while you play.
Pan on an input
PAN sets where this input sits across the stereo field, in what you hear and in what every track records from it. It reads C in the centre, and L1 to L100 or R1 to R100 off it. Drag it, or press ← and → (two units a press, one with Shift), and ⌥-click to return it to centre. Home is hard left and End is hard right. It is the same control, the same taper and the same keys as a track strip's pan.
This is how you record a stereo track. Pan one input hard left and another hard right, arm both onto one track from the side panel, and the track records two different sources, one on each channel. Both inputs stay in one set on one track, and the pan is what separates them.
A centred input records onto both channels equally. An input you never touch is centred.
The control is a balance, like the track strip's. The near channel holds its level all the way across and the far one falls to silence, so an input panned hard to one side is about 3 dB quieter in the room than it was at centre, and at full level on the channel it went to.
The pan reaches your headphones too. Pan an input left and you hear it on the left of the cue send as well as in the room.
It comes after this input's effect slots. A ping-pong delay on the input spreads the repeats across the pair first, and the pan then places that pair, so panning hard to one side takes the far-side repeats with it, as it does on a track.
The slider is live on every interface, including a mono one. A track always records two channels, so an input panned hard right is permanently on the right of your take even on an interface that cannot play the placement back to you. Unlike the track strip's pan, it is never drawn dead.
The fader is the same control as on the looper strip: the same taper, the same silence-to-unity range with no gain above unity, the same caption naming the bus it addresses, and the same keys.
MUTE is the monitoring switch; there is no separate on/off. It reads MUTE while you can hear the input and MUTED while you cannot, so the label shows the state. Muting remembers the level: unmute and the fader is where you left it. While an input is muted its value reads — rather than a number.
The destination in the header is a readout of which tracks record this input. You cannot edit it here, because a track's inputs are set from the side panel and this only shows that setting. One input can feed several tracks and one track can record several inputs, so a track may appear against more than one input here.
The meter in the fader's slot is live, and it moves whether or not the input is muted. Muting decides what you hear, not what LOOM is measuring, and the question this bank usually answers is which channel your microphone is in. A muted input's meter is drawn narrower, so you can see at a glance that you are looking at signal you cannot hear.
Linking two inputs as one stereo input
Link two inputs when one stereo instrument is plugged into them. Connect a keyboard, a stereo synth or a stereo pedal to inputs 1 and 2, press MONO on input 1, and the two strips become one.
Press the button again to separate them.
The button is on inputs 1, 3, 5 and 7 only, and it joins that input to the one after it. Inputs pair as 1+2, 3+4, 5+6 and 7+8. You cannot pair inputs 1 and 7. If your interface has an odd number of inputs, the last one has no button, because there is nothing for it to pair with.
The button reads the current state. MONO means the two inputs are separate; STEREO means they are joined.
What changes when you link
One strip replaces two:
| Before | After | |
|---|---|---|
| Strips | Two, IN 1 and IN 2 |
One, IN 1-2 |
| Effect slots | Eight on each, set separately | Eight, running across both channels |
| Meter | One bar on each | Two bars in one column, left and right |
PAN |
A position for each input | A balance between the two channels |
Fader, MUTE, sends |
One of each per input | One of each for the pair |
Effects are the reason to link. Unlinked, each input gets its own effect chain and each chain only ever sees one side of the instrument. Linked, one chain sees both sides at once:
- a delay hears both sides of the instrument, so each side's repeats stay on the side you played them on. See The delay for what
PING PONGstarts at on a linked pair; - a reverb decorrelates across the instrument instead of across one channel duplicated;
- you set every parameter once instead of setting it twice and keeping the two in step by hand.
PAN becomes a balance. It is the same slider, the same taper and the same keys, but it moves the pair left or right rather than placing a single input. At centre both channels pass at full level.
A track that records input 1 records the pair, left on left and right on right. You do not need to change the track's input.
When LOOM refuses to link
LOOM refuses to link rather than throw away something you set up. The notice line says which of these is the reason:
- a track already records the second input. The notice names that track. Point it somewhere else, then link.
- the second input has effects in its chain. Clear that chain, then link. The first input's chain is kept and becomes the pair's chain.
Linking discards nothing you built, so unlinking has nothing to restore. The second input's fader, mute, sends and pan are untouched the whole time, and they are exactly where you left them when you separate the pair again.
Linking is never refused in the other direction. You can always unlink.
Links are saved with the song and come back when you open it.
The MASTER strip
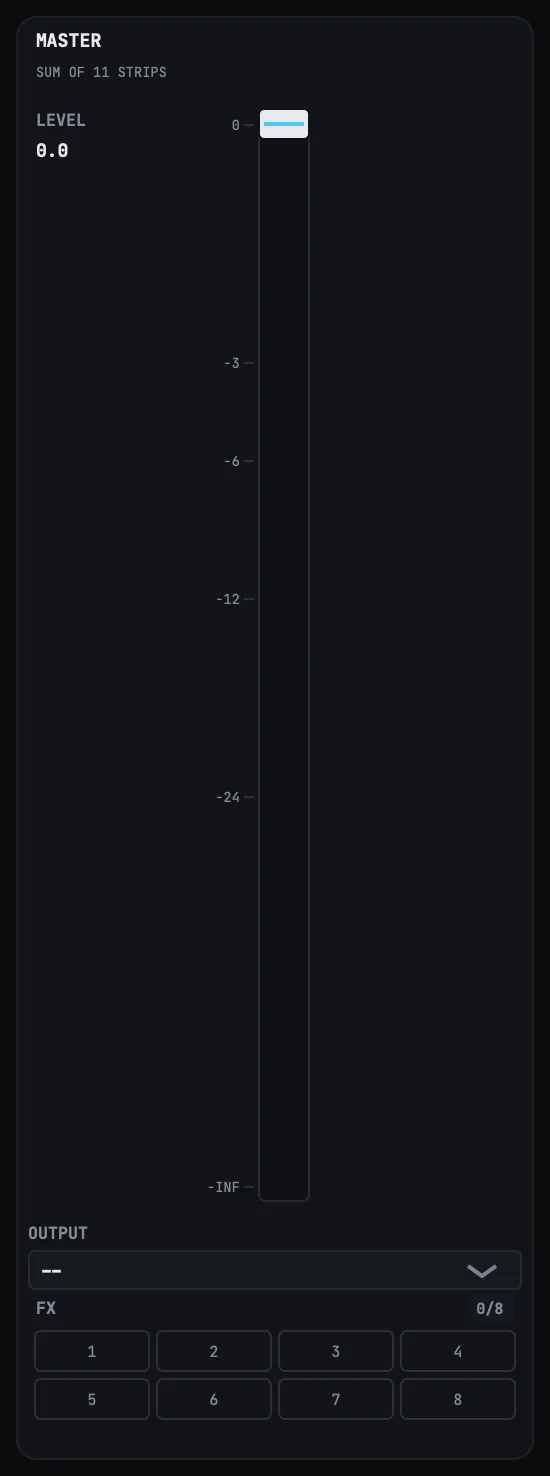
The master strip controls the whole mix, and it is the last thing in LOOM that touches your audio.
It is at the right-hand end of the rack, in every bank, and it does not scroll. The one place it is not drawn is the MASTER bank's ROUTING page, which takes the whole rack and has no faders. Scroll the loop tracks or run a 32-input interface and the row moves underneath it while the master stays where it is. Choosing MASTER in the BANK row is a filter, not a different place: it hides the other strips and shows this one beside the click and CUE strips. There is only one master strip, so what you read on LOOP TRACKS and what you read on MASTER cannot disagree.
Its header reads MASTER and, under it, SUM OF and the number of strips the master adds together: every loop track, every instrument track, every strip on the INPUTS bank, and the FX 1 and FX 2 returns. An input hidden by the SHOW filter is still counted, and a stereo-linked pair counts once. The click and the cue are not counted: the click is added after the master fader, and the cue leaves by its own outputs. The number follows the session.
Above the fader is the OUTPUT picker, which chooses the pair of outputs the whole mix leaves by. It is the same control the cue strip has, in the same place; see The OUTPUT picker.
The fader is the level of everything leaving LOOM. It runs from silence to unity like every other fader here, with no gain above unity. The master is the last stage before your interface, so a boost applied there would have nothing after it to catch the clipping it caused. Pull it to the bottom and the room goes properly silent, not just quiet.
The meter in its slot is what is actually going out, measured after the master's own effects and after the fader. It tells you whether what is leaving the building is too hot, not whether the mix was too hot before you turned it down.
It has two bars: the left channel of the main mix on the left bar and the right channel on the right one. Two bars at different heights mean your mix is leaning to one side. It is the only meter that shows whether the whole mix has collapsed to a single channel, so check it before you record a set.
If you have set the main output to a single channel, both bars show the same level, because there is no second channel to read.
It does not touch your headphones. Pulling the master down takes the room down and leaves the CUE send exactly where it was, so you can kill the house and still hear yourself. A track's MUTE follows the same rule.
Insert effects work here as they do on any other strip: eight slots across the foot, opening the same drawer. This is where a limiter goes, and it runs on the whole mix.
The master's effects follow the fader's rule about your headphones. They shape the main mix and stop there, so a limiter on the master changes what the room hears and leaves the CUE send as it was. They also follow the mix: if you move the main mix to a different pair of outputs with the OUTPUT picker, the master effects move with it.
MASTER and the CUE send
Switch FADERS to CUE with the master showing and the fader goes away, replaced by a panel reading NO SEND:
The master has no send. It is the main mix, not a source that feeds one.
Nothing is wrong. A send is what one strip contributes to a bus, and the master is the mix. Switch FADERS back to MAIN to reach the master level.
On LOOP TRACKS and INPUTS that panel sits beside faders that are live cue sends: every other strip in the row is showing what it sends to your headphones, and the master is saying the question does not apply to it. The panel is drawn in the same switched-off face LOOM uses for any action that is deliberately unavailable, and it carries its own sentence, so it reads as a refusal rather than as a strip that failed to draw.
The master level is saved with the song, so a song reopens at the level you left it. Starting a new song does not reset it: the session is still running and your house level is still your house level. Opening a different song does restore that song's.
The CUE strip
The CUE strip is on the MASTER bank, between the click strip and the master. It is your headphone feed, and it is on this bank because it is an output: it leaves LOOM by a pair of your interface's sockets, the way the main mix does. FX 1 and FX 2 come back into the mix, which is why they are on the BUSES bank and this strip is not.
Its header reads CUE and, under it, PRE-FADER.
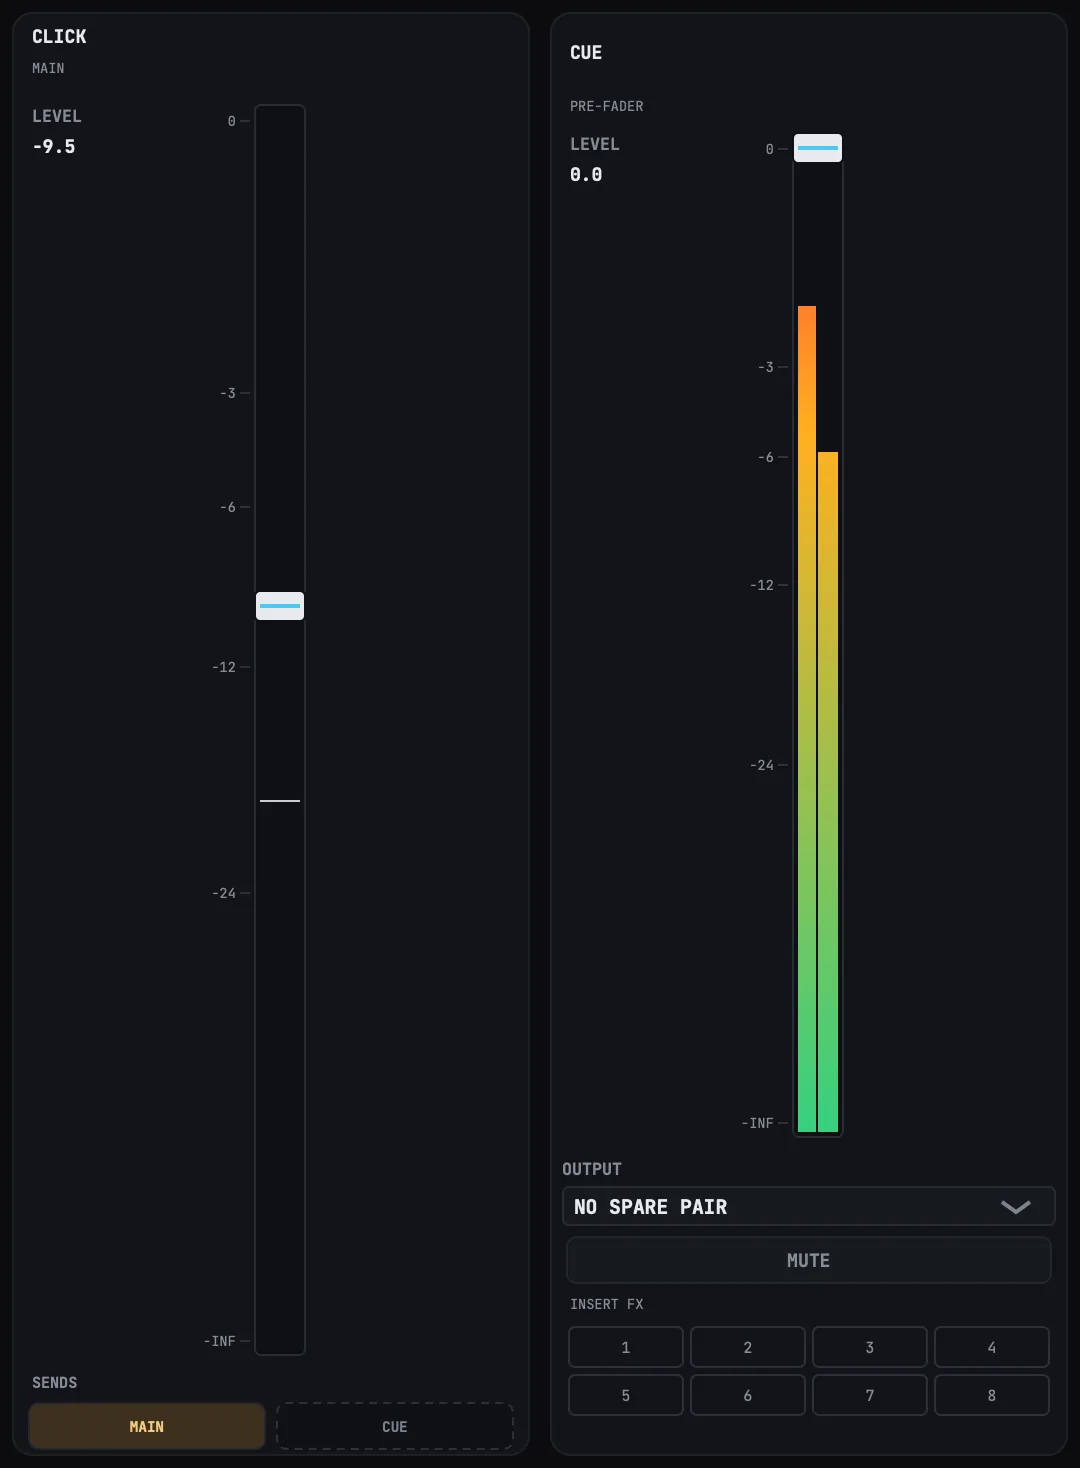
Its fader is the cue bus's own level, and it is on the MAIN page. The FADERS row does not move it, because the cue does not send to other buses and there is nothing for the row to point it at.
On CUE, FX 1 and FX 2 the strip draws NO SEND instead of a fader, and says that its level is on the MAIN page. Every strip on this bank refuses on those three pages, each for its own reason: the master has no send, the click has one level, and the cue has no send. Switch the FADERS row back to MAIN to reach any of the three levels.
The OUTPUT picker, MUTE and the insert slots stay on every page. They belong to the bus rather than to the FADERS row, so which sockets your headphone feed leaves by, and what is inserted in it, do not change with which faders you are looking at.
Above the fader is its OUTPUT picker, which chooses the pair of outputs your headphone feed leaves by. See The OUTPUT picker.
MUTE silences your own headphones, and it takes the whole width of the row because this strip has no SOLO. It is solo-safe: no solo anywhere in the mixer takes the cue out of the mix, and a SOLO on it would silence the room while leaving your headphones exactly as they were. See Muting and soloing a bus.
It has eight insert slots across the foot, the same eight every other strip has. This is where a limiter for your in-ears goes.
CUE does not send to other buses. It is where your monitor mix ends: it receives from every strip and from both effects buses, and it leaves by its own pair of outputs. If a song file asks for a send out of CUE, LOOM drops that send when it opens the song, keeps everything else, and tells you which direction to route instead. The tap point is the reason. CUE takes every strip before its fader, so a send out of it would put a strip you had pulled down for the room back into the house.
The click strip
The click strip is on the MASTER bank, at the left-hand end of the rack. It holds the metronome's level and the choice of what hears it.
Its header reads CLICK, and under it a line saying where the click is going: MAIN, CUE, MAIN + CUE or NO SEND.
The fader is the click's level. It runs from silence to unity like every other fader here, and it scales the beat and the accented downbeat together, so the downbeat stays louder than the beats at every setting and the click keeps its shape as you bring it up and down.
The click meter
The meter in the fader's slot shows the click at the level this fader sets. It has one bar, because the click is a single generator rather than a stereo signal. Use it to set the click by eye against the strips beside it, the way you set any other level here.
It shows the click itself and not the click as sent. Every other meter in this mixer reads what its strip is delivering; this one reads what the click is generating, before the MAIN and CUE sends below it. Switch both sends off and the bar keeps moving, because the click is still running. The two send buttons tell you where the click goes.
It reads zero when the click is off, and falls to zero rather than holding the last level it saw. Stop the transport and the bar falls with it. A still meter means the click is not sounding, not a meter that has stopped working.
MAIN and CUE are sends, and they work like every other send in the mixer. MAIN puts the click in the mix going to front of house. CUE puts it on the cue send with your headphone mix. Switch on both, either, or neither.
Each send follows the strip it feeds. Move the main mix to a different pair of outputs with the master strip's OUTPUT picker and the MAIN send moves with it; move the cue with the cue strip's picker and the CUE send moves with it. The click has no output channels of its own to set.
CUE needs four output channels: two for a stereo main mix and two for a separate stereo cue. On a two-output interface the CUE button is unavailable and the strip says how many outputs your device has. A song that asks for the cue still asks for it: open it on an interface that has one and the click is there again.
A click with no send is still running
Switch both sends off and the click keeps going with nothing coming out. That is a setting rather than a fault. The beat lights in the top bar still flash and the strip's meter keeps moving, so you have the grid in front of you without the room hearing it.
The CLICK button in the top bar does not change to reflect this. It says whether the click is running, which is a different question from whether you can hear it. The strip's two send buttons answer the second one.
There is no mute on this strip. The top bar's CLICK button turns the click on and off, and a mute here would only duplicate it.
The click strip and the CUE page
Switch FADERS to CUE and the click's fader goes away, replaced by a panel reading ONE LEVEL:
The click has one level and it is on the MAIN page. Use the CUE send below to put the click in your headphones.
The click is one generator with one level, so there is no separate cue level for the fader to show. The two send buttons stay live, because where the click goes is the question you are asking when you switch to the cue page.
The click's level and both sends are saved with the song, so a song reopens with the click where you left it.
Groups: the ROUTING page
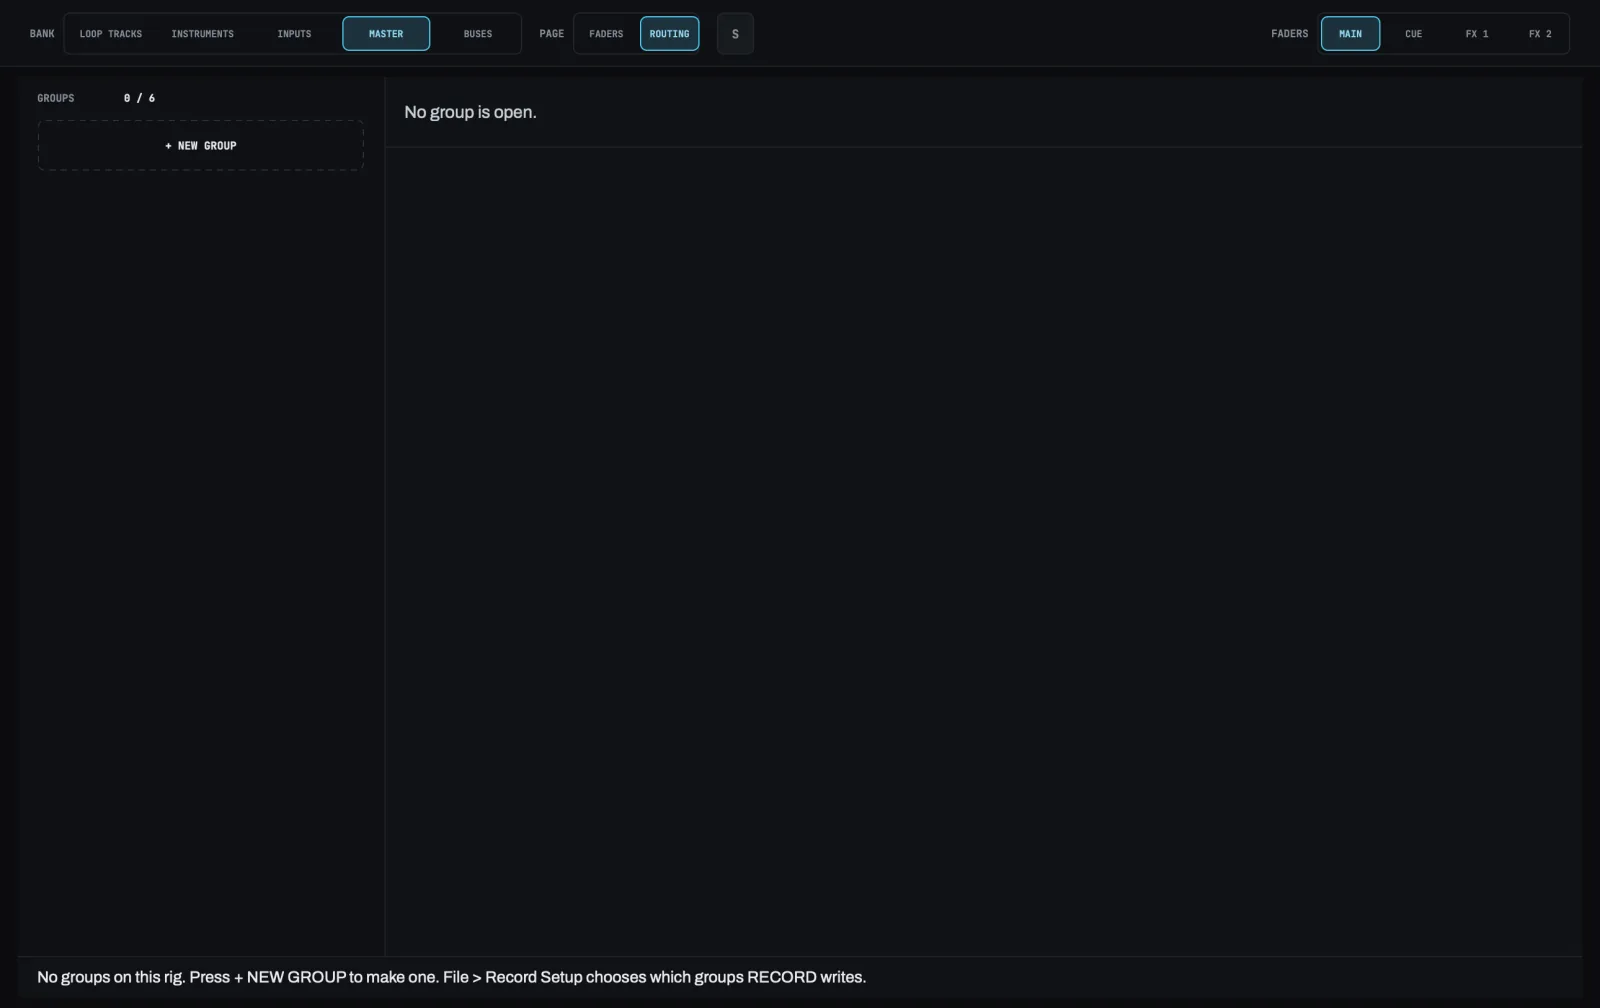
A group sums several sources into one stereo file when you record. Choose MASTER in the BANK row, then ROUTING in the PAGE row. You can also open this page from the MIXER › MASTER › ROUTING button in Record setup.
Groups are numbered, not named. Group 1 records to Group 1.wav, and a group keeps its number for as long as it exists: deleting a group does not renumber the others. A new group takes the lowest number no group has. LOOM holds a fixed number of groups on a rig; when every number is taken, the cell under the cards reads THE ROW IS FULL and you delete a group to make another.
This page builds groups; it does not record them. Tick a group in Record setup and RECORD writes its file.
The groups column
One card per group, down the left side. A card shows the group's number, whether it is LIVE, PLAYBACK or EMPTY, and one small label for each source in it. A source that is not on this interface, or not in this song, is struck through. A card whose sources are all missing here also reads NOTHING HERE: the group is kept, and RECORD writes no file for it until you are on a rig and in a song that have its sources.
Press a card to open that group. + NEW GROUP makes an empty group and opens it.
LIVE or PLAYBACK
A group holds live inputs, or tracks and buses, never both.
LIVE: device inputs only.PLAYBACK: loop tracks, instrument tracks and FX buses.
The first source you tick decides which it is. The other kind's section then dims, with a line that says so:
This group records live inputs. Tracks and buses go in a group of their own.
or
This group records loop tracks, instrument tracks and buses. Live inputs go in a group of their own.
Untick everything and the group is EMPTY again, so either kind can go in it.
A live input and a loop track cannot share a file because the recording lines up live inputs with the loops you played along to, and that moves an input's file by a different amount from a track's. One file has one starting point. An instrument track is PLAYBACK: LOOM makes its sound itself, so its file needs no moving, the same as a loop track's.
The sources
The right side lists what the open group can hold. Each section says, in small type under its heading, where its sources are taken from.
| Section | What a group takes from it |
|---|---|
DEVICE INPUTS |
Each input after its effects, its fader and its pan. A muted input is silent in its groups. |
LOOP TRACKS |
Each track after its fader and its pan. What a track sends to an FX bus is not in it; it is in that bus. |
INSTRUMENT TRACKS |
Each instrument track after its fader and its pan, like a loop track. Each row shows what the track plays, such as SYNTH. |
FX BUSES |
Each bus after its effects, before its return level. The first row is the CUE bus. |
The inputs are a grid. SHOW chooses which inputs the grid holds:
LIVE: the inputs carrying signal now, and the ones already in this group.IN GROUP: the inputs in this group.ALL: every input on the interface.
An input that is also in other groups carries a small +1, +2 and so on: the number of other groups it is in. An input a group holds that this interface does not have is drawn with not on this device, so you can still take it out.
A loop track row shows the buses the track sends to, for example → FX 1, or no sends.
Press a source, or move to it and press Space, to put it in the open group or take it out.
A dry track
A track's file does not carry its effects sends. The reverb or delay you hear on a track comes back on an FX bus, so a PLAYBACK group that holds the track and not the bus records the track dry.
When you tick a track whose send bus is not in the group:
- the track's row turns purple and is tagged
DRY · FX 1 MISSING, naming the bus; - a line under it says what the group's file will carry without that bus;
- an
ADD FX 1button puts the bus in the group; - the bus's own row gets a dashed purple border and
A TRACK HERE NEEDS IT.
When every bus a ticked track sends to is in the group, the track's row reads WITH FX 1 in green.
Deleting a group
DELETE, at the top of the open group, deletes it. A deleted group's tick in Record setup goes with it, so a new group that later takes the same number is not recorded until you tick it.
Keys on this page
These work while the keyboard is somewhere on the page. See Keyboard shortcuts.
↑and↓on a group card open the group above or below and move to its card.⇧⌘Nmakes a new group, like+ NEW GROUP.⌘Nis New Song and is not used here.⌘withDeleteorBackspacedeletes the open group, likeDELETE.
What is kept, and where
Groups belong to this Mac, not to the song, so they are the same in every song you open. A group keeps a source this song or this interface does not have; it comes back into use on the rig and in the song that have it.
The effect rack
Every strip has eight numbered slots, in signal order, and a drawer that opens beside the rack. The slots are the same eight on a loop track and on an input. What differs is what the chain does to the sound, which is described at the end of this section.
The slot grid
Two rows of four tiles across the foot of a strip, numbered 1 to 8. Signal runs in at 1 and out at 8.
| Tile | Means |
|---|---|
| An outline, with nothing filled in behind the number | The slot is empty. |
| Filled in the track's colour | An effect is in it and it is running. |
| Filled, dimmed, and a line struck across the tile | The effect is bypassed. |
| A brighter, thicker border | The drawer has this slot open. |
An empty slot is an outline and a filled one is solid, so you can tell a chain from an empty strip at a glance, even without telling the colours apart.
A bypassed slot has a line struck through its number rather than a badge over it, so the slot's place in the chain stays readable in every state. The line runs the full width of the tile, through the number, which keeps it readable at the size a strip draws the grid.
The badge beside the FX caption counts the chain, and it answers a different question when something is bypassed. Ordinarily it reads 2/8, how many of the eight slots are filled. As soon as a filled slot is switched out it turns amber and reads 2/3 on, how many of the effects on this strip are actually running. The word on tells the two apart, so the amber is never the only signal.
Empty and bypassed are different states, and both are silent. An empty slot has no effect in it; a bypassed one has an effect that keeps its settings and its place in the chain and is switched out of the signal path. Switching it back in cannot fail. Adding an effect can, if the effect memory is full.
A bypassed effect does not keep what it was sounding. It fades out and then clears itself, so a delay, a reverb or a chorus you switch back in starts empty: its repeats, its tail or its voices build up again from what you play next instead of resuming where they stopped. Both transitions are silent. You do not hear a click when you switch a slot out, when you switch it back in, or when a delay's repeats, a reverb's tail or a chorus's voices come back.
Adding a delay, a reverb or a chorus to a slot while you are playing is silent for the same reason. The effect builds up from what you play next instead of arriving all at once.
Click a slot to open it in the drawer. ⌥-click a filled slot to bypass it in place without opening anything. ⌥-clicking an empty slot does nothing, because there is nothing in it to switch out.
Moving an effect to another slot
In the effect drawer, drag a filled slot onto another slot, or press M on it, move the cursor with the arrow keys, and press M again. Esc puts it back. While you hold the effect, the grid shows the order it will make: the effect sits in the slot it will land in, with a dashed outline, and the effects between have already slid over by one. You can drop it on a filled slot.
A move keeps each effect's settings, its bypass and the preset name it was loaded from. It is one change, so ⌘Z puts the order back. If a rack is loaded, the rack bar reads EDITED, because a rack holds the order. If the effect you have open moves, the drawer stays on it.
You can move effects only in the drawer, where each slot shows the effect's name. The small grid in a mixer strip has no drag, and M there mutes the strip.
Moving the open drawer to another strip
With the drawer already open, click any strip's empty space and it follows you to that strip's chain. Anywhere on the strip that is not a control counts: the space around the fader, under the name. You do not have to close the drawer, find the strip and open a slot on it.
It works on every bank: a loop track, an instrument track, an input, a bus and the master.
A click on a control still does what that control does. The fader moves, the mute toggles, a slot opens. Only the strip's own background moves the drawer.
Clicking a strip's background never opens the drawer. With the drawer closed, it changes nothing about the drawer. You often click a strip's empty space on the way to a fader, and a pane appearing every time you missed would rearrange the window under your hand.
The drawer lands on the new strip's chain rather than on a slot. Slot 3 on another strip may be empty or hold a different effect, so the drawer shows you the chain and you choose a slot from it, with the same click you would have used anyway.
Using the keyboard does the same thing. Tab or arrow into any control on a strip and the open drawer follows to that strip's chain. There is no extra tab stop for this, because the strip is already where you were going.
On a loop track or an instrument track, clicking the background also focuses that track. On an input, a bus or the master it moves the drawer only: those are not tracks, and your focused track stays where you put it.
The drawer
Opening a slot slides a 548 px pane in beside the rack. Nothing floats over the mixer, and there is nothing to drag, resize or tear off. Its width is the same for every effect, so choosing a different one never moves the strips under your hand.
Its header says what you are editing: a colour dot, the name of the strip the drawer was opened from, the slot number and the effect. When the side panel is closed, that header is the only thing on screen that names any of it.
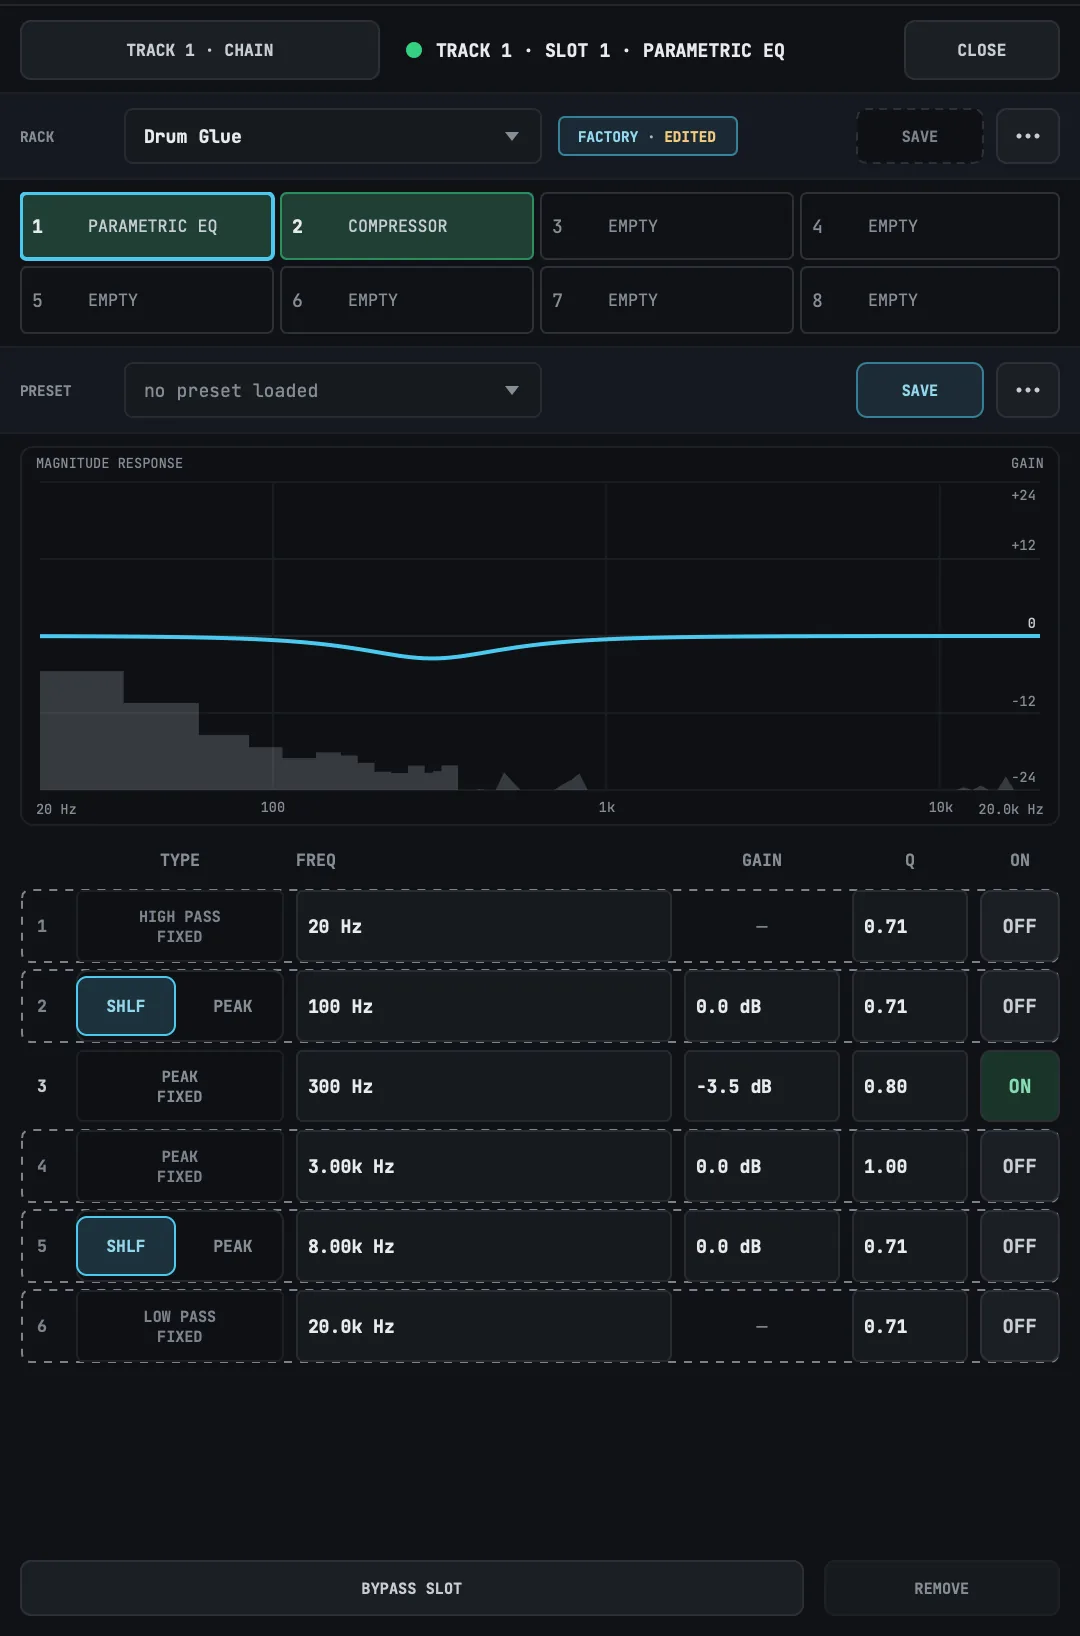
The name is the one that strip carries in the rack, so the header tells you which chain you are about to change:
| Drawer opened from | Header reads |
|---|---|
| A loop track | TRACK 3 |
| An input | IN 2 |
| The master strip | MASTER |
| A bus | CUE, FX 1 or FX 2 — the names the FADERS row uses |
The master's header carries no number, because there is one master chain and nothing to number.
A filled slot opens the effect's controls. An empty slot offers the effects you can add. The breadcrumb button in the header (TRACK 3 · CHAIN on a track, CUE · CHAIN on the cue bus) goes back from an effect to the chain; CLOSE shuts the drawer and gives the width back to the mixer.
Adding an effect reserves its memory at that moment, so a full pool is a refusal at soundcheck rather than an effect that stops working mid-song. A refusal is written to the notice line and nothing changes.
Most effects open at settings that change nothing you can hear: a compressor at 1:1, a reverb with its WET at zero and its DRY at 100%, a noise gate with its RANGE at 0 dB. Turn it up from there.
BYPASS SLOT and REMOVE sit at the foot of the drawer. BYPASS SLOT does the same as ⌥-clicking the tile. REMOVE empties the slot and gives its memory back.
The two look different because you can undo one by pressing it again, while the other throws away an effect you have set up. BYPASS SLOT is the wide button, with the brighter label. REMOVE is the narrow one beside it and is dimmer at rest. It turns red only while your pointer is on it.
When the song has an automation lane that switches the open slot, BYPASS SLOT carries a mark at its right end: a LANE tag with a small filled square in it, which is the node shape the lane draws, and beside the tag the number of nodes the lane holds, such as 2 NODES. A violet bar runs down the button's left edge. The mark is there whenever the lane is, whether or not the arrangement is performing and whether or not the playhead has reached the lane's first node. A screen reader adds Driven by an automation lane and the node count to the button's description.
The mark does not lock the button. Press BYPASS SLOT and the slot switches, as it does on a slot with no lane. While the arrangement performs, your change holds until the lane's value in force changes: the slot stays as you set it until the lane's next node switches it. When a performance ends, the slot stays where it was.
The slot tiles on the mixer strips do not carry this mark. Open the slot in the drawer to see it.
A control an automation lane moves is marked the same way, in the effect's own rows:
- A slider or a row of choices has a violet bar down the left edge of its row. The slider's fill, or the chosen cell, is violet instead of cyan.
- A cell in the EQ's band table has a violet outline. Its value and its background stay as they are, so the number stays readable.
The mark is there whenever the lane is, as it is on BYPASS SLOT. A lane drawn for a different effect than the one in the slot does not mark anything. A screen reader adds Driven by an automation lane and the node count to the control's description, and a band in the EQ names which of its controls are driven. The control still works by hand, on the same terms as BYPASS SLOT.
Racks and presets
A rack is a whole chain: which effect is in each slot, every setting, and which slots are bypassed. A preset is one effect's settings and nothing else, not its slot and not whether it is bypassed.
The drawer carries a bar for each. The RACK bar sits under the header and is there whenever the drawer is open. The PRESET bar sits above the open effect's controls and appears only while an effect is open. Both bars work the same way.
The name field shows what the chain or the effect was loaded from or last saved as. With nothing loaded it reads no rack loaded or no preset loaded, or no rack or no preset where the field is too narrow for the longer words.
Click the PRESET bar's name field to open the preset list for the effect in that slot. The list shows the presets that ship with LOOM under FACTORY, and yours under USER. Each row shows the preset's description, or a summary of its settings when it has none. The preset you have loaded reads LOADED, and its name field is outlined while the list is open.
Click the RACK bar's name field to open the rack list for the chain the drawer is showing. Each row shows the rack's name, its description or how many slots it fills, and a cell for every slot. A filled cell names the effect in it (EQ, CMP for a compressor, DLY, RVB, GATE for a noise gate, CHO for a chorus), and an empty slot is drawn as an outline. The list is the same on every strip: a rack saved on an input loads onto a track, and a track rack onto an input.
Press LOAD beside a row to load that preset or rack. Moving through the list with the arrow keys changes nothing you hear; Return loads the row you are on. Escape, or a click outside the list, closes it. A preset changes the effect's settings and nothing else, so a bypassed slot stays bypassed, and ⌘Z puts back the settings you had before.
Loading a rack replaces the whole chain. A slot the rack leaves empty is cleared, so a rack with four effects loaded over a chain with six leaves four. It is one change: ⌘Z puts back the chain you had, with its names. The notice line names the rack you loaded.
A word beside the name tells you where that sound stands:
| Word | What it means |
|---|---|
| No word | What you hear is what the saved entry holds. |
EDITED |
A setting has moved since the entry was loaded or saved. The name stays, because it is still where you started. |
FACTORY |
The entry ships with LOOM. You cannot save over it. |
FACTORY · EDITED |
A factory entry, changed since you loaded it. |
AUTOMATED |
An automation lane moves a setting this entry holds. It joins the other words, as in EDITED · AUTOMATED. |
OVERRIDE |
You loaded this entry by hand while a RACK PRESET or PRESET lane had loaded a different one. It is the only word shown while it applies. |
A rack reads EDITED when you move an effect to another slot or bypass a slot. A preset does not, because a preset holds neither.
A setting an automation lane moves does not count as an edit, so a performance on its own never turns on EDITED. On a preset bar, AUTOMATED means a lane on one of that effect's settings. On a rack bar, it also means a lane that switches a slot's bypass.
When a RACK PRESET lane on this chain, or a PRESET lane on this slot, chooses what loads here, the name field shows LANE. If you load a different entry by hand, it stays until the lane's next node, and the bar reads OVERRIDE until then. Stopping the performance does not clear it. The next performance loads the lane's entry again. See The arrange view.
SAVE works while a lane is moving settings. It saves the settings as they are at that moment, and during a performance the notice line says the saved values include what the lanes had reached.
SAVE:
- With nothing loaded, opens the save sheet so you can name the rack or preset.
- With one of your own entries loaded, saves over it straight away.
- On a factory entry, is unavailable. Use
SAVE AS…to keep your changes as a copy of your own.
The ··· button opens a menu:
| Item | What it does |
|---|---|
SAVE AS… |
Saves under a new name, and the bar then shows that name. |
GET INFO… |
Changes the name and the description in one sheet. |
DELETE |
Removes the saved file after asking. The chain keeps its sound, and the bar keeps the name. |
REVEAL IN FINDER |
Shows the saved file in Finder. |
REVERT TO SAVED |
Puts back the settings you loaded or last saved. |
GET INFO…, DELETE and REVEAL IN FINDER are unavailable on a factory entry, because it has no file. REVERT TO SAVED is available only when the bar reads EDITED. It still works after you delete the file, because the bar keeps the settings it loaded.
The save sheet
The sheet has a name field and a description field. The description is what the list shows on that row. A row with no description shows a summary of the settings instead.
What the sheet holds depends on how you open it:
| Opened from | Name field | Description field |
|---|---|---|
SAVE, with nothing loaded |
Empty, with the cursor in it | Empty |
SAVE AS… |
The loaded entry's name | Its description |
GET INFO… |
The entry's name | Its description |
SAVE on one of your own entries that already has a name overwrites it without a sheet.
Press Escape or CANCEL to close the sheet and save nothing.
A name LOOM cannot use is refused as you confirm, with the reason under the field and the cursor put back in the field it is about. A name cannot be empty, cannot contain a slash or a colon, cannot start with a period, and has to be about 100 characters or fewer. A description has its own length, which the sheet names when it refuses one. Nothing is saved until the name is one LOOM can write.
If the name is already one of your own entries, LOOM asks before replacing it. Replacing changes that one file and nothing else: nothing stops playing, and no recorded audio is involved.
Racks are saved in ~/Music/LOOM/Racks, and presets in ~/Music/LOOM/Presets, in a folder for each effect.
The controls
Every effect except the EQ draws one row per control, under a heading for each group of related controls. The compressor's rows sit under DETECTOR, ENVELOPE and OUTPUT; the gate's under the same three; the delay's under TIME, MIX and TONE; the reverb's under ROOM and MIX; the chorus's under MOTION and MIX. A screen reader reads the heading with the control, so a row announces as THRESHOLD, in DETECTOR.
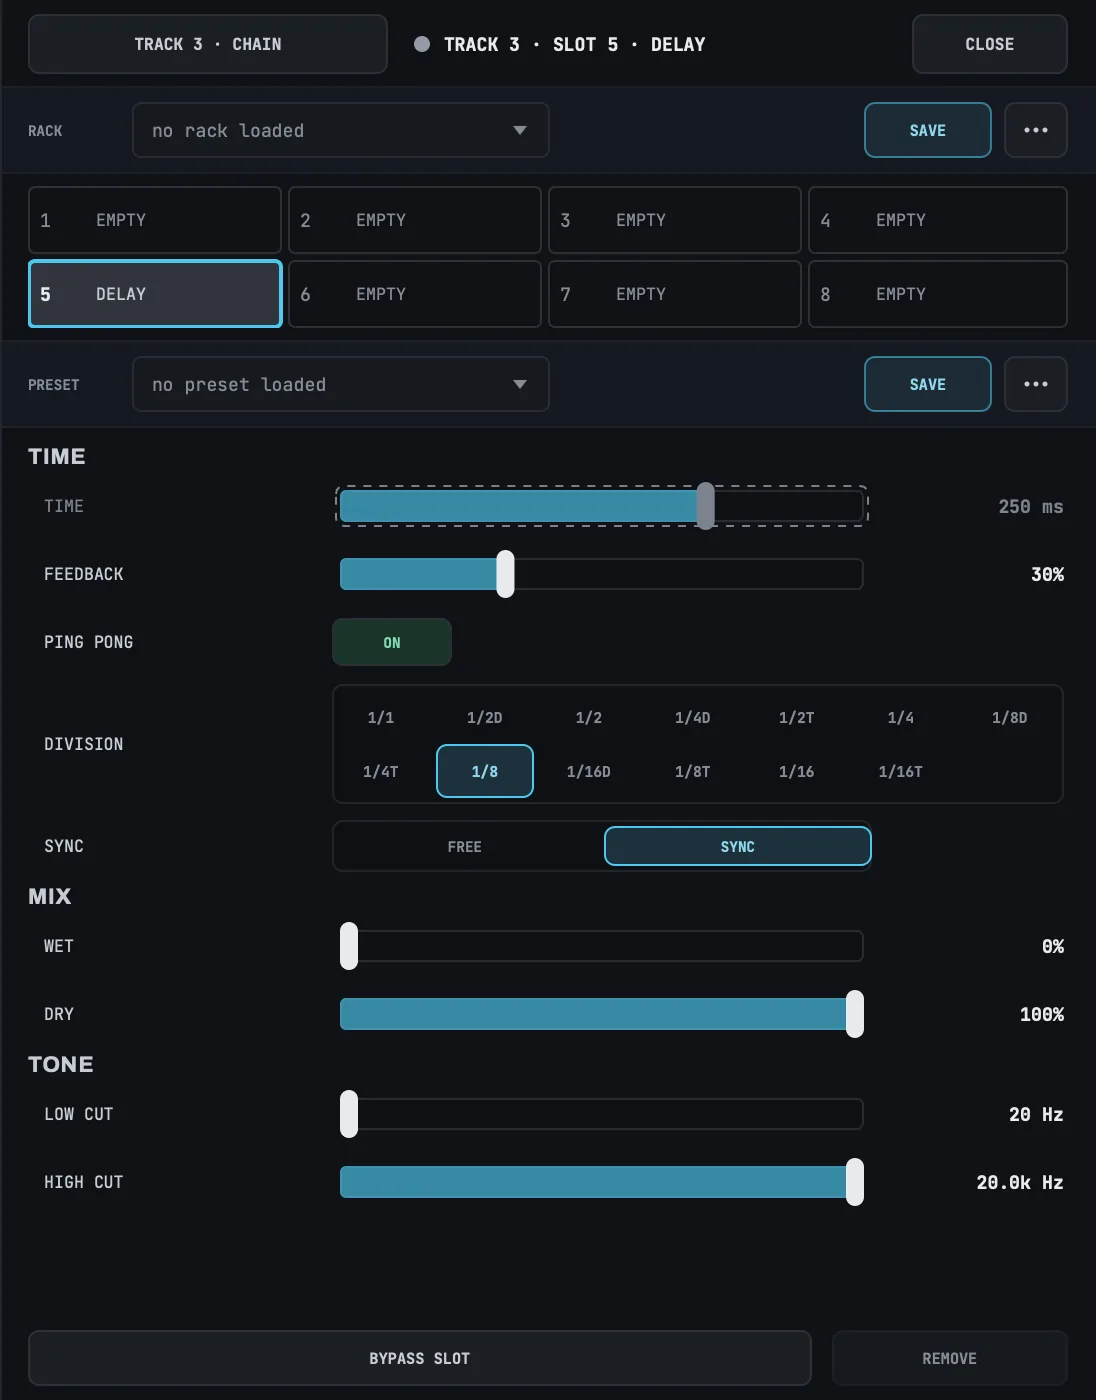
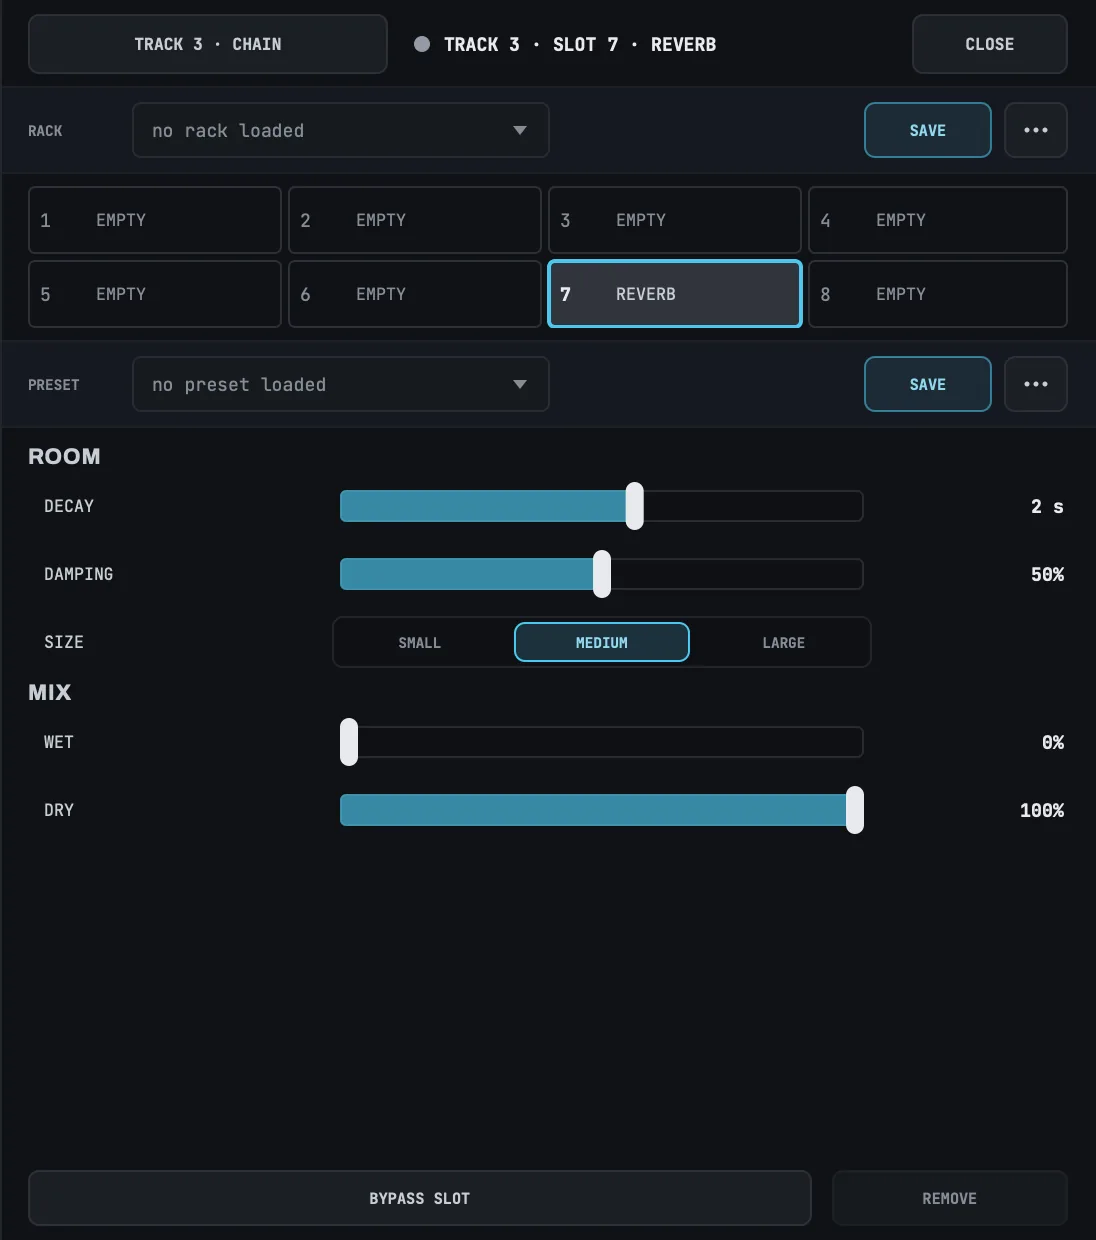
Each row carries the control's name, its value in its own unit, and the control itself. Most controls are a track you can drag. ← and → move a track by a hundredth of its travel, Shift with them by a thousandth, and Home and End go to the ends. Dragging and the arrows stay inside the control's range, so neither can ask for a value the effect would refuse.
Some settings are not a range, and those rows carry a different control:
| Setting | Control | Example |
|---|---|---|
| Two states | A switch reading its current state | The delay's PING PONG |
| A short fixed list | A row of cells, one lit | The reverb's SIZE, the chorus's VOICES |
Both take one Tab stop, like a track. On a switch, Return changes it. On a row of cells, ← and → move the selection and Home and End go to the ends. You cannot type a value into these settings, because they have no numbers.
A row with more cells than fit across the drawer wraps onto a second line rather than shrinking its cells. Every cell stays on screen and stays where it is; the row is taller. On a wrapped row, ↑ and ↓ move to the cell above and the cell below, and ← and → still step one cell at a time through the whole set. The delay's DIVISION is the setting that wraps.
A switch that is off has a dashed outline as well as reading OFF, so its state does not depend on colour alone. Nothing else on the row is disabled by it.
A row of cells can also have cells you cannot choose right now. Those are dimmed and have a dashed outline. They stay where they are, so nothing else moves, and ← and → step over them. The notice row says why. The delay's DIVISION is the setting that does this.
The EQ is laid out differently. See The EQ's six bands.
The controls scroll when there are more of them than fit, which happens mostly at a short window. Arrowing or tabbing onto a control that is off the bottom scrolls it into view.
⌥-click a control to put it back to its default, the setting a fresh effect opens at. It is per control, so resetting the reverb's WET leaves its DECAY where you had it. A control whose range runs from a negative value to the same positive value, such as the amp's PRESENCE or a synth's ENV AMT, goes back to 0 instead.
Delete does the same thing from the keyboard: the key marked Delete or Backspace, on the control you have tabbed to. It works on every effect's controls and on the EQ's. When you land on a control, it names the value it would go back to, so you know the result before you press the key.
⌥-click does two different things in this drawer. On a slot tile in the grid it bypasses that slot. On a control it resets that one control.
Click the printed value, or press Return on the control, to type a number in. Return again takes it; Escape discards it and leaves the control where it was; clicking away takes it, the way every other typed field in LOOM does. Type only the number, without the unit.
A number outside the control's range is refused by name rather than rounded into range. The notice line says what to type and which control refused, and the control does not move.
Dry and wet are two separate levels
The delay, the reverb and the chorus each have a DRY control and a WET control, and they do not move each other. DRY sets how much of the original signal goes through the slot. WET sets how loud the effect's own output is. Both run from 0% to 100%, and you can have both at 100% at once.
Turning WET up adds the repeats or the room beside what you are already hearing. It does not make the original signal quieter; for that, turn DRY down.
A fresh delay or reverb opens with DRY at 100% and WET at 0%, which is the signal you had, unchanged. Turn WET up to hear the effect.
Common settings:
| You want | Set |
|---|---|
| the original plus some effect | DRY 100%, WET where it sounds right |
| the effect only, with no original | DRY 0%, WET 100% |
| the slot doing nothing | DRY 100%, WET 0% |
Both at 0% is silence through that slot. Nothing stops you setting it. If you want the slot out of the way, use BYPASS SLOT instead: that also stops the effect running, which DRY 0% and WET 0% does not.
The compressor and the EQ have no dry and wet controls. They shape the signal rather than adding something beside it, so there is nothing to blend.
The delay
The controls set how far back the echo reads, how much of it comes back, what the repeats sound like, whether they bounce between your speakers, and whether the time is a number of milliseconds or a division of the beat:
| Control | Does |
|---|---|
TIME |
how far back the echo reads — 1 ms to about 2.7 seconds at 48 kHz. The longest time depends on your sample rate; see below. On SYNC it reads the length of the division and you cannot set it |
SYNC |
whether TIME is a number of milliseconds or a division of the beat. It is a pair of cells, FREE and SYNC, with the one in force lit. It opens on FREE |
DIVISION |
which division of the beat the delay follows while SYNC is on. It is a row of cells, 1/1 down to 1/16T, wrapped onto two lines, and it opens on 1/8 |
FEEDBACK |
how much of the output goes back in, which is what makes it repeat rather than echo once. It stops at 95%, which is where a delay would start oscillating instead of dying away |
WET |
how loud the repeats are. It opens at zero |
LOW CUT |
takes bass out of the repeats, so they sit under the dry signal instead of fighting it |
HIGH CUT |
takes top off them, so the tail darkens as it dies, as a tape delay's does and a plain digital one's does not |
PING PONG |
whether the repeats alternate left and right instead of sitting in the middle. It is a switch rather than a track. It is on when you put a delay in a slot, except where the source is already stereo: a stereo-linked input pair, a drum machine, and a sampler holding a stereo sample. There it starts off |
DRY |
how much of the original signal goes through the slot. It opens at 100% |
The two cuts are on the feedback path, so each repeat is filtered again. A little goes a long way: after four repeats a high cut has been applied four times.
PING PONG is on to start with, so the first thing you hear when you turn WET up is repeats crossing the stereo field: the first one on the left, the second on the right, the third back on the left, dying away as they go. Turn it off and you get the ordinary delay, the same echo on both sides, with whatever you played coming back where you played it.
With PING PONG on, each repeat is quieter than the one before it by the same amount, whichever side it is on, and FEEDBACK sets how much quieter each repeat is than the one two before it, on the same side. At 25%, each repeat is half the level of the one before it. With PING PONG off, FEEDBACK sets how much quieter each repeat is than the one before it. So at the same FEEDBACK, the repeats of a ping-pong delay take twice as long to die away as the ordinary delay's.
On a stereo-linked input pair it starts off instead. A linked pair carries a stereo source, such as the two outputs of a keyboard or a pair of microphones, so the delay is already handed two different signals. With PING PONG off, each side's repeats stay on the side you played them on. Turn it on and the two sides are summed first, and that sum is what alternates, so what you played on the left comes back on the right. The control does the same thing in both places; what changes is what a new delay starts at.
On an instrument track, a delay starts with PING PONG on for the synth and off for the drum machine, whose parts are already placed across the two sides. On a sampler it follows the sample the track holds when you add the delay: on for a mono sample, or when no sample is loaded, and off for a stereo sample. A sample recorded from a LOOM audio track is stereo, so a delay added to a sampler playing one starts off.
Linking or unlinking a pair, or loading a different sample into a sampler, leaves a delay you have already set up alone. The starting value applies when you put the delay in the slot and not afterwards. If you link a pair whose delay has PING PONG on, it stays on. Turn it off yourself if you want each side on its own side.
Switching it while WET is at zero does nothing you can hear. At WET 0% there are no repeats yet, so there is nothing for a side to alternate. Turn WET up first, then try the button.
It works on a mono part. A single track through a delay with PING PONG on still bounces, because the input is fed into one side and then crosses over. On many delays this control does nothing unless what you feed it is already spread across the two channels; this one does not need that.
It works in every slot: an input strip's, a loop track's, a bus's and the master's. All four chains run in stereo, so a delay in any of them has two sides to alternate between.
On an input slot the bounce is printed into the take. An input chain runs before the recorder, so what you hear while you play is what the track plays back. Put the delay on the loop track instead if you want to change it later, because a track chain shapes playback and leaves the recording alone.
A hard-panned strip loses the repeats on the far side, on an input and on a loop track alike. See Pan: the balance takes one channel away, and the repeats that were on it go too.
Setting the delay time in beats
SYNC decides where TIME comes from. On FREE, which is where a new delay opens, you set TIME yourself and nothing else moves it. On SYNC, you choose a DIVISION and LOOM works the milliseconds out from the song's tempo.
While SYNC is on, TIME is a readout. It shows the length of the division you are on, and it dims: you cannot drag it, type into it or reset it, and the drawer tells you to turn SYNC off if you try. Turn SYNC off and TIME becomes a control again, starting from the number it was showing, so what you hear does not jump when you take the delay off the grid.
Pressing a DIVISION cell changes the delay straight away, and so does turning SYNC on or off. You do not have to touch the tempo for it to take effect.
The divisions run longest first, from 1/1, a whole note, down to 1/16T. D means dotted, which is half as long again. T means triplet, which is two thirds as long.
A new delay opens with TIME at 250 ms and DIVISION at 1/8. At 120 bpm, which is the tempo LOOM starts in, those are the same length, so turning SYNC on there does not change what you hear.
Change the song's tempo and every delay on SYNC follows it. A delay on FREE keeps the time you gave it, whatever the tempo does. Saving a song keeps the division rather than the milliseconds it worked out to, so a song you save at one tempo and reopen at another is still in time.
Some divisions are longer than the delay line can reach, and which ones depends on the tempo and the sample rate. Those cells are drawn dimmed with a dashed outline, they stay where they are, and they still read their own name so you can see which divisions they are. The notice row names the longest division you can use. Pressing one tells you the same thing and changes nothing.
If you change the tempo and the division you are on becomes too long, the delay keeps that division and the time it last worked out, and stops following the tempo. The notice row says so. Raise the tempo, or choose a shorter division, and it starts following again.
How long TIME can go depends on your sample rate. The delay line is a fixed number of samples, so it reaches about 3.0 seconds at 44.1 kHz, about 2.7 seconds at 48 kHz and about 1.4 seconds at 96 kHz. The control's top end follows the sample rate in both directions, so you can set any time the delay can play and no time it cannot. The same ceiling decides which divisions SYNC can offer, so a session at a higher sample rate offers fewer of them.
A song can hold a TIME longer than your interface can play, for example a song saved at 48 kHz with TIME at 2000 ms and opened at 96 kHz. When the song opens on that interface, including when you switch to the interface with the song open, LOOM sets TIME to the longest time the interface can play. The notice row says so, with the old time, the new time and the sample rate. The delay was already playing that shorter time, so what you hear does not change, and every control on the delay works as usual. The song saves the shorter time from then on.
If that delay is on SYNC and its division is too long at the song's tempo as well, the notice also names the division and the tempo. The delay keeps the division.
The reverb
Five controls, under two headings. DECAY, DAMPING and SIZE describe the room; WET and DRY decide how much of it you hear.
| Control | Does |
|---|---|
DECAY |
how long the tail takes to die away — 0.2 s to 12 s |
DAMPING |
how fast the top comes off the tail. Higher is darker, the way a room with soft walls sounds |
SIZE |
which of three rooms the reverb is: SMALL, MEDIUM or LARGE. It is a row of three cells, not a track |
WET |
how loud the room is. It opens at zero |
DRY |
how much of the original signal goes through the slot. It opens at 100% |
SIZE has three settings and nothing between them. A room's size is the length of the delay lines inside it, and those lengths are fixed when the effect is created, so a continuous knob would have nothing to land on between the three. That is why the control is three cells.
The reverb's DECAY is not on an even scale. It runs from 0.2 s to 12 s, and about half its travel is spent under 1.5 s, where most of the useful settings are.
The delay's TIME, LOW CUT and HIGH CUT are tapered the same way. Musical delay times are ratios, and the two cuts are frequencies; on an even scale a 250 ms delay would sit in the first tenth of the control.
The chorus's RATE and DEPTH are tapered too, for the same reason: on an even scale everything between a slow swell and a gentle warble would sit in the first quarter of the rate control.
The gate's ATTACK, HOLD and RELEASE are the same. On an even scale a 1 ms attack would sit in the first hundredth of the control, and every setting you would actually use would be crowded there. The gate's THRESHOLD and RANGE stay even, because decibels are already a ratio scale.
The EQ's six frequencies are on the same kind of scale. Pitch is logarithmic, so an even control would spend its first twentieth on everything below 1 kHz and the rest on the top four octaves. Here equal movement is equal musical interval: the middle of the travel is about 630 Hz, and one press of an arrow key moves about the same fraction of a semitone wherever you are. Gain and Q stay even, because decibels are already a ratio scale and Q is not one.
The EQ's six bands
The EQ draws a row per band, not a row per control: six rows under a magnitude graph, with the columns #, TYPE, FREQ, GAIN, Q and ON. Everything belonging to one band is on one line, and a screen reader announces the band before its controls.
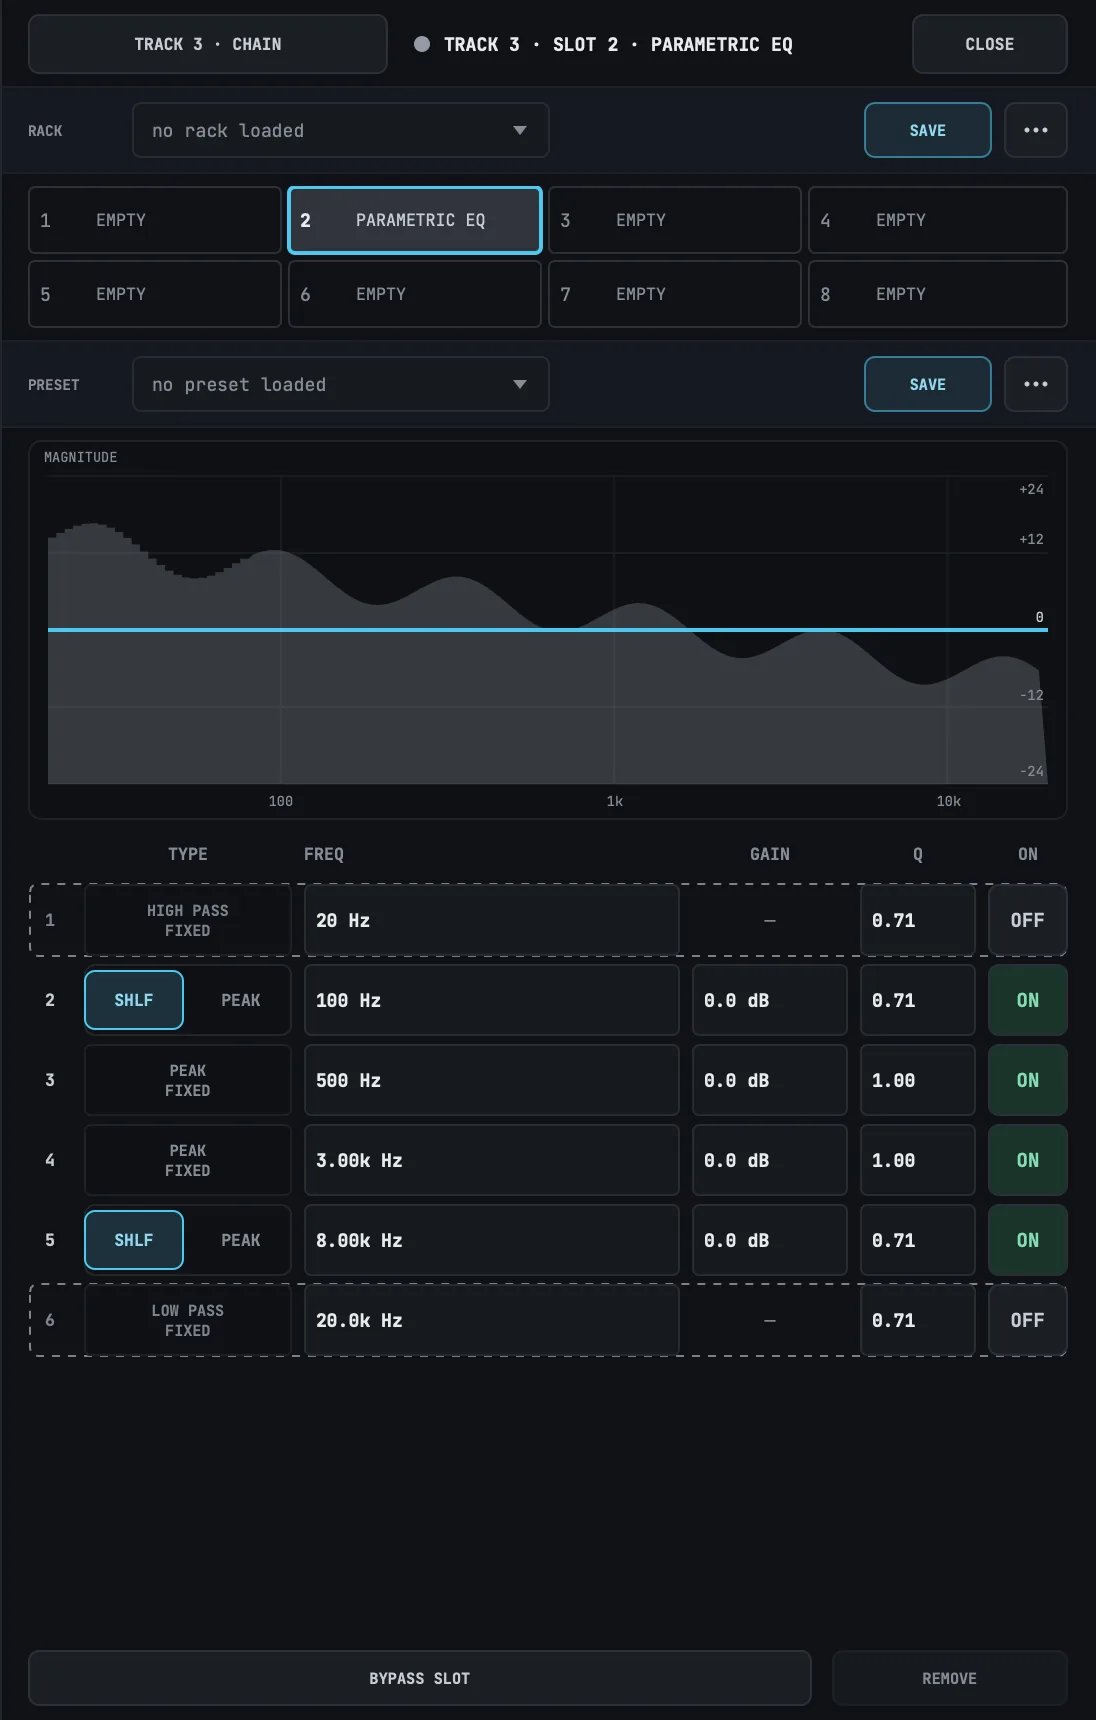
| Band | Is |
|---|---|
1 |
a high pass |
2 |
a low shelf, or a bell |
3, 4 |
bells |
5 |
a high shelf, or a bell |
6 |
a low pass |
Bands 2 and 5 can be a shelf or a bell, and their TYPE cell is a two-way control saying which. The other four have fixed roles, so their TYPE cell is a label rather than a control. It is drawn flatter and dimmer than the two-way cell and reads FIXED under the band's type, so you can see there is no choice to make without pressing it.
FREQ, GAIN and Q are numbers you drag and type into, not sliders. Drag up and down on the number; click it, or press Return, to type one in; arrows nudge it. They behave like the tempo field in the top bar.
A cell that reads — is a control that band does not have. Only GAIN ever does, because a high pass and a low pass have no gain to set. Every band has a Q, including the two shelves; on a shelf it sets how steeply the shelf climbs.
ON switches the band out. Switching a band off takes it out of the filter completely rather than flattening or turning it down: it stops running, and what comes out of that band is bit for bit what went in. It fades out over about ten milliseconds rather than switching instantly, so doing it mid-song does not click.
A band that is off has a dashed outline and its button reads OFF, so its state does not depend on colour alone. Its controls stay live, so you can set a band up before you switch it in.
The high pass and the low pass arrive switched off, the way Logic's Channel EQ ships them. The other four arrive on and flat. Those two are the only bands with no GAIN control: every other band at 0 dB is already doing nothing, and a flat bell is skipped entirely, but a high pass at 20 Hz still takes a little off the bottom octave. So a new EQ passes the sound through untouched until you switch a filter on or move a gain.
The compressor and the EQ also draw a curve above the controls: the compressor's transfer curve with a dashed 1:1 line behind it, and the EQ's magnitude response. Both are computed from the settings themselves, so they are right the instant you move something.
The EQ's plot carries a scale on both axes, so you can read a value off the curve rather than only its shape. Across the bottom it runs from 20 Hz on the left to 20.0k Hz on the right, logarithmically, with marks at 100, 1k and 10k: each octave takes the same width, the way it does on the FREQ cells. Up the right-hand edge it runs in decibels of gain, marked at the top and bottom of the range the bands can reach and halfway to each. The brightest of those rules is 0, so a curve lying along it is an EQ that is doing nothing at that frequency.
The grey shape behind the curve is the signal after the EQ, so you can see the effect the curve is having on it. It is taken at the end of the chain, so any effect in a later slot is in it too. It has no scale of its own and is not meant to be read as a number. The curve is what the EQ is set to do, and the grey shape is the result.
The compressor also draws a gain-reduction meter, in a narrow strip at the right of its transfer curve, marked GR. It shows how much the compressor is taking off right now, as a bar that grows downward and a reading in decibels below it. It reads 0.0 when the compressor is not compressing, and it goes to zero rather than freezing the moment you bypass the slot or the chain. It falls at the same rate as the level meters on the strips, so two meters on one screen never tell you different things about how fast something moved.
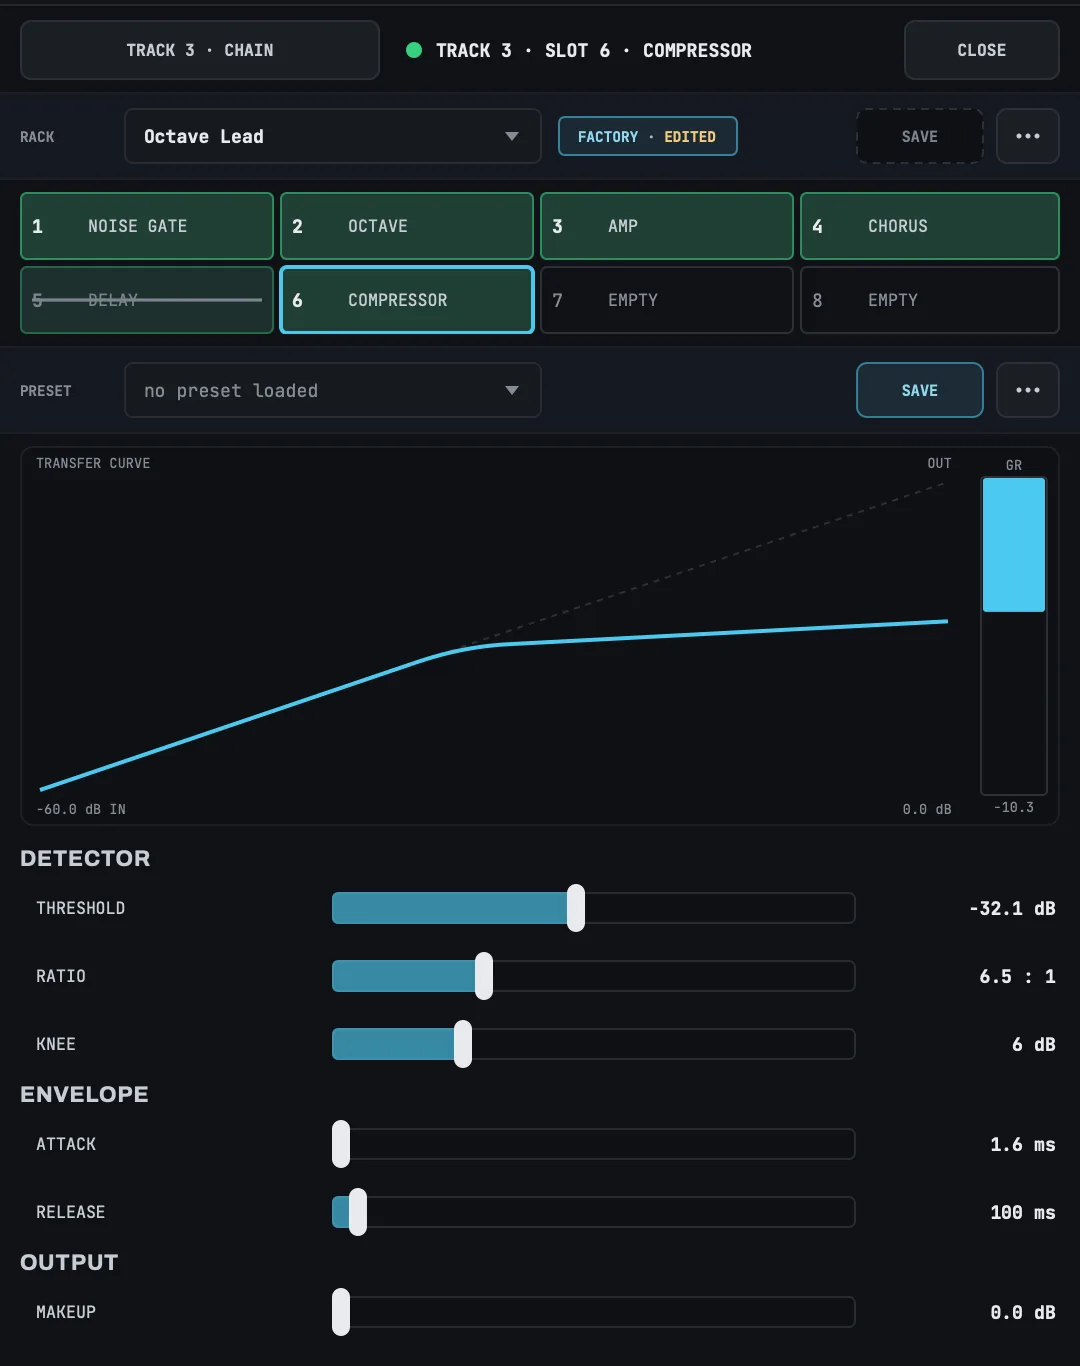
There are no input or output meters in the drawer. Gain reduction is a number the compressor works out anyway in order to do its job, so showing it costs nothing. An input or output level would be a measurement of the signal itself, which nothing in LOOM's engine reports.
The effects offered are a parametric EQ, a compressor, a noise gate, a delay, a reverb, a chorus, an octave, a cab and an amp.
The noise gate
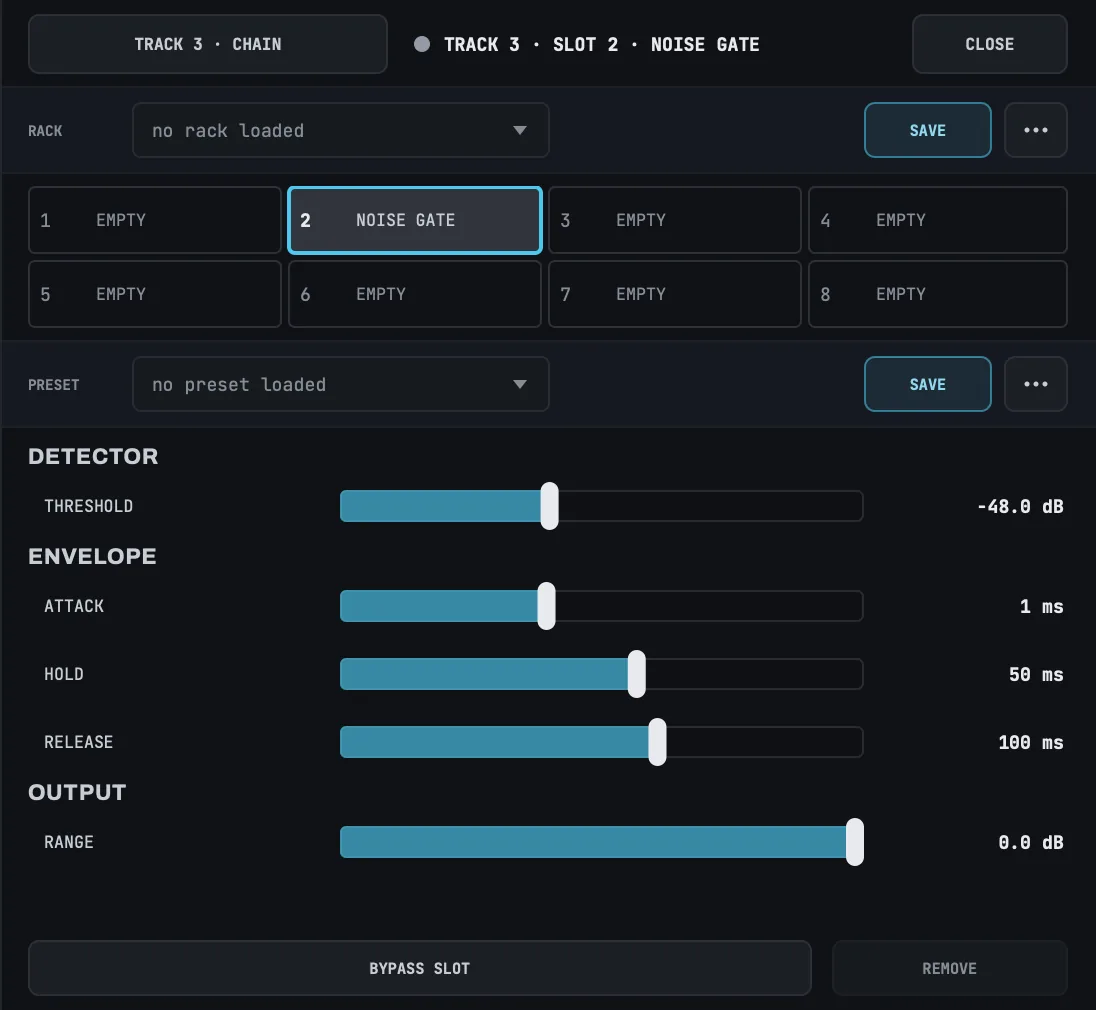
The gate turns the signal down when you stop playing, so the hiss, the amp buzz and the room stop with you. Put it first on an input.
Five controls, under three headings. THRESHOLD decides when the gate is open; ATTACK, HOLD and RELEASE decide how it moves; RANGE decides how far down it goes.
| Control | Does |
|---|---|
THRESHOLD |
the level the signal has to reach before the gate opens — -80 dBFS to 0 dBFS, opening at -48 dBFS. Set it above the room and below the quietest note you want through |
ATTACK |
how fast the gate opens once the signal arrives — 0.05 ms to 100 ms, opening at 1 ms |
HOLD |
how long it stays open after the signal drops back below the threshold — 1 ms to 1 second, opening at 50 ms. This is what keeps a decaying note from being chopped |
RELEASE |
how fast it closes once the hold has run out — 1 ms to 2 seconds, opening at 100 ms |
RANGE |
how far down it goes when it closes — -90 dB to 0 dB, opening at 0 dB |
RANGE is why a new gate changes nothing: at 0 dB it turns the signal down by nothing at all. Turn it down to hear the gate work.
The gate never mutes completely. -90 dB is below the noise floor of any interface, so it is silence in every practical sense, but a gate that slammed to nothing would turn a decaying note into an edit and a room mic into a stutter. RANGE is the control that decides how much of that you want.
There is no lookahead, because nothing in LOOM delays your signal. A short ATTACK is what protects the front of a note instead.
The gate reads both sides of a stereo signal together and applies one gain to both, so a note panned hard to one side opens the whole gate rather than half of it.
The gate draws a curve above its controls: the level going in against the level coming out, with a dashed diagonal behind it. The step is at the threshold and the floor below it is the range. The curve is what the gate settles at. ATTACK, HOLD and RELEASE set how long it takes to get there, so they are not in it.
There is no open-and-closed light. You can hear a gate working: the sound stops.
The chorus
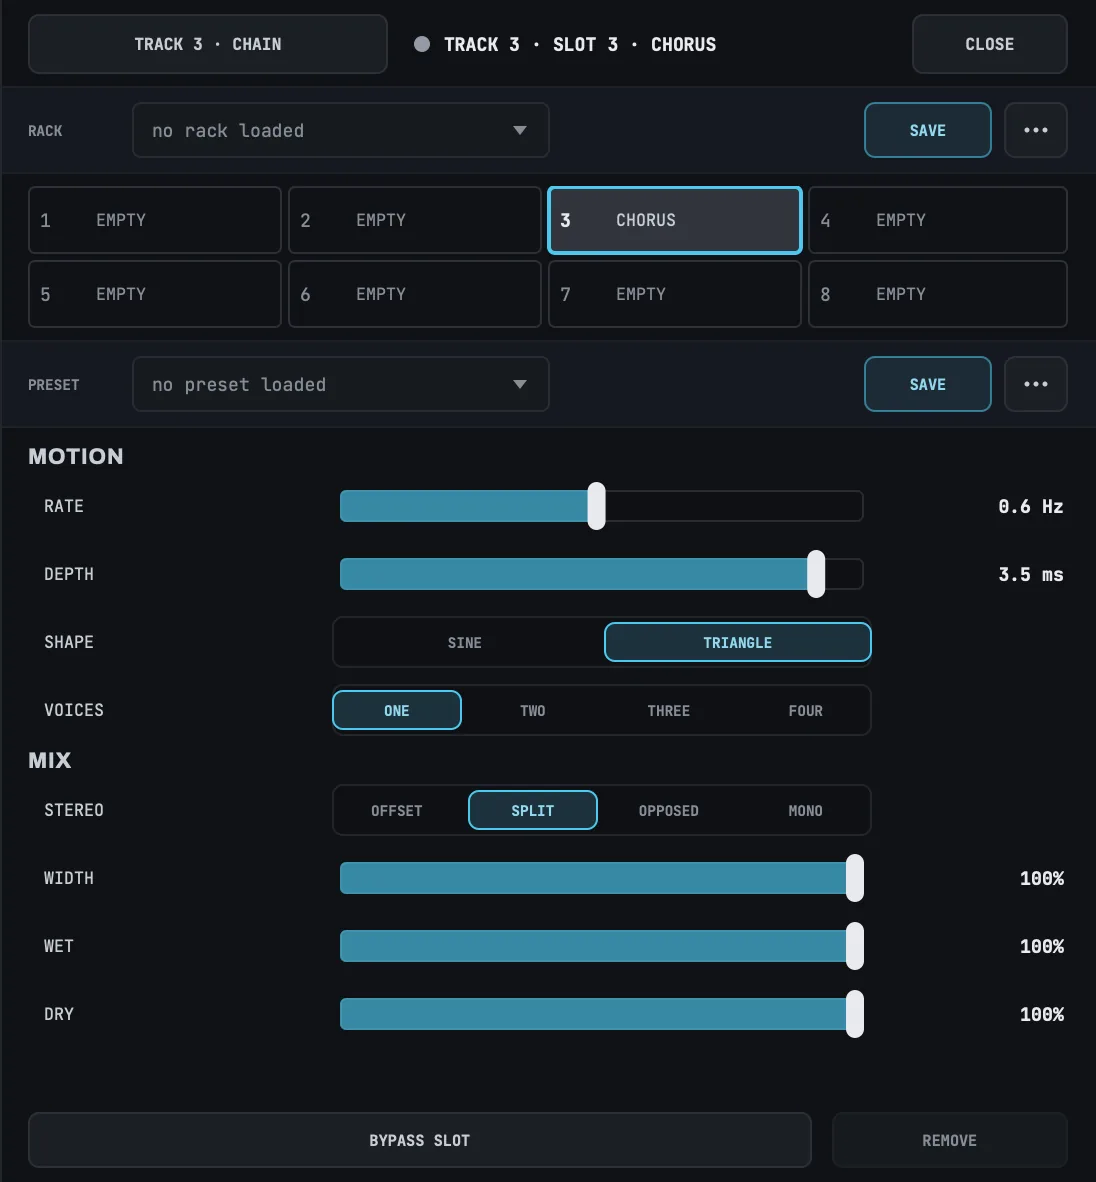
The chorus thickens a sound and spreads it across the stereo field. It runs delayed copies of the signal whose delay drifts up and down, so each copy is slightly out of tune with the original in a way that keeps changing. One copy is the sound of a chorus pedal; four is an ensemble.
A new chorus arrives sounding. It opens as a Roland Jazz Chorus-style split: the original signal on the left, one drifting copy on the right, at full level. A chorus with its copies turned down is a slot that changes nothing. The cab and the amp also open sounding; every other effect opens at settings you cannot hear.
Eight controls, under two headings. RATE, DEPTH, SHAPE and VOICES decide the movement; STEREO, WIDTH, DRY and WET decide what reaches the mix.
| Control | Does |
|---|---|
RATE |
how fast the pitch drifts — 0.05 Hz to 8 Hz, opening at 0.6 Hz. Slow is a swell; fast is a warble |
DEPTH |
how far it drifts — 0.1 ms to 5 ms, opening at 3.5 ms |
SHAPE |
the path the drift follows. It is a pair of cells, SINE and TRIANGLE, with the one in force lit. It opens on TRIANGLE |
VOICES |
how many delayed copies are running — ONE, TWO, THREE or FOUR, opening at ONE |
STEREO |
how the two sides are made — OFFSET, SPLIT, OPPOSED or MONO, opening at SPLIT |
WIDTH |
how far apart the two sides drift — 0% to 100%. Available in OFFSET and OPPOSED. See below for what it opens at |
DRY |
how much of the original signal goes through the slot — 0% to 100%, opening at 100% |
WET |
how loud the copies are — 0% to 100%, opening at 100% |
RATE and DEPTH are on a ratio scale, like the reverb's DECAY and the delay's TIME: doubling a rate is what sounds like a step, not adding a hertz to it. About half the travel of each is spent under the settings you reach for most.
VOICES is a row of four cells rather than a knob, because there is nothing between two copies and three. More voices do not make the effect louder: the copies are averaged, so changing the texture does not send you back to WET. The change takes about ten milliseconds, which feels immediate and keeps a change of texture from clicking.
A new chorus opens at ONE copy, which is the Jazz Chorus arrangement the other defaults are built around: a single delayed copy, split away from the original. What VOICES does above one depends on STEREO. In OFFSET and OPPOSED the copies spread across the stereo field, spaced by WIDTH. In SPLIT and MONO there is one field to put them in, so they stack up in it and thicken the sound instead of widening it. In SPLIT that thickening lands on the side the copies are on.
SHAPE and STEREO are the same kind of control: a fixed set of settings rather than a range, drawn as a row of cells with the setting in force lit. A control drawn this way always shows you the settings you are not on as well as the one you are, so you can read what pressing it will do without pressing it.
SHAPE decides whether the drift moves evenly or gathers at the turns
What you hear from a chorus is how fast the delay is moving, not where it is. That makes the shape of the drift audible in a way it is not on most modulated effects.
TRIANGLE moves at one speed and reverses at the top and bottom of each sweep. The detune stays even across the whole cycle. This is the movement of a classic chorus pedal, and it is what a new chorus opens with.
SINE slows to a stop at the top and bottom of each sweep and moves fastest through the middle. The detune swells and fades twice a cycle, which sounds fuller and less regular. If you hear the effect gathering around the points where it changes direction, that is this shape.
Choruses saved before SHAPE existed open on SINE, because that is what they were recorded with. Set them to TRIANGLE if you want the newer movement.
STEREO decides how the two sides are made
| Setting | What it does |
|---|---|
OFFSET |
Both sides carry drifting copies, and their drift is offset from each other by WIDTH |
SPLIT |
The original signal leans left and the drifting copies lean right |
OPPOSED |
Both sides carry drifting copies, moving in opposite directions |
MONO |
Both sides carry the same drifting copies |
SPLIT is what a new chorus opens with. It is the arrangement a Roland Jazz Chorus uses: the dry signal in one speaker and the chorused signal in the other. The width comes from the two sides carrying different signals rather than from the drift being offset.
In SPLIT, DRY and WET set how far the split opens as well as how loud each part is. At DRY 100% and WET 100% the split is complete: the left is the original and the right is the copies. As you turn either one down the two sides move back together, so at WET 0% both sides carry the original and at DRY 0% both sides carry the copies. Turning either control down never moves the instrument to one side. In every other setting DRY and WET are plain levels.
Opening the split takes about 3 dB off the original signal, because it stops being in both ears and ends up in one. The copies arrive in the other ear as it goes, so the instrument does not get quieter; the sound spreads rather than drops.
OPPOSED is the widest of the four. It disappears if the room sums to mono: the two sides carry the same copies with opposite polarity, so a mono PA cancels them and leaves the original signal alone. OFFSET and SPLIT both survive a mono sum. If you do not know what the house is running, SPLIT is the safe one, which is part of why it is the default.
MONO puts the same copies on both sides. Use it when you want the thickening without any change to the stereo image.
WIDTH moves the two sides apart, it does not move the sound to one side
WIDTH sets how far apart the left and right drift from each other. At 0% both sides move together, which leaves a stereo image exactly as it arrived. At 100% they move against each other, which is what turns a mono source into a wide one.
WIDTH is available in OFFSET and OPPOSED. In SPLIT and MONO there is a single set of drifting copies, so there is no second set for WIDTH to move it away from; the control is dimmed and says so if you try to move it. Because a new chorus opens in SPLIT, WIDTH is dimmed on a chorus you have just added. Set STEREO to OFFSET to use it.
When WIDTH is available, it opens at a different setting depending on what is feeding the chain:
- On a track, an input that is not stereo-linked, a bus or the master, it opens at 100%. The source is one signal on both sides, so the chorus is what creates the stereo image at all. The same goes for a synth, and for a sampler holding a mono sample or none.
- On a stereo-linked input pair it opens at 0%. The two sides are already the instrument's own two sides, and moving them against each other smears an image you set up at the keyboard. The same goes for a drum machine, and for a sampler holding a stereo sample.
This is the same rule the delay's PING PONG follows, for the same reason. You can change it either way afterwards; the setting only decides what a new chorus opens at.
There is no graph. A chorus's movement is where the drift is at each instant rather than a fixed shape, so a still picture could not show you anything the sound does not.
The octave
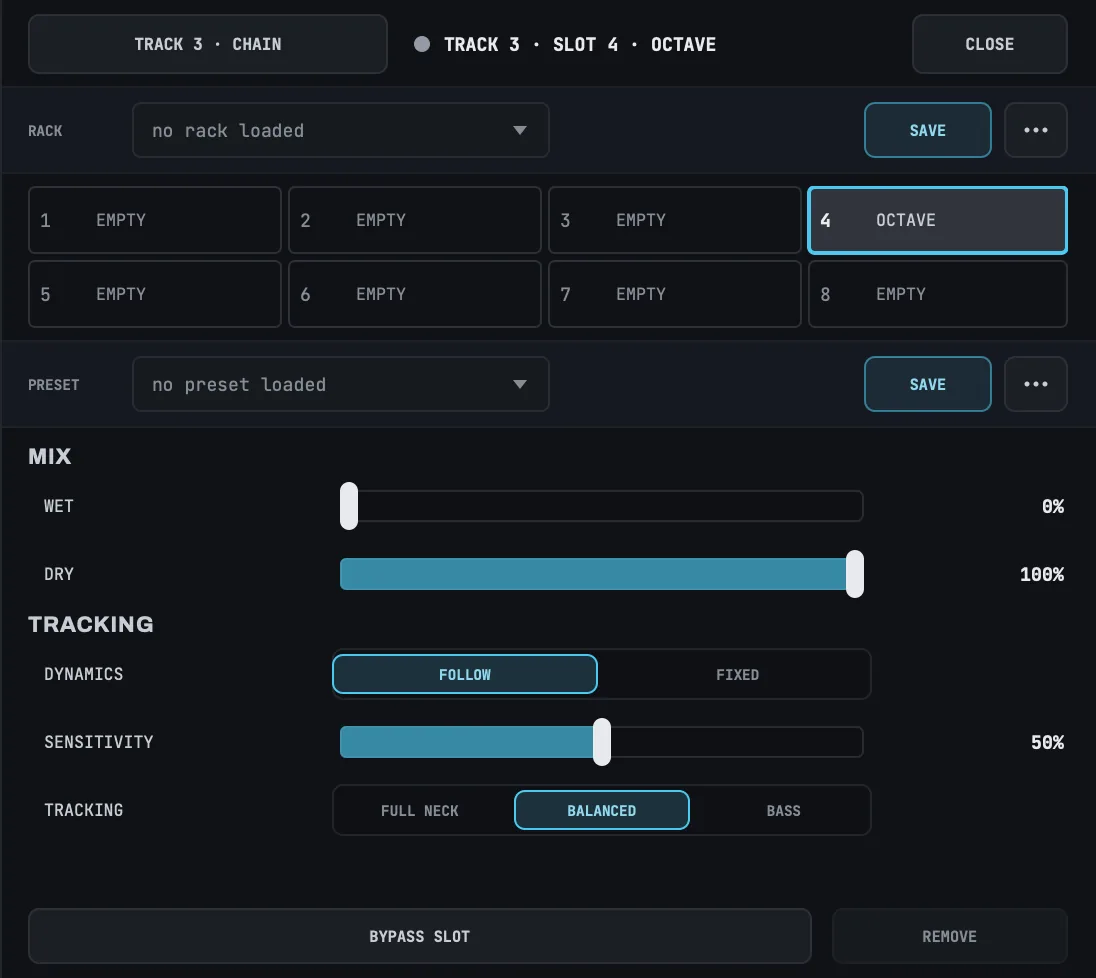
The octave adds a note one octave below what you play. It is built the way an analog octave pedal is built: it counts the cycles of your signal and puts out a wave at half that rate. It does not work out which note you are playing, so it adds no delay to your signal at all.
Play one note at a time. A chord gives the effect two notes to count at once and the result is neither note's octave. That is how this kind of octave works rather than a limitation LOOM adds, and it is what makes it instant. Fast runs and the very end of a fading note can stumble for a moment, which is part of the sound.
The common use is to play a bass part on a guitar. Turn WET up, bring DRY down, and the guitar becomes the bass.
Five controls, under two headings. WET and DRY decide what you hear; DYNAMICS, SENSITIVITY and TRACKING decide how the octave follows your playing.
| Control | Does |
|---|---|
WET |
how loud the octave is — 0% to 100%, opening at 0% |
DRY |
how loud your own signal is beside it — 0% to 100%, opening at 100% |
DYNAMICS |
FOLLOW or FIXED, opening at FOLLOW |
SENSITIVITY |
how quiet a note can be and still be tracked — 0% to 100%, opening at 50% |
TRACKING |
FULL NECK, BALANCED or BASS, opening at BALANCED |
A new octave changes nothing until you move something, because WET opens at 0%. Turn WET up to hear it.
WET and DRY are separate levels rather than one balance, so you can have both at full, either on its own, or neither.
DYNAMICS decides whether the octave follows your picking
On FOLLOW, the octave rises and falls with your playing. Pick hard and it is loud; let the note decay and it decays with you. This is how an octave pedal behaves and it is what the effect opens at.
On FIXED, the octave holds a steady level for as long as a note is sounding, whatever you do with your hands. It sounds like a synthesiser rather than like a pedal, and it is the setting to use when you want the bass part to sit still under everything else.
FIXED fades in and out over a few milliseconds rather than switching, so notes do not click.
SENSITIVITY decides how quiet a note can be
Raise it and the octave holds on through the tail of a ringing note. Lower it and the octave speaks only on notes you play deliberately.
This is the control to reach for when the effect misbehaves, and it goes both ways:
- If the octave keeps sounding between notes, or mutters over string noise, lower it.
- If the octave drops out before the note has finished, raise it.
It matters most on FIXED. A steady tone triggered by string noise is a drone, where on FOLLOW the same noise would only produce something very quiet.
TRACKING decides which end of the neck the octave is best at
Low notes and high notes ask opposite things of the effect. A low note carries strong overtones that can fool the divider into producing a note an octave too high; filtering them away fixes that, but the same filtering leaves less to work with high on the neck. TRACKING is where you choose.
BALANCEDis the default and suits most playing.FULL NECKtracks best above the twelfth fret. On a low E it can jump between the octave below and the note you played. If you hear that, this setting is the cause.BASSis the steadiest on the low strings. Use it for bass parts.
If a low note is unstable, move towards BASS. If notes high on the neck drop out, move towards FULL NECK.
The octave reads both sides of a stereo signal together and puts the same octave on both, so it sits in the centre rather than spreading. There is only one octave being generated, which is why it survives a mono PA.
There is no TONE control, and the octave is always the same waveform. The filtering that shapes it is fixed, chosen so the result is a round sub rather than a buzz. TRACKING changes the filtering in front of the divider, which affects how reliably the effect follows you, not what it sounds like.
The cab
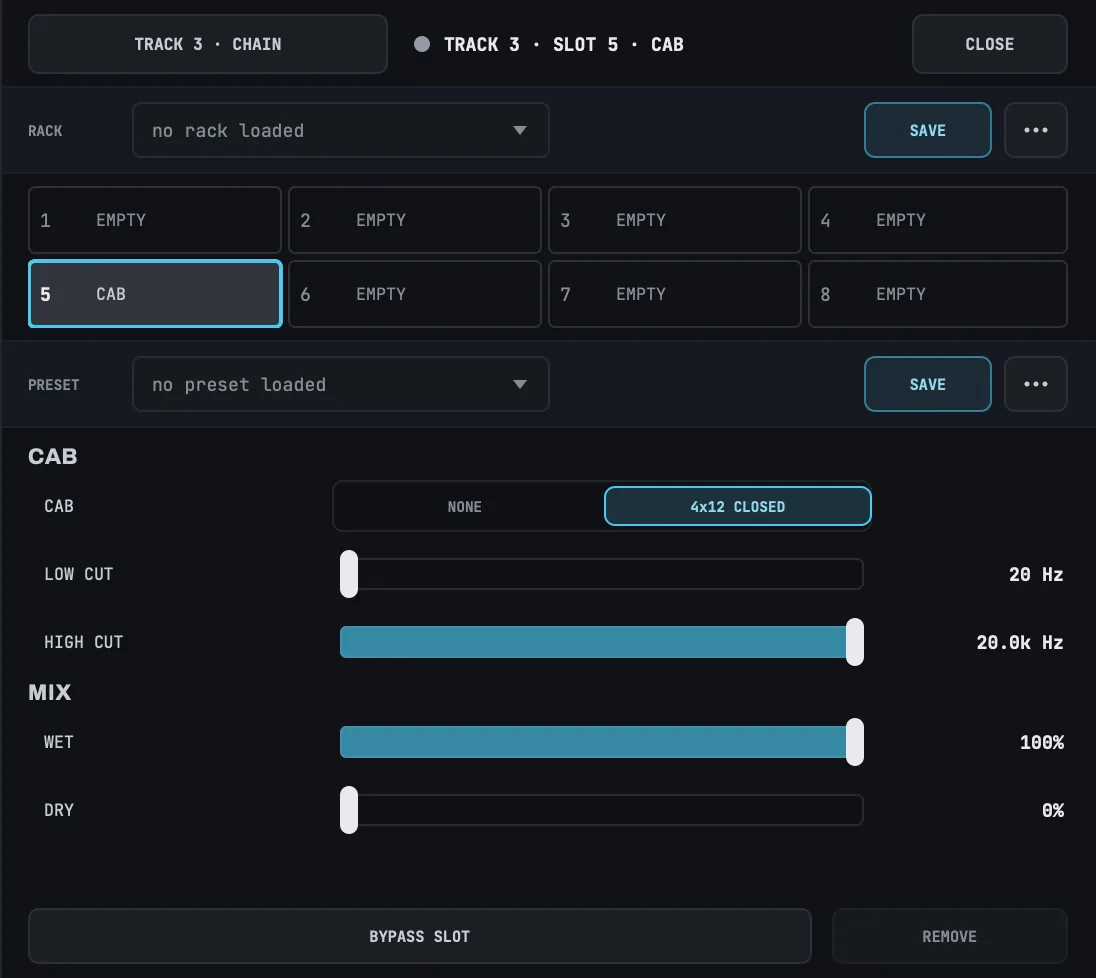
The cab is a speaker cabinet. A drive pedal played straight into an interface sounds harsh and thin, because a real one always reaches the audience through a speaker. Put the cab after a drive, or after anything else you want to sound as if it came out of an amplifier, and it shapes the sound the way a miked cabinet does.
| Control | Does |
|---|---|
CAB |
the voicing. It is a row of cells, NONE and 4x12 CLOSED, and it opens on 4x12 CLOSED |
LOW CUT |
takes low end out below the frequency you set, from 20 Hz to 500 Hz. It opens at 20 Hz, which is off |
HIGH CUT |
takes top end out above the frequency you set, from 1.00k Hz to 20.0k Hz. It opens at 20.0k Hz, which is off |
WET |
how loud the sound through the cabinet is. It opens at 100% |
DRY |
how loud your signal is without the cabinet, beside it. It opens at 0% |
A new cab is heard as soon as you add it. Unlike the delay and the reverb, it opens with WET at 100% and DRY at 0%, because a cabinet replaces the sound rather than adding something beside it.
The cab adds no delay to your signal.
CAB chooses the voicing
A voicing is a set of filters that gives your signal the shape of a kind of cabinet. The voicings are built from filters rather than from recordings of cabinets, so each one sounds the same at every sample rate your interface runs at.
4x12 CLOSEDis a closed-back cabinet with four 12-inch speakers. Its filters are fitted to measurements of a real cabinet of that kind. Below about 100 Hz the low end falls away steeply, there is a lift around 130 Hz where the sealed box resonates, the middle is scooped, and above about 4k Hz the top rolls off steeply, the way a guitar speaker's does. It follows the measured cabinet's overall shape, but not the small peaks and dips a particular microphone position adds between about 1.5k Hz and 3k Hz.NONEis no cabinet at all. Your signal goes through unchanged: the sound of a guitar plugged straight into a desk. It is a sound in its own right rather than an off switch, and you choose it the same way you choose any other voicing.
The voicings are matched in loudness for a guitar played straight in, so switching between them changes the tone and not the level.
When you change the voicing while you play, the cab fades from the old voicing to the new one over about 10 ms, so the change does not click.
LOW CUT and HIGH CUT trim the ends
Each one cuts at 12 dB per octave past the frequency you set. At the end of its travel, where a new cab opens, each one is off rather than set to a very low or very high frequency.
They work on every voicing, NONE included. With NONE, they are a quick way to take rumble or fizz off a direct sound.
The amp
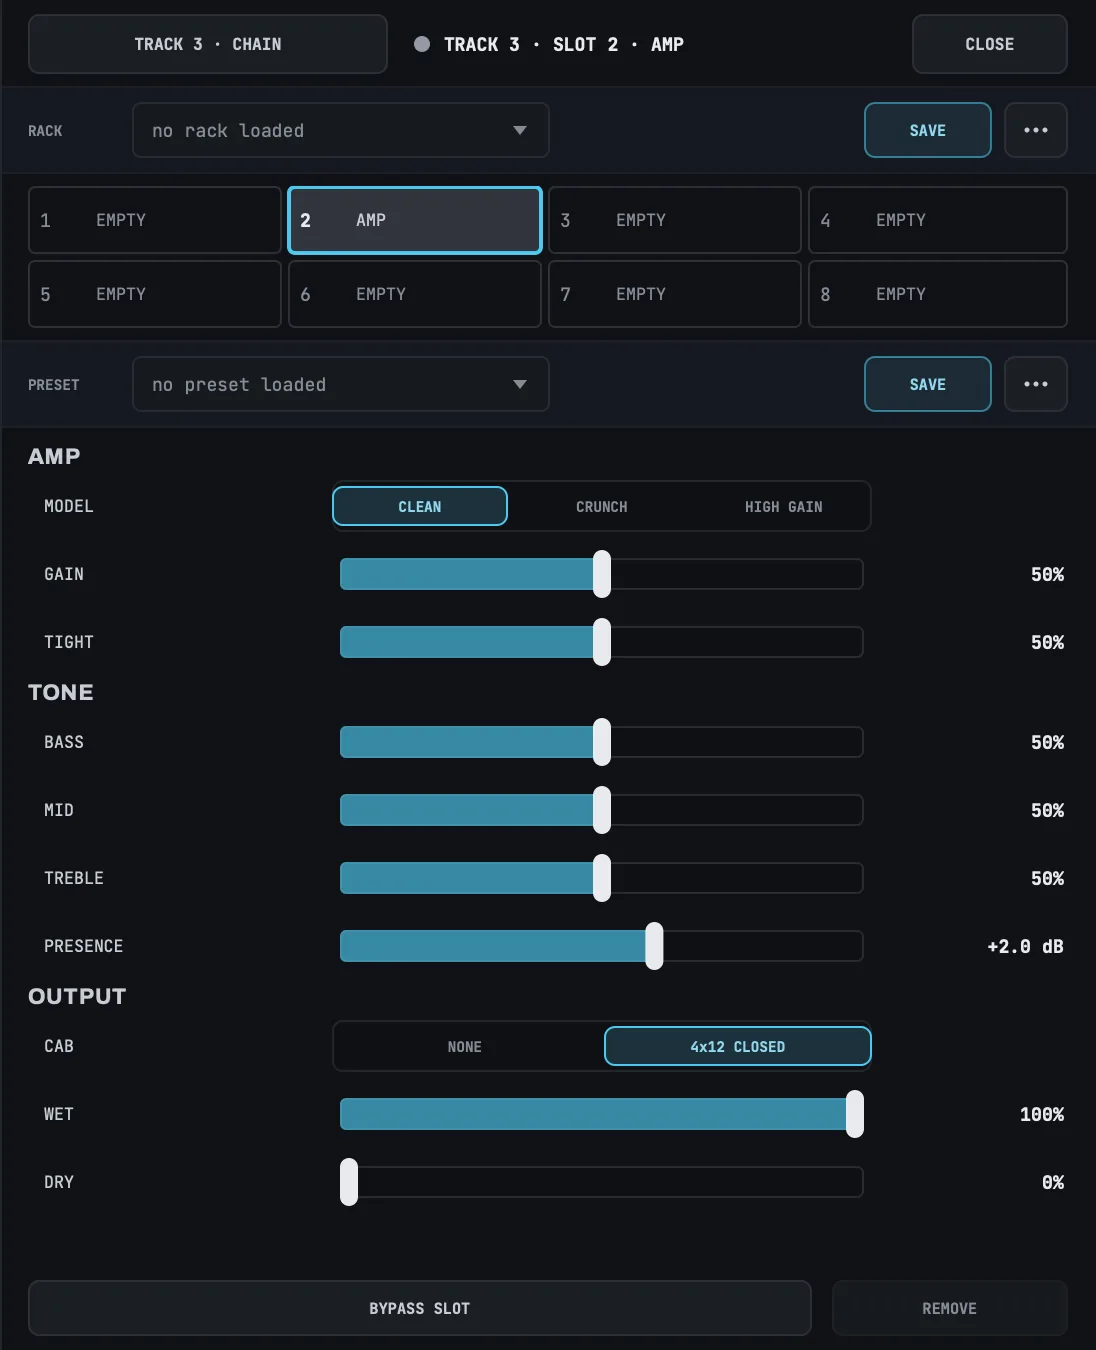
The amp is a guitar amplifier and its speaker cabinet in one slot: a preamp that distorts, a tone stack, a power amp, and the cab's voicings. Plug a guitar straight into your interface, add an amp, and you hear it the way it sounds through a miked amplifier.
| Control | Does |
|---|---|
MODEL |
which amp: CLEAN, CRUNCH or HIGH GAIN. It opens on CLEAN |
GAIN |
how hard the model is driven, from 0% to 100%. It opens at 50% |
TIGHT |
how loose or tight the amp feels, from 0% to 100%. It opens at 50% |
BASS |
the low end, from 0% to 100%. It opens at 50% |
MID |
the middle, from 0% to 100%. It opens at 50% |
TREBLE |
the top, from 0% to 100%. It opens at 50% |
PRESENCE |
the top end after the power amp, from -10.0 dB to +10.0 dB. It opens at +2.0 dB |
CAB |
the cabinet: NONE or 4x12 CLOSED, the same voicings as the cab. It opens on 4x12 CLOSED |
WET |
how loud the amp is. It opens at 100% |
DRY |
how loud your guitar is without the amp, beside it. It opens at 0% |
A new amp is heard as soon as you add it, because it opens with WET at 100% and DRY at 0%.
The amp adds no delay to your signal.
GAIN changes how much the amp distorts, not how loud it is
The amp holds its level as you turn GAIN: it is matched to the loudness of your guitar played straight in. Use WET to set how loud the amp is.
The amp responds to how hard you play. Near the point where it starts to break up, a note picked lightly stays clean and a note dug in distorts. Turn GAIN down and more of your playing stays clean; turn it up and more of it breaks up.
MODEL chooses how far GAIN reaches
Each model is the same amplifier with a different range for GAIN. The tone controls, TIGHT and CAB do the same thing on every model.
CLEANruns from clean, even when you dig in, through the point where the amp starts to break up. The edge of breakup is a little past the middle of its range.CRUNCHstarts whereCLEANis breaking up and goes on to a driven rhythm sound.HIGH GAINgoes from saturated to heavily saturated.
When you change the model while you play, the amp moves to the new drive over about 10 ms, so the change does not click and the level stays where it was.
MODEL has no automation lane yet. To change the model at a point in a song, use a preset or a rack node.
TIGHT sets how the amp holds together
At 0% the amp is loose: more low end reaches the distortion, and the power amp sags under a loud chord, so the chord swells and softens. At 100% the amp is tight: the low end is trimmed before it distorts and the power amp barely sags, so palm mutes and fast low notes stay distinct.
The tone controls work together
BASS, MID and TREBLE behave like an amplifier's tone controls rather than like an EQ.
MIDmostly cuts. At 0% it scoops the middle deeply, and the scoop narrows as it deepens. Only near 100% does it lift the middle, and then only a little.BASSandTREBLEaffect each other. Raising one takes a little away from the other.PRESENCEacts after the power amp, so it brightens the distorted sound rather than the guitar going in.
CAB is the cab's voicing, inside the amp
CAB offers the same voicings as the cab effect, described in The cab. NONE sends the amp out with no cabinet, which is the sound of an amplifier's line output. Use it when a cab later in the chain supplies the cabinet, or when you want the direct sound.
When you change CAB while you play, the amp fades from the old cabinet to the new one over about 10 ms, so the change does not click.
WET and DRY
WET is the amp's output level. DRY adds your guitar without the amp beside it, which keeps the attack of the pick under a heavily driven sound.
Where the models come from
The models are studied from three kinds of amplifier: CLEAN from an American clean combo, CRUNCH from a British crunch head and HIGH GAIN from a modern high-gain head. They are not measurements of any particular product. The 4x12 CLOSED voicing is fitted to measurements of a closed-back cabinet with four 12-inch speakers.
LOOM is not affiliated with or endorsed by any amplifier or speaker manufacturer. Any product names that describe these kinds of amplifier are trademarks of their respective owners.
Track chains and input chains are not the same
A track chain is playback-side. It shapes what the recorded loop plays back as, it stays editable forever, and taking an effect out puts the take back the way it was.
An input chain is pre-record. It is printed into the take and cannot be undone afterwards, so what you record through it is what you have. The drawer says so on the input bank, where the decision is being made. ⌘Z on an input chain changes the chain for what you record next, not a take you already recorded.
Both chains run in stereo. Effects that spread a sound across the two sides (the delay with PING PONG on, the reverb, and the chorus with WIDTH up) work the same in an input slot, a loop track's slot, a bus's and the master's. Every input leaves its chain as a pair, whether the interface handed LOOM one channel or two, and the take carries that pair.
The difference is when you can change your mind. A spread printed by an input chain is in the recording; the same effect on the loop track shapes playback and can be taken out later. See Track strips.
Undoing a change to an effect chain
With the keyboard in the effect drawer or on a slot grid, ⌘Z undoes the last change to an effect chain and ⇧⌘Z redoes it. The notice line says what was undone or redone and on which chain. When the change loaded a rack or a preset, the notice line names it.
Each of these is one change:
- Adding an effect to a slot, including the settings it opens with.
- Removing an effect.
- Moving an effect to another slot, however far the others slide over.
- Turning bypass on or off for a slot.
- Loading a rack, however many slots it changes.
- Loading a preset into a slot.
- One drag on a control, from the moment you press the mouse button to the moment you release it.
- Holding an arrow key on a control, from the moment you press the key to the moment you release it.
- Typing a value and pressing
Return.
A change that leaves the chain as it was is not recorded, so ⌘Z never spends a press on it.
The history is shared by every chain in the song. ⌘Z undoes the most recent change on any chain, which is not always the chain the drawer is showing; the notice line names the chain it changed.
Automation does not add to the history. Neither does a delay's TIME following a tempo change.
Saving, renaming and deleting a rack or preset do not add to the history either. ⌘Z never removes or restores a saved file. REVERT TO SAVED does add to the history, so ⌘Z takes a revert back.
On an input chain, undo changes the chain and nothing you already recorded through it. A take keeps the sound it was recorded with, and the notice line says so.
If an effect cannot come back because the effect memory is full, its slot stays empty and the notice line names it. Remove an effect from a chain you are not using, then add it again.
The history is cleared when you start a new song, when LOOM opens the audio interface, and when the interface restarts, for example after a sample-rate change.
Replacing an effect while the chain is running
When you load a rack or a preset onto a chain that is already playing, LOOM keeps the effect in any slot whose type does not change. That effect goes on running: its delay line, its reverb tail and its modulation carry over, and its settings move to the new values rather than jumping to them.
A slot whose effect type changes is replaced. LOOM fades the outgoing effect out over about 50 ms, then fades the incoming one in over the same length, so the change does not click. You hear that as a short dip while the new effect arrives, most clearly when the effects involved change the level, such as a compressor with makeup gain. Place a rack change where a brief dip suits the music, for example on a rest or at the start of a new section.
If LOOM cannot load an effect into a slot, because there is no memory left for it or a setting is outside the range this build accepts, it leaves that slot empty and loads the rest of the rack. The notice line names the slot. A delay TIME longer than your interface can hold is not refused: it is set to the longest time the interface holds, and the notice line says so.
Where your effects are saved
Your effects are saved in two places, and they are independent.
A chain belongs to the song: which effects are in which slots, their settings, and which of them are bypassed. It is written at ⌘S and read back when you open the song. Every chain is saved this way, whether it is on a track, an input, a bus or the master, so a song opens sounding the way you saved it, whatever is in your library.
A rack or a preset is a file of its own, and it crosses songs: a vocal chain you built on Tuesday loads into the song you start on Friday. See Racks and presets for how to save and load them, and for where the files live.
The name is saved with the song as well. Reopen a song and each bar still shows what that chain and each slot were loaded from, along with EDITED if you had changed anything since.
Loading takes a copy
When you load a rack or a preset, the chain takes a copy of its settings. The song holds those settings, not a link to the file.
So you can tidy your library without touching your songs. Rename a rack, edit it, or delete it, and every song that loaded it sounds exactly as it did. The bar goes on showing the name it loaded from, and REVERT TO SAVED still puts back the settings you loaded, because the chain kept them.
To take a rack's new settings into an older song, open that song and load the rack again.
The keyboard
A loop-track strip is five tab stops: PAN, the fader, MUTE, SOLO, then the slot grid. An input strip is four, the same list without SOLO. An input that can pair with the one after it is five: the MONO/STEREO button is the last stop on inputs 1, 3, 5 and 7, after the slot grid, so the four you reach during a set never move when it appears. No control on this surface has a keystroke of its own. The up/down, Home and End rules are the fader's own, BANK and SHOW take the arrows every setting row takes, and all of them are in Keyboard shortcuts.
An effects bus strip is four stops: the fader, MUTE, SOLO and the slot grid. It has no OUTPUT picker. The CUE strip is four for the opposite reason: the fader, its OUTPUT picker, MUTE and the slot grid, with no SOLO. The master strip is three: the fader, its OUTPUT picker and the slot grid.
An effects bus strip is three stops on its own FADERS page. A bus cannot send to itself, so its fader is not drawn there and there is nothing to tab onto. Its own level is on the MAIN page.
On the loop tracks, ← and → move between strips as they move between tracks everywhere else, and the focus ring goes with the focused track, so → → ↑ raises the level of the strip you just arrived on.
On the inputs, ← and → still move the focused track, which this bank is not drawing, so Tab is how you move from one input strip to the next.
The slot grid is one tab stop with a cursor inside it, not eight. Arrows move the cursor between the eight tiles, Home and End go to the ends, and Return or Space opens the tile under it in the drawer. Bypass has no key of its own here. The drawer's BYPASS SLOT button is one stop away and does the same thing.
Arrowing or tabbing onto a strip that is off the edge scrolls it into view.
Tab order on this surface is the view switcher, the panel toggle, FADERS, BANK, then SHOW on the INPUTS bank or PAGE on the MASTER bank, then the rack: every strip in turn, left to right, and within a strip its PAN, its fader, MUTE, SOLO on the loop tracks and the instrument tracks, then its slot grid. Last in the rack is the master strip, where it is drawn, with its fader, its OUTPUT picker and its slot grid. After that comes the effect drawer if it is open, and only then the top bar's ROLL, STOP, TEMPO and CLICK, then the side panel's tabs and whatever it is showing.
On the MASTER bank the rack is the click strip, then the cue strip, then the master. The click's three stops are its fader, its MAIN send and its CUE send.
On a send page every fader on this bank refuses, and a control that is not drawn is not a tab stop. What remains: the click keeps its two sends, the cue keeps its OUTPUT picker, MUTE and slot grid, and the master keeps its OUTPUT picker and slot grid.
On the ROUTING page the rack is the page: the group cards from the top, + NEW GROUP, DELETE, the SHOW row over the inputs, then the inputs, the loop tracks with any ADD button under a track, and the buses.
On the BUSES bank a strip's stops run down it in the order it is drawn (the fader, MUTE, SOLO, then the slot grid), and then comes the pinned master, as on every other bank.
That is the looper's own order with the rack where the strips are: the body of the view before the top bar, and the panel down the right edge last. It reads the same way in all three panel modes, GLOBAL, TRACK and SONG, because the panel is one block and it comes after the rack in every one of them.
What the mixer saves
An input's pan, its level and its mute belong to the song, and they are written into it at ⌘S and read back when you open it. A song you reopen records from the same inputs, in the same places across the stereo field, as the song you saved. They survive a device change, because what is plugged into which channel does not stop being true when you change interface. A new song resets them; see What a new song resets below.
Every chain belongs to the song too: track, input, bus and master chains alike, with their settings and their bypasses. A rack or a preset you saved is a separate file that crosses songs. See Where your effects are saved.
Each bus's level, its MUTE, its SOLO and what it sends to the other buses belong to the song. A bus you park muted comes back muted, and a mix you built with a bus soloed comes back with it soloed. What a bus sends to the other buses is saved the same way, so a song opens with the routing it was saved with.
The click's level and both of its sends belong to the song, and they are written and read back the same way. A song that asks for the cue send keeps asking for it on an interface that cannot carry one.
Which bank you were looking at, which way SHOW was set, which PAGE the MASTER bank was on, and whether the effect drawer was open are not saved. Every session starts on LOOP TRACKS, on ASSIGNED, on FADERS, with the drawer shut.
Groups are not saved with the song. They belong to this Mac, like the ticks in Record setup, so they are the same in every song you open.
What a new song resets
A new song (⌘N) gives you the mixer a new song starts with. Every control on this page goes back to its starting value: the track faders, pans, mutes, solos and their FX 1 and FX 2 sends; the input strips, including their mutes; the bus levels, mutes, solos and bus-to-bus sends; the master fader; the click; and every effect chain, track, input, bus and master, with its slots and its bypasses.
Your interface is not touched. LOOM keeps the input and output devices, the sample rate, the buffer size, which inputs each track records from, which output channels carry the main mix and each bus, the MIDI command channel, the latency calibration and the track count. What you hear belongs to the song; which socket it leaves by belongs to the box.
The input strips come back the way they start: input 1 open, every other input muted. That is the same state LOOM launches in. An interface with every channel live can put a whole stage into the monitors and the mains before you have touched a fader. If you were playing through input 3, unmute it again in the INPUTS bank.
Nothing that reaches the disk is affected. A new song clears what is loaded and not what is saved. The song you were working on keeps everything you wrote into it at your last ⌘S, and opening it again brings its mixer back exactly as you left it.
The rest of the window while you are here
The top bar and both bottom rails are unchanged. The transport, the tempo, the click, the beat LEDs and the position readout are the same controls doing the same things, and switching to the mixer moves none of them.
The side panel follows you here, with all three of its modes and its collapse, in whichever mode you left it in.
Below about 1400 px wide the effect drawer and the side panel cannot both fit, so opening the drawer puts the panel away. The panel toggle in the top bar brings it back, and doing so closes the drawer. Above that width both stay open and nothing moves. To reach a track's settings here, press the strip you want and then the panel's TRACK tab; or leave the panel on TRACK and press strips, and it follows the focused track.
Arriving writes showing the mixer to the notice line, and speaks it if ANNOUNCE is on.
What a screen reader gets
The view is a named group. Its description opens with the sentence the header used to draw, such as LOOP TRACKS on the MAIN mix or INPUTS on the FX 1 send, 3 of 18 shown, and then says what is on it: the bank, the fader state, how many strips there are, how many stops each of them is, and that the master strip is pinned at the end of the rack, so you know how far to Tab. On the MASTER bank it names the strips it holds, the click, the cue and the master, and says that nothing on it is a track, a device input or an effects return. On the ROUTING page it reads the page's own sentence: which group is open, whether it is LIVE or PLAYBACK, what it holds and the file it records to. On the BUSES bank it says the strips are one per effects bus and that they carry no OUTPUT picker. On the INPUTS bank it also reads the signal map out in words, how many channels the interface has and which of them a track records, because the map itself is a picture.
Each loop-track strip is a named group, Mixer strip 3, and a screen reader gets the whole strip in one reading: "Strip 3 of 5, track 3, level -9.0 dB. It holds a recorded loop. This is the focused strip. The fader sets what this track sends to front of house." On the cue send the last clause becomes "the fader sets what this track sends to your headphones, pre-fader; the main mix is unchanged."
Each input strip is Mixer input strip 2, and reads down the same way: "Input 3, strip 2 of 4, level 0.0 dB, audible, pan centre. Recorded by TRK 1,3. You hear it because it is unmuted, not because a track is on it. Press MUTE to stop hearing this input through LOOM. Muting remembers the level. The pan and the effects on this input are recorded into the take. The fader and the sends are monitor levels and change nothing that is recorded." A muted strip says "Muted is the normal setting if you monitor through your interface. Press MUTE to hear this input through LOOM." instead, and ends with the same sentence about what is permanent.
Each bus strip is Mixer bus strip 2, and reads down the same way: "Bus strip FX 1. It taps POST-fader and post-mute, so pulling a strip down or muting it takes that strip out of this bus too. Its level is 0.0 dB. It goes to the main mix. It has no OUTPUT picker: an effects bus returns into the main mix and into the cue rather than leaving by an output of its own, and the FADERS row is where you set how much of each. It has a MUTE and a SOLO. It carries eight insert slots." The CUE strip differs in both of those clauses: it names its OUTPUT picker, and it ends "It has a MUTE. It has no SOLO because it is solo-safe: no solo anywhere takes your headphone feed out of the mix, and soloing it would silence the room rather than isolate anything." On a send page it says its fader is not drawn there, that it has no send, and to put the FADERS row on MAIN for its own level. When the cue is following rather than fixed, the destination clause reads "It goes to outputs 3-4, following the main mix: move the main mix and this moves with it." A bus another strip's solo has silenced adds "It is silent right now because something else is soloed."
The click strip is Mixer click strip, and reads: "The click strip. The metronome's own level and where it goes. Its fader is the click's level, which scales the beat and the accent together so the downbeat stays louder than the beats. Level -6.0 dB. It is sent to the main mix and not to the cue send. There is no mute on this strip: the CLICK button in the top bar turns the click on and off." With both sends off it says the click "is sent nowhere, so it runs and flashes and nothing comes out", and names that as a setting rather than a fault. On a device with no cue bus it adds how many output channels the device has and that the cue send cannot be switched on tonight.
Each slot grid reads its whole chain in one pass, for example Track 3 effect slots, eight of them in signal order. Slot 1, noise gate. Slot 2, parametric eq, bypassed. The cursor is on slot 1, noise gate., and then says what the arrows and Return do. The grid is one control, so the eight tiles are in this sentence rather than being eight stops.
Each parameter row is a slider with a settable value, named for the control it is (TRACK 3 slot 2 THRESHOLD), and it speaks its value in the unit it is printed in, -15.0 dB rather than -15. Its sentence names its range, says that Return types a value in and that one outside the range is refused rather than rounded, and says what ⌥-click restores it to.
A row that is a switch or a row of cells says so, and says what its states are called rather than what number is behind them. The chorus's VOICES announces as TRACK 3 slot 2 VOICES, in MOTION and reads TWO, and its sentence names the four settings and says that ← and → move between them. It is one stop, not four, so tabbing past a setting with four states costs the same as tabbing past a knob.
The parameter area is a named scrolling region, Effect parameters, so a screen reader can say what it is about to read down before it starts on a long column.
Each fader names the surface it is on: Track 3 level in the mixer on the main mix, or the bus by name on a send, as in Track 3 CUE send in the mixer or Track 3 FX 1 send in the mixer. One track has two faders in the window, so the fader has to say which. The input strips' faders name their surface too, and each MUTE names the input it acts on. As on the looper strip, a fader's value can be set through the accessibility layer, not only read.
A fader's description also says how many meter bars it has. On a track strip, a bus strip, the master and a stereo-linked input pair it says there are two, that the left channel is the left bar and the right channel the right one, and that two bars at different heights mean the signal is not centred. On a click strip and an unlinked input it says there is one.
The bars themselves are not read out and carry no figure. A level that changes thirty times a second would be announced continuously, and you would be listening to the meter instead of to the music. The number a fader reads out is its own value, which is the one you can change.